Thermal Master P1 macro lens adaptor / microscope


Print Profile(1)
Description
The Thermal Master P1 infrared camera has a fixed focus lens that cannot focus closer than about 4 inches / 10cm.
This model is an adaptor allows you to use a 12mm diameter zinc selenide lens (commonly available from the usual online marketplaces, sold for focussing lasers) to reduce the focal distance down to about 1 inch.
This allow you to do thermal macro photography.
| Search on your online marketplace of choice for “znse lens 12mm”. Then select one with a focal distance of 25.4mm. They typically cost about $5 |
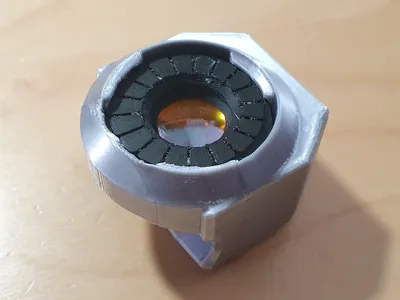
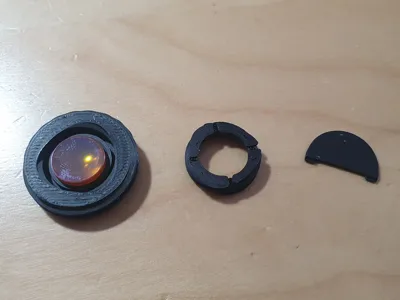
This model consists of:
- A cell (in two parts, top and bottom), that are screwed together, to hold the lens.
- A little tool to help you screw them together.
- A frame that accepts the cell, and fits over the Thermal Master P1.
Printing
This is an ‘easy’ print: with no need for supports etc.
While it is quite detailed, the normal 0.4mm nozzle works fine.
As some of the parts are small, you may want to print them with a brim, but I would try without first, to save the hassle of brim-removal.
I suggest printing the cell in black (PLA is fine), and then you can print the frame in black, or choose a contrasting color.
In this case for the frame I have used PLA silk in silver.
Assembly
Once you have printed the parts you need to assemble them.
Take care to avoid touching the lens - both to avoid leaving smudges on it, and also because it is toxic! Wear nitrile gloves or just be careful.
Start with the cell:
The front of the cell has a series of grip lines. Turn it over, so you are looking at the back, and place the lens down on it, with the curved convex surface downwards, as shown in the image below:

Now place the cell cover over this, with the side with the four grooves facing upwards:

Then use the semi-circular tool to gently rotate the cell cover clockwise to clamp down on to the lens. Be gentle, and ensure the lens remains centered as you do so.

Depending on the thickness of the lens, the cell cover should end up slightly proud of the surrounding front part:

The cell is now assembled:

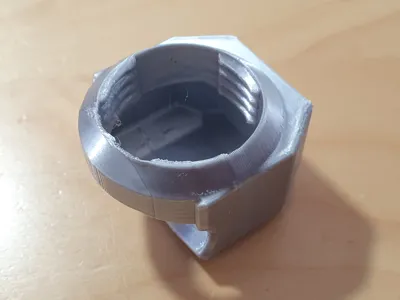
Place the cell on to the frame and gently rotate it clockwise to lower it into the frame. The exact height is not too critical, but the focus can be adjusted by changing this height.

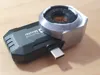
Now slide the frame over the Thermal Master P1. It should be a friction fit.

Connect your P1 as normal, and you should find that objects about 1 inch from the lens are now in focus.
Results
 This image is using the macro lens adaptor. Note how you can see the how the temperature detail of the surface mount components. |  This is the equivalent image without the adaptor. Note how the individual components are hard to make out, and there's no detail. |
Here's a test image showing callipers set with a 0.2mm gap:

If you found this useful, please give it a Boost. Thank you!
Boost Me (for free)
Please give this a boost, for free
There's more:
If you have a Thermal Master P1, you may also like this:

License
You shall not share, sub-license, sell, rent, host, transfer, or distribute in any way the digital or 3D printed versions of this object, nor any other derivative work of this object in its digital or physical format (including - but not limited to - remixes of this object, and hosting on other digital platforms). The objects may not be used without permission in any way whatsoever in which you charge money, or collect fees.
Comment & Rating (4)