Dual-Density Foam Roller


Print Profile(1)
Description
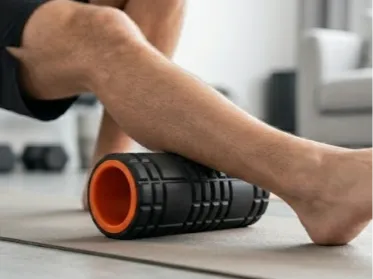
Dual-Density Foam Roller
Recovery & Therapy Equipment · 3D Printed
Two densities. One roller. Zero compromises.
Meet Your New Recovery Secret Weapon
Most foam roller models are just... a tube of single density foam.
The Dual-Density Foam Roller was built from scratch to solve this problem. It's 3D printed in three purposeful layers that each do a specific job. so what you feel under your muscles isn't an accident, it's by design. Soft where you need give. Firm where you need support. And unlike anything else on Maker World, you can actually tune it to your body before you ever print one.
How It's Built (And Why It Matters)
The Core — Your Foundation Deep inside is a solid PLA structural tube. It's the reason this roller will never go flat, never squish lopsided, and never lose its shape after a few months of hard use. Think of it as the skeleton. You don't feel it directly, but everything else depends on it.
The Inner Layer — The Give Wrapped around the core is the first foam layer, printed in Siraya Tech's Roamr 85A foaming TPU. By running it at a higher temperature, the foam cells come out denser. Giving you that satisfying, medium-firm cushion that actually pushes back against tight muscles. It's printed in a gyroid pattern internally, which sounds fancy but just means it flexes evenly in every direction. No weird hard spots, no uneven pressure. Just consistent, smooth response every roll.
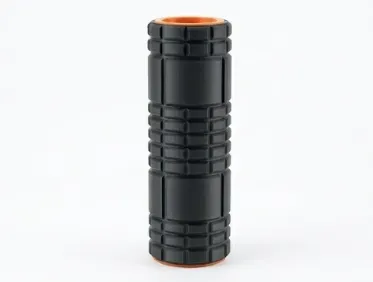
The Outer Shell — The Touch Here's where things get clever. The outer contact layer uses the exact same Roamr 85A filament. But printed cooler, which lets the foam expand more and come out noticeably softer. So the part that actually touches your body? Forgiving. The part doing the work underneath? Firm. That's the dual-density magic, and it's something you simply cannot achieve with a conventional foam roller.
The Specs
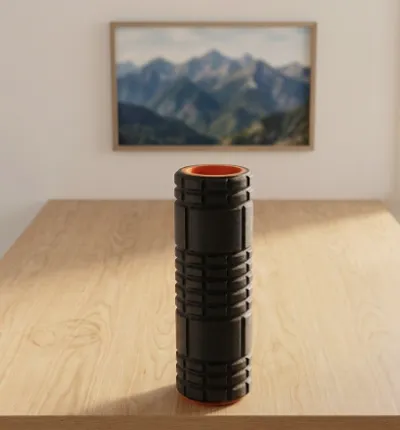
| Diameter | 138 mm (~5.5") |
| Length | 305 mm (~12.0") |
| Core material | PLA |
| Foam material | Siraya Tech Roamr 85A foaming TPU |
| Inner infill pattern | Gyroid |
| Layer height | 0.20 mm |
| Nozzle size | 0.40 mm |
Make It Yours Before You Print It
This is the part that makes the Dual-Density Roller genuinely unlike anything else in the recovery space — it's tunable. Before a single layer goes down, you can configure exactly how it'll feel:
Want a gentler roller for warmup or sensitive areas? Drop the infill density and/or lower the print temps slightly. More expansion, more softness, lighter touch.
Need something serious for deep-tissue IT band work? Crank up the infill and/or run the inner layer hotter. More density, more resistance, more results.
Different length? Scale it. The three components grow together proportionally — no redesign needed.
You're not locked into one feel. You dial it in, you print it, you use it. If you want it different next time, you change two numbers in your slicer and go again.
Why You'll Actually Use This One
Most foam rollers end up in the corner collecting dust because they're either too aggressive or not effective enough. The progressive dual-density feel here hits differently. The soft outer layer makes it comfortable enough to actually stay on it, while the firmer inner zone does real work on tight spots. That balance is what keeps this roller in your daily routine instead of your closet.
Great for myofascial release, IT band and lower-back rolling, pre-workout warmup, post-workout recovery, and trigger point work.
How to Print
What You'll Need
- Ideally, a dual extruder printer
- Flexible material: Preferably a foaming TPU or PEBA as tuning foam density using nozzle temp adds an additional layer of customization. I used Siraya Tech Roamr 85A Foaming TPU
- A PLA filament of your choice for the core. Can use PETG or other filament as desired
- Use my print settings. I have edited the filament profiles for foaming TPU. If you are not using foaming TPU, use the preset for you desired filament and adjust infill between the dual density areas.
The Foaming TPU/PEBA Trick — Read This First
Here's the key insight that makes the dual-density effect work, and it's a little unconventional: you only need one spool of Roamr 85A, but you need to create two separate filament profiles for it in Bambu Studio.
Why? Because the dual-density effect isn't achieved with two different materials — it's achieved by printing the inner and outer foam layers at different nozzle temperatures. Hotter temperature on the inner layer = softer feel. Cooler temperature on the outer shell = firmer feel. Same filament, two personalities.
To pull this off in Bambu Studio:
- Create two filament profiles for your foaming filament. I chose Roamr 85A — call them something like "Roamr 85A — Firm" and "Roamr 85A — Soft." The only difference between them is the nozzle temperature. Set the firm profile cooler and the soft profile hotter. I chose 260 degrees for the softer inner foam and 240 degrees for firmer outer foam.
- Assign each profile to its respective part — the inner foam layer gets the Soft profile, the outer shell gets the Firm profile.
- Map both profiles to the same physical filament slot — point both to the same external spool. Bambu Studio will treat them as separate materials in the print queue, but since they're fed from the same source, the printer won't perform a filament swap or pause. It will simply change the nozzle temperature between the two zones and keep printing.
This is the magic of the setup. The printer just quietly adjusts temperature as it moves between parts.
Important: This two-profile-one-spool strategy only applies when you're using a foaming filament and relying on temperature to create density differences. If you'd rather skip the temperature tuning and simply use one foam profile with different infill densities for parts 2 and 3, you don't need any of this — just assign a single filament profile to both foam parts and adjust the infill percentages per part in your slicer. Simpler setup, still a great result.
Part-by-Part Print Settings
| Part | Material | Profile | Notes |
|---|---|---|---|
| Core tube | PLA | Standard PLA | 7 wall loops — print this solid and strong |
| Inner foam | Roamr 85A | Soft profile (hotter) | Gyroid infill — increase % for a firmer roller |
| Outer shell | Roamr 85A | Firm profile (cooler) | Patterned geometry — decrease infill % for a softer surface feel |
License
You shall not share, sub-license, sell, rent, host, transfer, or distribute in any way the digital or 3D printed versions of this object, nor any other derivative work of this object in its digital or physical format (including - but not limited to - remixes of this object, and hosting on other digital platforms). The objects may not be used without permission in any way whatsoever in which you charge money, or collect fees.
Comment & Rating (0)