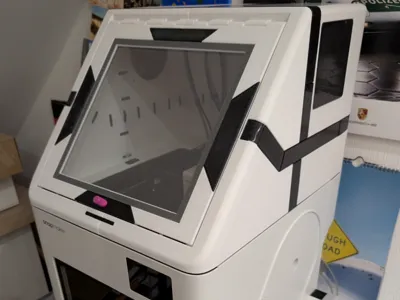
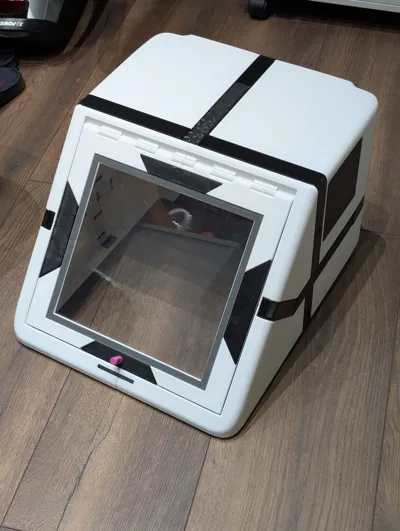
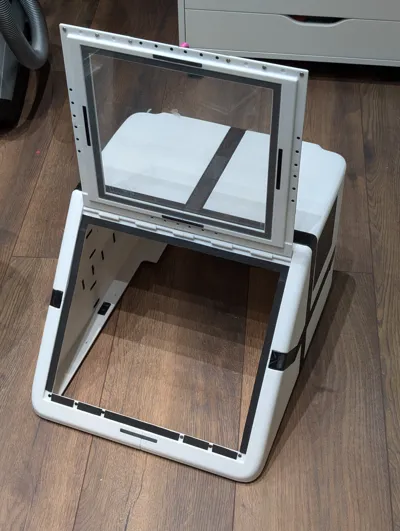
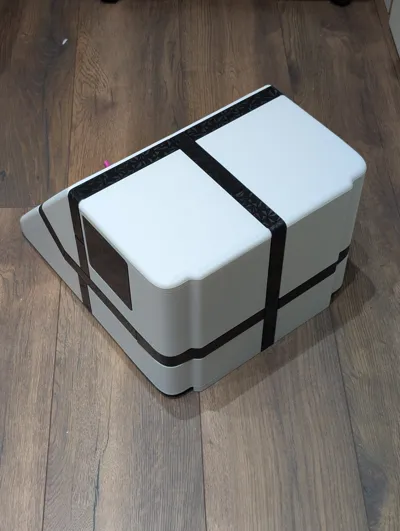
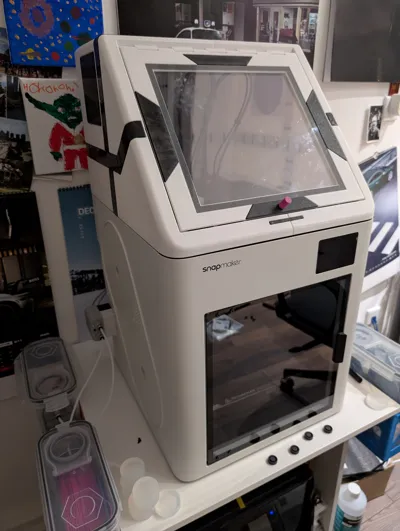
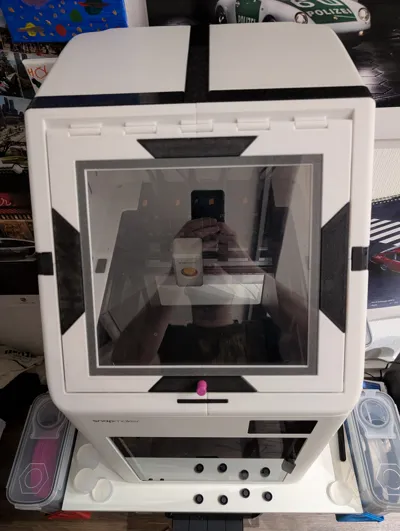
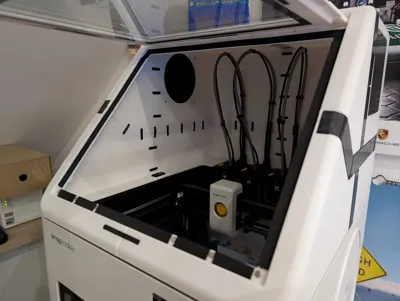
Snapmaker u1 top cover/ enclosure + CAD Modell stp


Print Profile(2)

Description
Update:
I have added the CAD model in Step format for download
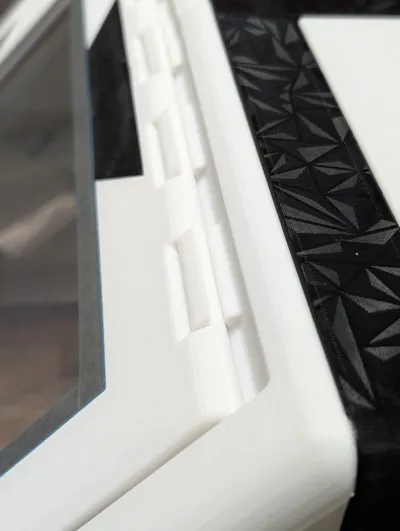
All connectors that are bent during assembly are unwrapped in the model here

_________________________ _______________________ _________________________________
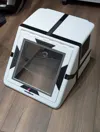
And another cover for the Snapmaker U1
Inspired by the many versions, I have designed my own
Please read the notes on print profiles and conditions carefully
Materials Used:
Filament:
Jayo PETG HS white (~2.5 kg required)
Jayo PETG HS black (~450g required)
snapmaker PLA (included material from the printer, but essentially it doesn't matter, only support material)
Adhesive Tape:
VHB Tape, 10mm wide, 1mm thick (~2.3 m required)
Sealing Tape/Damping Tape
EPDM self-adhesive tape, 10mm wide, 1.5mm thick (~1.15m for the flap, optionally the same amount for the base)
Adhesive
Uhu Hard Plastic (used in small amounts on the flap at the top of the hinge to join the two parts)
Information on Print Profiles:
I have attached a total of three print profiles
Please check the projects in the desktop application before printing. It is not recommended to simply start printing with the app
The scope is very large. You should adjust the settings based on your experience (material, bed temperature, warping probability, etc...) if necessary
I would also recommend printing on an enclosed device. The risk of warping is slightly higher with PETG than with PLA
Here you should add "mouse ears" or brim based on your device. However, this involves a bit more post-processing work
- Print profile for casing and frame part; white PETG with supports; designed for the Bambu Lab P1S
- Print profile for the connecting elements; black PETG without supports; designed for the Bambu Lab P1S
- Print profile for all parts in Snapmaker Orca, designed for the U1
The casing and frame parts are mostly designed with a fold at the edges. This requires support
I would work with PLA for PETG support. And further recommend using the Snapmaker U1 for this
In the Snapmaker Orca profile, all support material is PLA. In the profile for Bambu, only the interface material is set to PLA to reduce changes
Depending on what is most important to you, you can change the orientation of the components. This would reduce the number of changes, but possibly not every overhang would be supported
For supporting PETG with PLA and vice versa, the top Z-distance is set to 0 and the interface distance to 0. The supported surfaces thus become quite good
Important for printing with P1S and co: Pay attention to the flushing volume. It sets the amount of material for material changes. If the values here are set too low, problems with layer adhesion will occur!!!
I used 600mm³ for switching from PETG to PLA and 800mm³ for switching from PLA to PETG
I have slightly adjusted the filament profiles. Since PLA and PETG are used in one print, I set the print bed to 70°C
Since I used HS PETG, I set the flow rate to 20mm³/s. If you use normal PETG, the print time will increase enormously
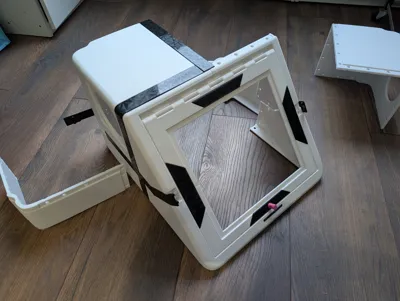
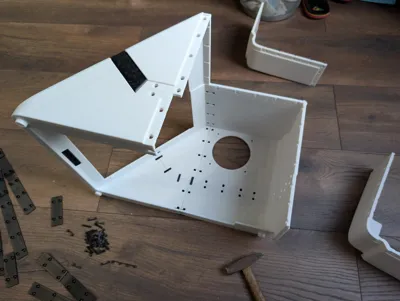
Assembly:
Check out the PDF document, all components are marked there
The housing connectors also have the numbering embossed on the inside
The printed components should be usable without further post-processing
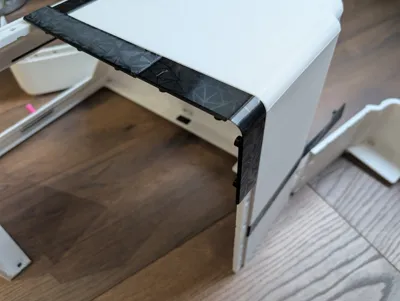
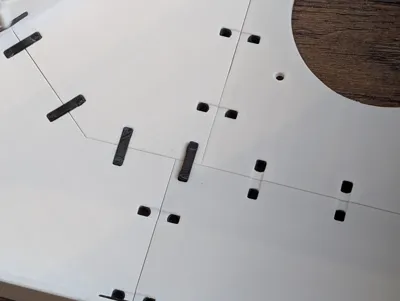
It is best to first assemble one half of the housing with the outer connectors
Then always lay the side that is to be connected flat on the floor. This worked wonderfully on laminate
I used a hammer to install the inner connecting parts. In retrospect, I would even recommend just pressing the parts in. You can also use a hammer or something comparably stable/heavy for this
Should the flap in the hinge squeak later unexpectedly, simply apply some of your printer grease to it
Feel free to give feedback via the comments


Have fun with it
Documentation (1)
License
You may create derivative works based on this object, provided that all such derivative works are published exclusively on the MakerWorld platform and include proper attribution to the original creator. You may not share, upload, host, distribute, or publish this object—or any derivative work of this object—on any other digital platform, marketplace, or distribution channel. Commercial use of this object and any derivative works is strictly prohibited. This includes, but is not limited to, selling, renting, sublicensing, or using the object in any context in which you receive monetary compensation or other financial benefits.
Comment & Rating (0)