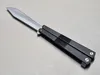
Spy's Knife from Team Fortress 2


Print Profile(1)
Description
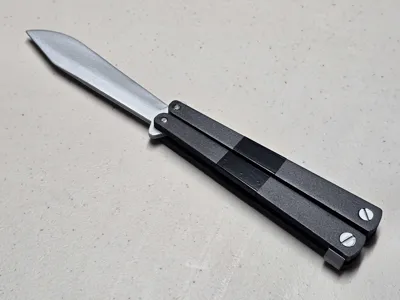
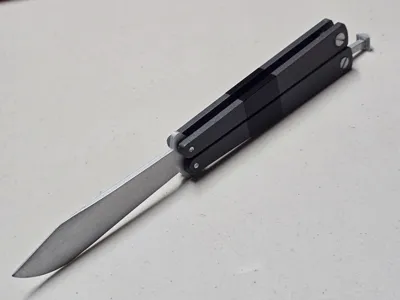
Spy's Knife
Team Fortress 2
Printing
Atached print profile is used for both blades and handle componentry.
The blades are printed with adaptive layers to achieve a smoother slope.
100% infill is used to add weight and structure to the prop.
Post-Print Processing
The post-print process is performed on each item seperately prior to assembly.
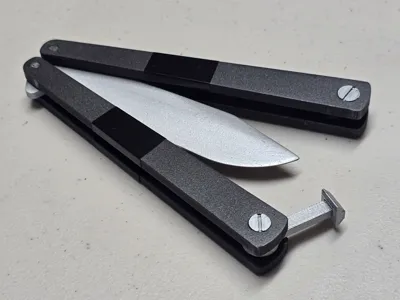
Glue segmented parts together:
Two halves of blades
Two pieces of latch
Sand down print lines with sandpaper.
Fill defects and major print lines with putty filler.
Repeat sand + fill to achieve smooth finish (or until all patience is lost).
Paint with acrylic based spray paint.
Coat with a satin clear coat finish.
Detail
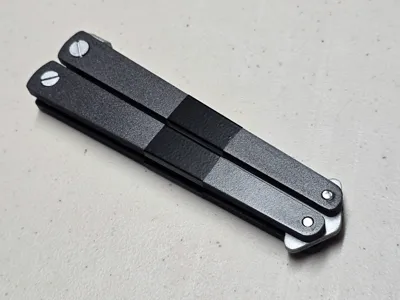
Black electrical tape is used to create the detail on the handles.
Assembly
Assembly will require 2off M10x16mm Dowels (Pins), each for a pair of handles.
While assembly is straight forward, here are some pointers:
Blade holes must achieve a clearance fit - blade will rotate freely around the pin. Sand or file down the blade holes if fit is too tight.
Handle holes must achieve a pressed fit - pin should be pressed into the handle holes with no budging. Tap the pins carefully with a hammer for this.
Glue is used for all remaining connections.
To ensure the blade swivels freely between the handles, there should be a very small gap between the handles and the blade. Use a blunt tool like a screwdriver to gently wedge the handles apart after assembly.
License
You shall not share, sub-license, sell, rent, host, transfer, or distribute in any way the digital or 3D printed versions of this object, nor any other derivative work of this object in its digital or physical format (including - but not limited to - remixes of this object, and hosting on other digital platforms). The objects may not be used without permission in any way whatsoever in which you charge money, or collect fees.
Comment & Rating (3)