Search models, users, collections, and posts
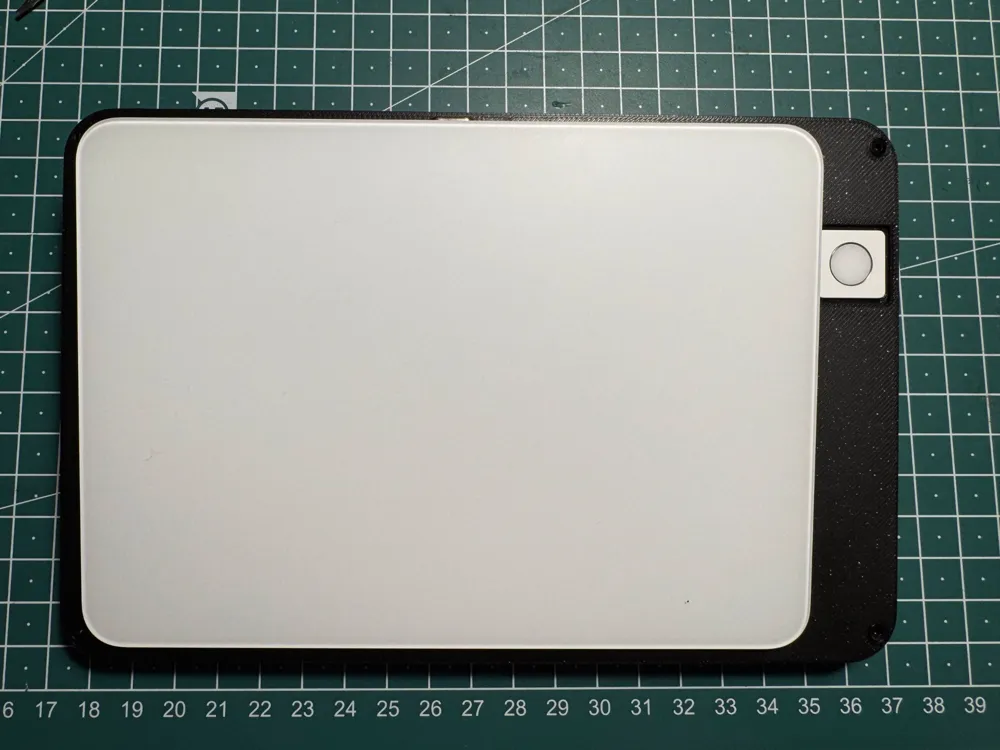
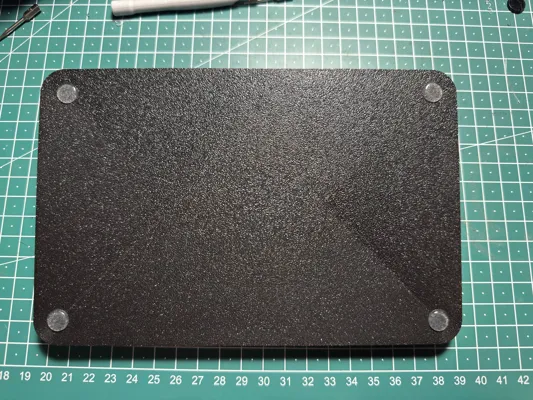
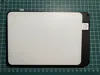
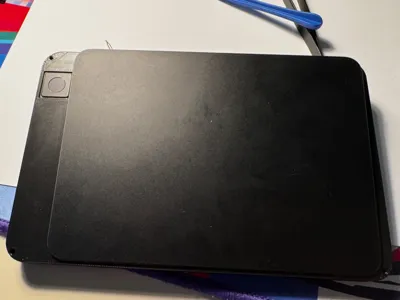
Trackpad + Touch ID using full-size keyboard parts
Remixed by
IP Report


Print Profile(1)
0.2mm layer, 3 walls, 15% infill
Designer
3 h
2 plates
Open in Bambu Studio
Boost
4
15
0
0
6
2
Released
Bill of Materials
Bambu Filaments
Select all

Description
I really liked @atomicdude's model, but I prefer to have Touch ID on the right, so I remixed it and added some small improvements.
List of changes:
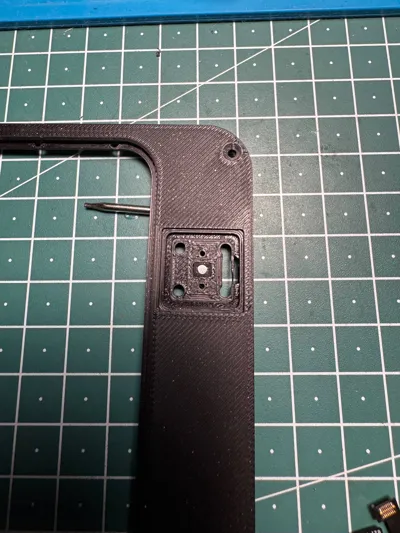
- Touch ID module moved to the right
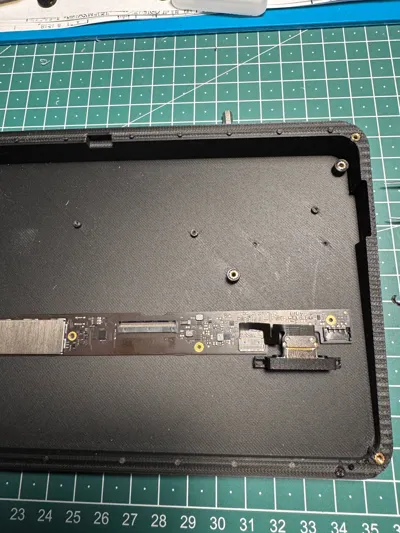
- mounts for other components moved accordingly
- adjusted the lid and battery shelf mounting holes for the M2 heatset inserts
- slightly thicker shell to accommodate heatset inserts without artifacts present in the original model
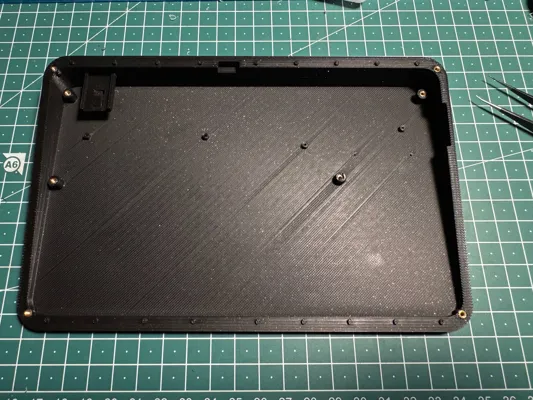
- removed bottom holes
added a small chamfer to the lid for easier trackpad attachment
Required parts:
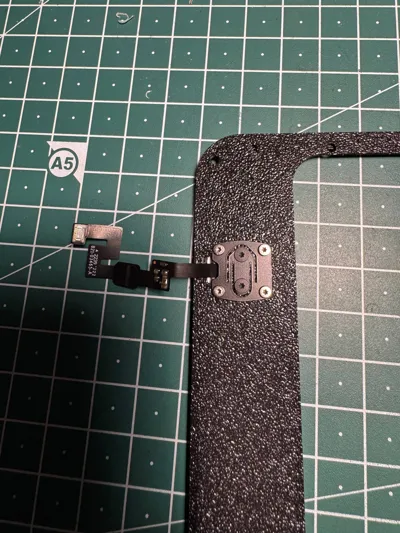
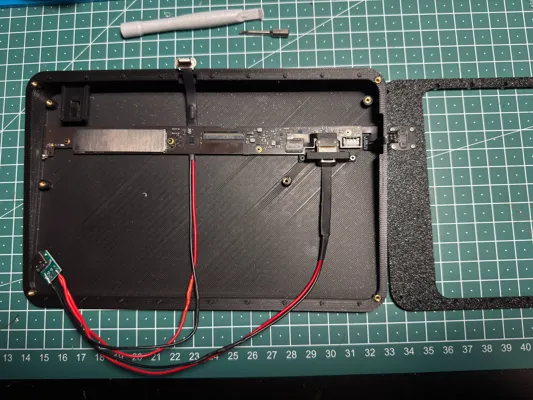
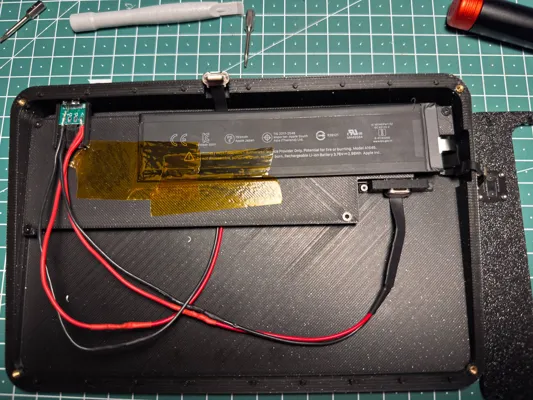
- Touch ID button, main board with the lightning connector, and battery salvaged from the Magic Keyboard with numpad
- 8 M2 4mm heatset inserts
- 8 M2 6mm or 8mm countersunk screws
- Various screws from the keyboard
- 2 lightning cables (Aliexpress)
- 1 USB C connector (Aliexpress)
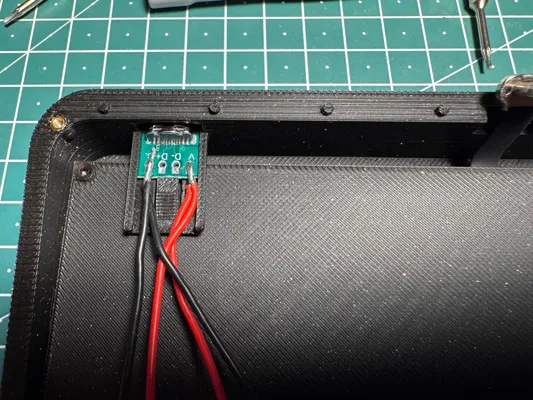
- a bit of wire to extend cables
- rubber feet
tape
Quote from original model regarding screws:
All of the screws used for the PCB/Port/Touch ID are from the Magic Keyboard.
- For the PCB I've used the 4 grey screws;
- For the lightning port I've used 2 black screws with a small head
- For screwing the lightning port shell into the case I've used 2 black screws with a big head
- For the Touch ID I've used the same screw and mechanism as in the original keyboard, 4 silver screws and 2 black screws with a big head. I've also transfered the small round metal piece used for the clicking mechanism of the Touch ID
Assembly:
- Install heatset inserts
- Extend lightning cables and solder them to the USB C connector
- Attach the mounting bracket to the main board's lightning port
- Attach Touch ID module to the top lid. Do not forget the round metal piece, and do not overtighten silver screws, or it won't click
- Attach Touch ID ribbon cable to the main board
- Route the touchpad charging cable under the main board and screw it in
- Connect the main board charging cable
- Install battery shelf
- Attach USB C port to the case. Make sure that the latch popped back up and is holding the port in place
- Attach the battery and secure it with some tape
- Close the case, connect the touchpad to the charging cable, and pop it into place. This may require a little force
- Add rubber feet to prevent it from sliding around
This remix is based on
License
This user content is licensed under a
Creative Commons Attribution-Noncommercial-Share Alike
Comment & Rating (0)