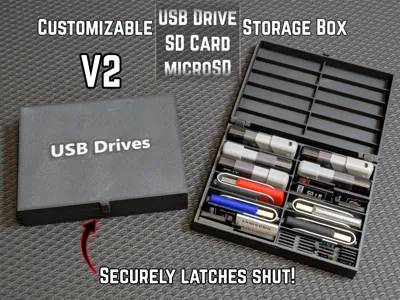
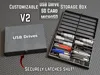
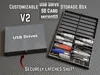
Customizable USB and SD Card Storage Box - V2


Print Profile(2)
Description
Version 2 of my Customizable USB Drive Storage Box (and SD cards) model. Improvements:
- Thicker, sturdier hinges (the most requested change on the original model)
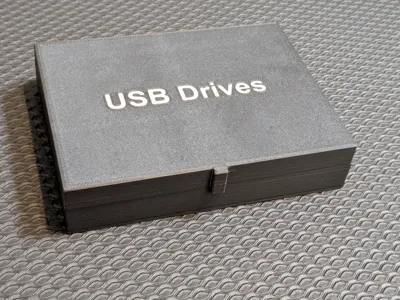
- If you download the f3d file and open it in Fusion, you can customize the lid text there; unfortunately the Customizer doesn't support parametric text fields.
- Improved MicroSD card holder holds cards in place more securely and reliably
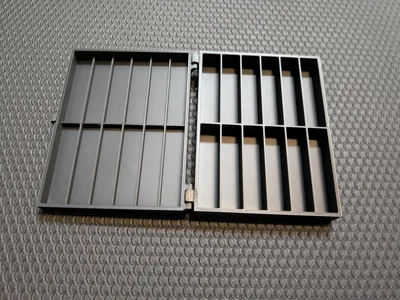
- Lid compartment walls are now shorter by default to make the lid easier to close without colliding with stuff stored in the bottom
- Various internal improvements to the parametric generator to handle more edge case gracefully
Important: The thicker hinges require that the total width of the box be at least 40mm to generate a functional model, but assembly probably won't work unless it's closer to 100mm wide.
As with all parametric models, if you encounter a combination of values that don't generate a functional model please post a screenshot of it so I can reproduce and try to fix it.
General Description
Simple but robust latching box to store USB drives (aka flash drives or thumb drives), SD cards, and MicroSD cards. You can customize the dimensions and number of compartments, so really this could be used to store lots of other stuff too.
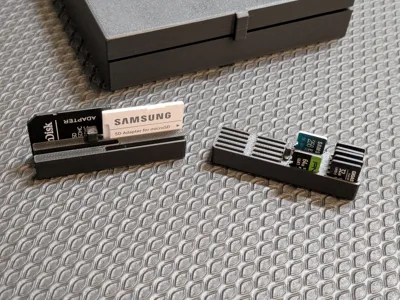
Includes optional inserts for holding SD cards and MicroSD cards. These automatically adapt to the length and width of the compartments and cannot be customized; they may not work properly if the main compartments are made smaller in any dimension, but should work OK with bigger compartments.
The provided print profile model features 12 compartments (2 rows of 6) with each compartment measuring 60x14x24mm internally, which should be large enough to accommodate the majority of USB drive models.
Customization
The size and number of compartments can be customized, along with various wall, top, and bottom thicknesses. I've tested a wide range of values to try to ensure that anything that'll fit on your print bed should generate properly. Though the small hinges may not work well for particularly large boxes.
The text is sadly NOT customizable through the website (because the Customizer does not support parameterized text, even though Fusion does). If you want custom text you'll either have to download the F3D file and change it in Fusion's Parameters, or delete the generated text object in your slicer and add different text using your slicer.
Slicing Instructions
When customizing, make sure to select STEP as the output format. If you don't, other formats won't group all the text object together correctly so you'll have to manually select each letter when merging in the next steps, which is a pain.
After importing into your slicer, you'll need to manually merge the Text and SOLID (lid) objects together:

That will leave all the other object still grouped together. You'll need to separate them by right-clicking on their group and doing Split → To Objects:

Change the color of the text object if you want to use your AMS to print it in a different color. The final result should look like this in the Objects tab. MAKE SURE that the SOLID (lid) object is listed above the Text object, or the text won't print:

Assembly and Use
The printed latch is fairly strong to ensure the box doesn't accidentally come open. You may need to gently press the lid forward and the bottom backwards at the same time while opening to get it to unlatch.
Hinges
Here's a GIF showing how to assemble the hinges. Note that one hinge (seen on the left here) has a small divot; connect the divot hinge second. If you try to connect the divot hinge first then the other one won't be able to slide in.

MicroSD
The improved MicroSD card holder has internal tapered shelves to provide a snug fit even with variations in printing tolerances. Cards will only fit in one way, and should only be pushed down far enough to get a decent friction fit; DO NOT try to push the microSD cards in all the way to the bottom. They will likely all stick out at slightly different heights due to printing variations, this is expected.

Boost Me (for free)
Like it? Leave a like.
LOVE it? Boost it!
License
You may create derivative works based on this object, provided that all such derivative works are published exclusively on the MakerWorld platform and include proper attribution to the original creator. You may not share, upload, host, distribute, or publish this object—or any derivative work of this object—on any other digital platform, marketplace, or distribution channel. Commercial use of this object and any derivative works is strictly prohibited. This includes, but is not limited to, selling, renting, sublicensing, or using the object in any context in which you receive monetary compensation or other financial benefits.
Comment & Rating (37)