Rapala f3 replica very slow sinking - single color


Print Profile(1)
Bill of Materials

Description
Boost Me (for free)
Please consider Sending me a boost, as it will help me make even more Wobblers and lures!
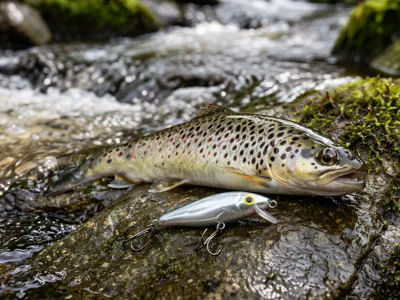
This is my single-color F3-replica (designed from a 3D scan of a original rapala F3), made as a fast and simple print for people who want a great-looking and great-working lure without needing AMS or a long print time.
Unlike my earlier 4-color version, this one is designed to be quick to print, easy to finish, and cheap to produce in larger numbers. There is no reason to spend 10+ Euro on a single lure when you can print around 10 of these in under 2 hours.
Even though this is a simple single-color model, a lot of thought has gone into the design.
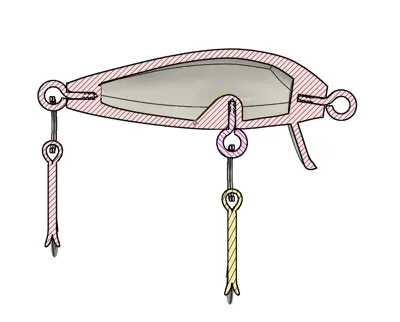
The internal cavity is carefully designed around center of mass, volume, and final hardware weight to give the lure the right balance and action in the water.
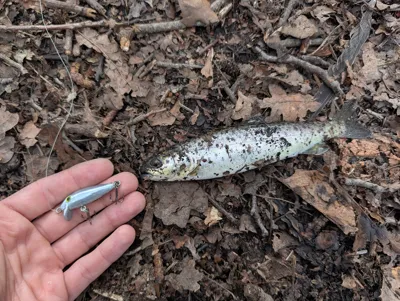
The goal was to make it sink slightly and swim well with great action!
Design notes
- Internal cavity designed with center of mass in mind
- Volume and mass calculated to achieve a slightly sinking lure
- Lure body volume: 2.046 cm³
- Final assembled weight: 2.240 g
This final weight includes:
- 3x eye screws
- 2x 5 mm split rings
- 2x #12 treble hooks
I have also included a section cut image so you can see the internal cavity design for yourself.
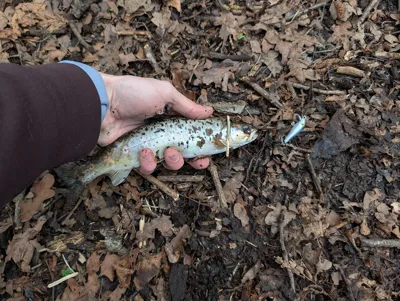
In my own testing, this lure has a very lively action and performs very well for trout (it slays!).
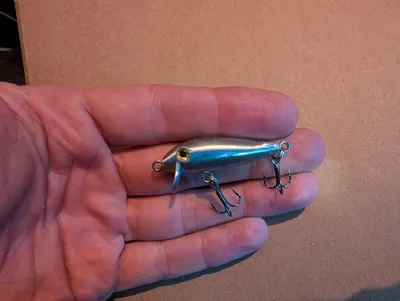
The one shown here was printed in Bambu Lab Silver Silk, coated in clear UV resin, and it catches fish extremely well.
Assembly
The lure prints as one single part.
Uses 4mm eyes (cheap on temu or similar sites).
After printing, install 3 small eye screws into the prepared holes in the body.
For easier installation and a stronger fit, I recommend gently heating the eye screws with a lighter and then pressing them into the holes.
The eye screws I used are:
- 4 mm outer diameter
- 2 mm inner diameter
- 5 mm shaft length
(thise can be found very cheaply on temu or similar sites - make sure you get the stainless steel)
After that, attach:
- 2x 5 mm split rings
- 2x #12 treble hooks
Then the lure is ready to fish.
Finishing
For my own lures, I dip the printed body in clear UV resin and let the excess drip off for 5 - 10 mins.
Before curing, I make sure there is no resin blocking the eyelets of the eye screws.
After that, I cure the lure in my UV curing station.
This gives the lure:
- a smoother shiny finish
- better durability
- improved water resistance
The model shown in the pictures was finished this way.
Note: The clear coat of uv resin adds 0.2 grams of weight to the lure, so if you skip this it might float.
Strength note
In my own testing, these eye screws mounted in the printed body have held more than 6.8 kg.
Important
For the best balance, sink rate, and swimming action, it is very important to use my included print profile.
This model has been designed around that profile, and changing print settings may affect the final result.
Tight Lines!
License
You shall not share, sub-license, sell, rent, host, transfer, or distribute in any way the digital or 3D printed versions of this object, nor any other derivative work of this object in its digital or physical format (including - but not limited to - remixes of this object, and hosting on other digital platforms). The objects may not be used without permission in any way whatsoever in which you charge money, or collect fees.
Comment & Rating (10)