Filament Shredder


Print Profile(1)
Description
🚧 Experimental Drill-Powered Filament Crusher v1.2 🚧
Recycling concept →https://makerworld.com/de/models/2686241-modular-filament-scrap-funnel#profileId-2975818← Recycling concept
IMPORTANT NOTE IN ADVANCE: This is purely an experimental proof of concept! Please do not expect an industrial-grade, smoothly functioning recycling system. This shredder works, but it will jam, it will stutter, and if you push your cordless drill too hard, a plastic part might give way. It's a hobby project by a maker for makers – use at your own risk! (Wear safety goggles!)
About the Project
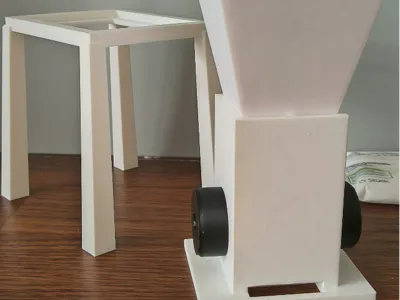
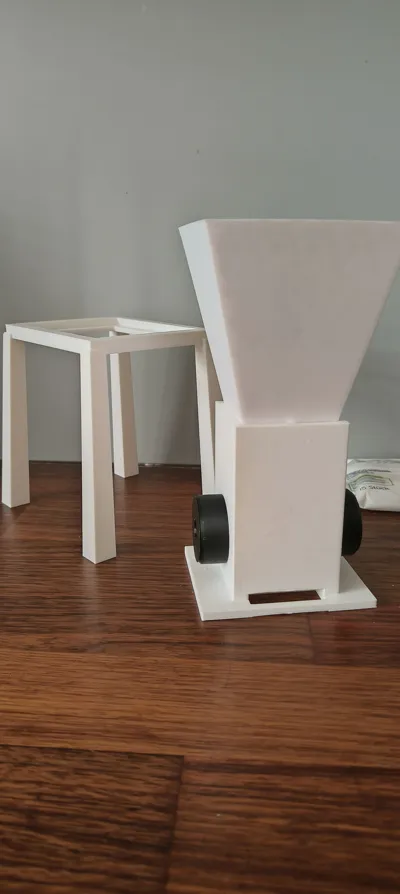
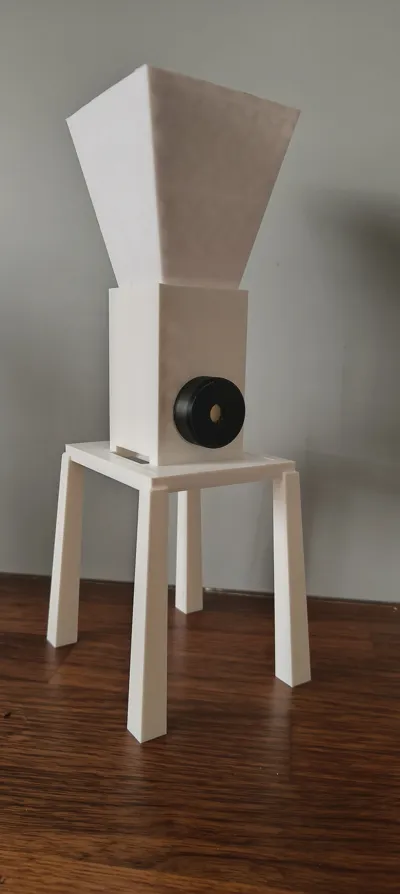
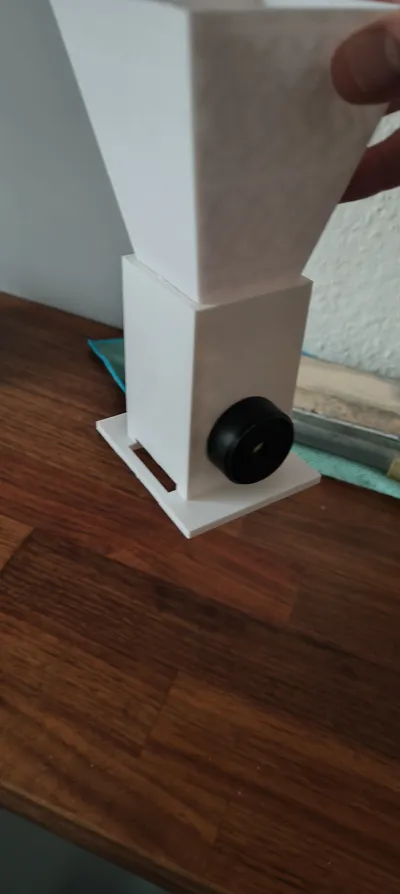
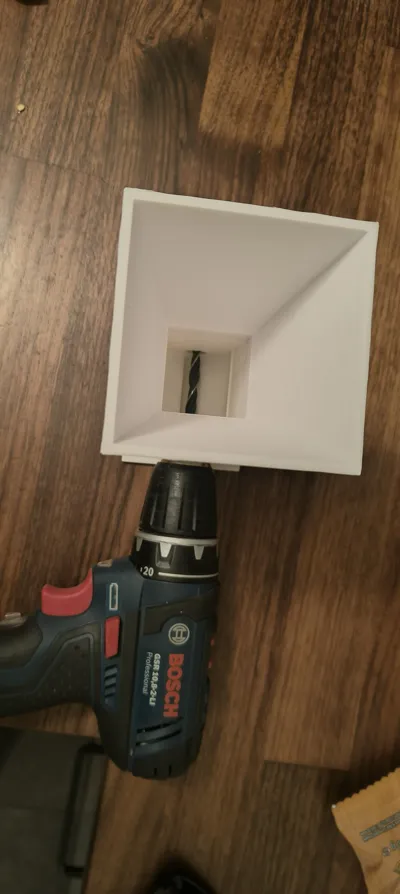
I wanted to find a way to shred my FDM waste (brims, support structures, small failed prints) without having to buy expensive specialized motors. The solution: The raw power of a standard cordless drill paired with a thick twist drill bit.
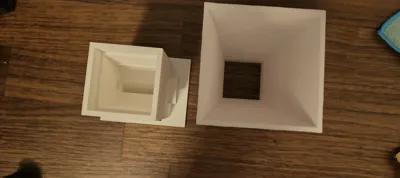
This design was developed over several iterations and is completely modular.
Features
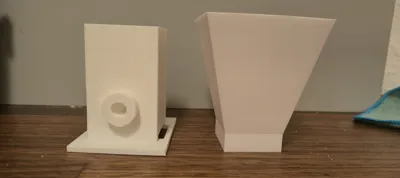
- Cordless Drill Drive: Uses a standard drill bit as an "auger" to shred the filament against the housing walls.
- V-Shape Hopper: Designed so that material slides down well, but deep enough to prevent accidentally touching the rotating drill bit with your fingers.
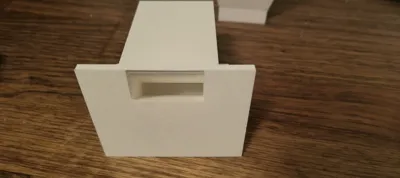
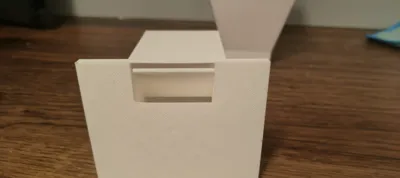
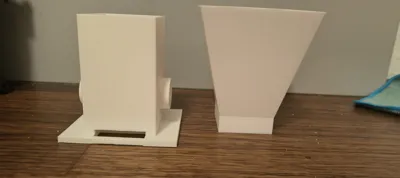
- Modular Plug-in System: Consists of a main housing, separate (replaceable) bearing caps for the drill bit, a stand for ergonomic working, and an open ejection chute (U-profile) through which the shredded material directly trickles into a collection container.
- Easy Maintenance: If the drill bit melts the bearing caps (bushings) due to friction, these can be re-printed as small individual parts in 15 minutes.
Required Hardware
- 1x Standard Cordless Drill
- 1x Twist Drill Bit (10 mm to 10.5 mm diameter – test what fits best through your bearing caps)
- Some lubricant (e.g., PTFE spray) for the drill bit bearings.
Print Settings (EXTREMELY IMPORTANT)
Do NOT print the main housing and bearing caps from PLA! The friction of the metal drill bit against the plastic quickly generates temperatures that soften PLA.
- Recommended Material: PETG, ABS, ASA, or PC.
- Walls/Perimeter: 5 to 6 wall lines (stability comes from the walls, not just the infill!).
- Infill: 40% - 50% (Gyroid or Cubic).
- Supports: Most parts (chute, hopper, stand) are optimized to be printed standing/upside down largely without supports.
Usage Tips
- Do Not Overfeed: Always drop only a few small support scraps into the hopper at a time.
- Speed: Start slowly! High speeds only generate heat and melt the filament instead of breaking it.
- Reverse Gear: If the drill bit jams, simply run the cordless drill in reverse for a moment to clear the jam.
I welcome your feedback, makes, and especially remixes to further improve the concept. Happy Crushing!
Boost Me (for free)
if you like it feel free
License
You shall not share, sub-license, sell, rent, host, transfer, or distribute in any way the digital or 3D printed versions of this object, nor any other derivative work of this object in its digital or physical format (including - but not limited to - remixes of this object, and hosting on other digital platforms). The objects may not be used without permission in any way whatsoever in which you charge money, or collect fees.
Comment & Rating (8)