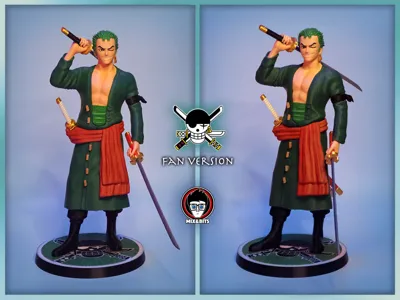
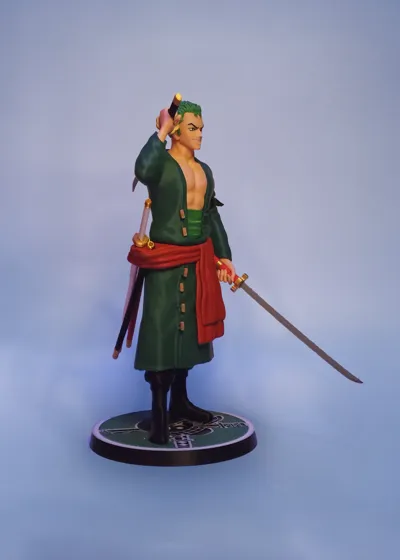
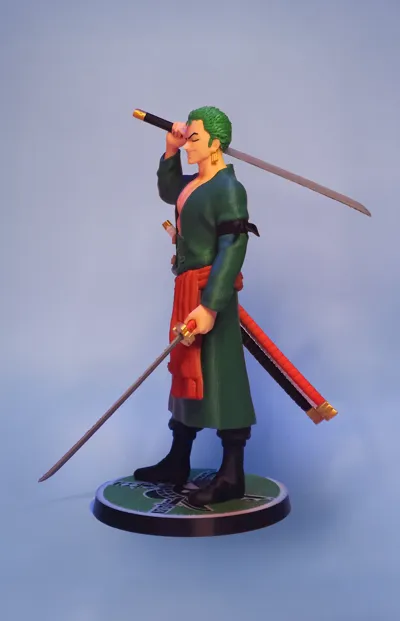
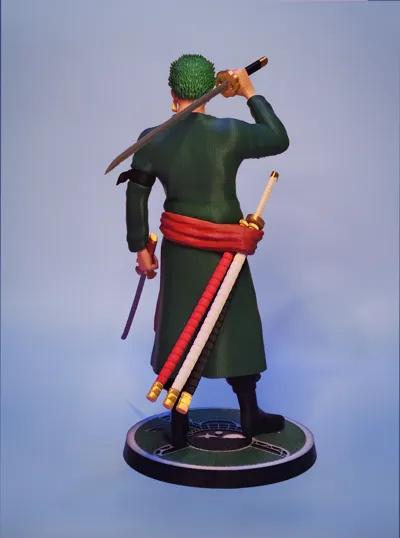
Thank you 22k! Zoro fanart! (35 cm- tallest part)


Print Profile(2)


Bill of Materials


Description
Boost Me (for free)
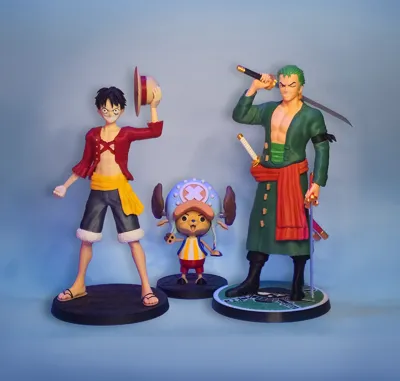
Want to see more statues of this series? At 150 boosts we will start working on next Character! Remember also to like and follow if you like our work! thanks!

Hey guys!! You can now choose our next fanart of the series!!
Vote here: https://makerworld.com/community/post/1733170


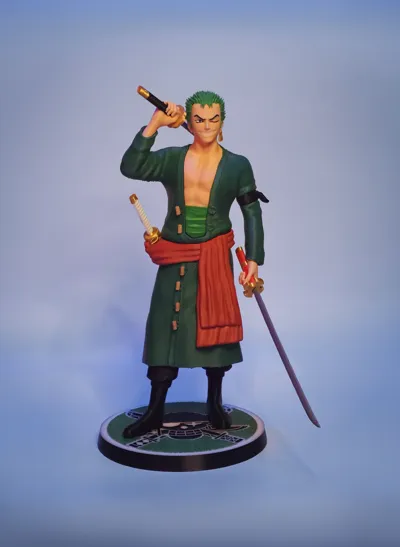
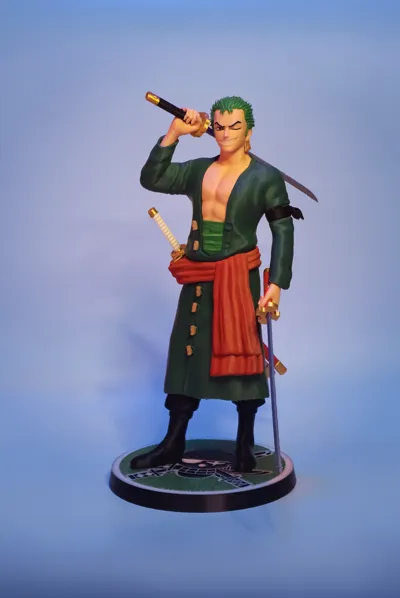
Hey everybody!
I know You've been waiting for this guy for a while!
Here He is! Zoro Fanart is finally here to join his crew!

We are pretty happy of the result! We hope you like this model too!
Assembling:
Mounth the teeth on the mouth then add the hair and glue the sideburns.
Glue the earrings to the ear and let dry!
Mount the bust formed on the green waistband and insert the piece inside the upper part of the tunic.
Add the buttons to the upper part and to the lower part of the tunic.
Add the black bandana to the arm and then the sleeve.
Mount the red scarf between the upper and the lower part of the body.
Add the legs.
Now insert the 2 blades in the 2 swords handles and mount the swords inside the hands.
You can add the hands to the sleeves.
Now insert the third white handle to the white sword cover and insert it in one of the holes present in the scarf/belt.
Also add the other two swords covers.
Mount the figure to the base… DONE!
P.S. the print of the sword covers take a while in the position we chose (if you use a single nozzle printer) but came out great.
We have a H2C and H2D so it didn't take long.
Bambu Studio suggest to print the piece standing…
It takes half the time…The print would probably be more “shaky”…but you can definitely give it a try!
Enjoy this print!!
License
You shall not share, sub-license, sell, rent, host, transfer, or distribute in any way the digital or 3D printed versions of this object, nor any other derivative work of this object in its digital or physical format (including - but not limited to - remixes of this object, and hosting on other digital platforms). The objects may not be used without permission in any way whatsoever in which you charge money, or collect fees.
Comment & Rating (128)