Removable License Plate Holder for Aprilia RS660


Print Profile(1)

Bill of Materials

Description
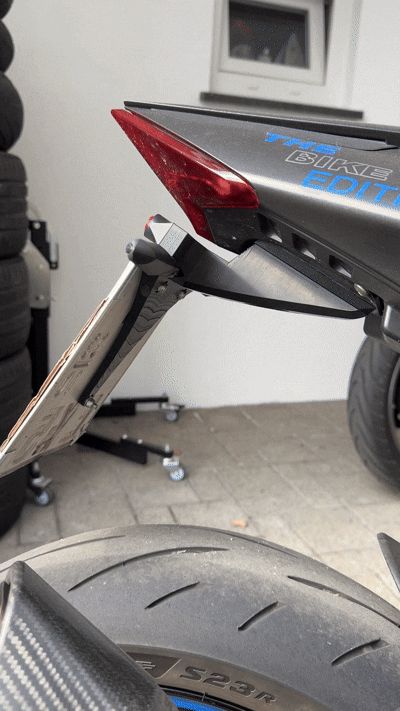
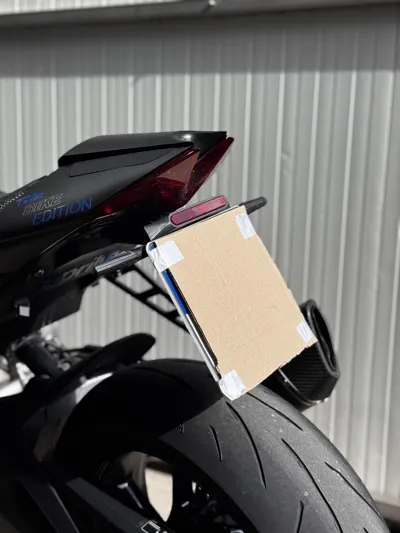
This license plate holder was specially developed for the Aprilia RS 660 and allows you to remove the entire rear (license plate, turn signals, reflector) with a single movement.
Perfect for:
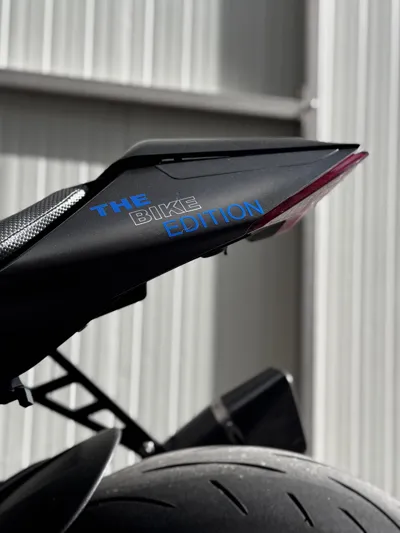
- clean bike photos without a license plate
- Show & Presentation
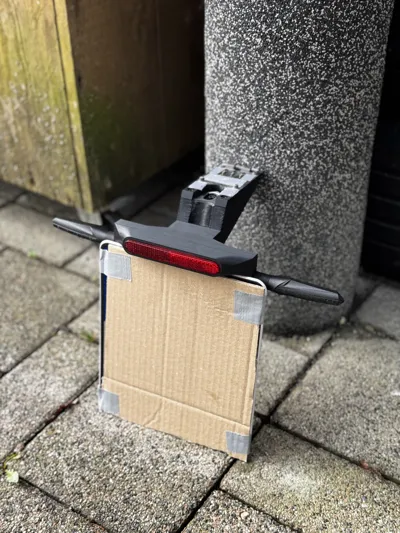
- quick dismantling without tools
⚠️ Note: Use without a license plate on public roads is not permitted!
🔧 Required Materials
The following components are used for this project:
- Reflector
- Quick Release
- Pogo Pins
- Heat Shrink Tubing
- Turn Signals (sequential recommended)
- License Plate Light
(Links below)
🖨️ 3D Printing
The following parts must be printed:
- 4 components in total
- Material: ASA recommended at minimum
- high stability
- UV-resistant (important for outdoor use)
⚙️ Assembly Instructions
- Disassemble original license plate holder
- Route cables from turn signals & license plate light through “Part-08”
- Tip: Thread string through first, attach cable and pull back
- Mount and screw turn signals
- Attach license plate light
- Insert brass inserts with soldering iron
- Screw or glue Pogo Pins into “Endpart-06”
- Solder cables to the Pogo Pins
- Screw “Endpart-06"” (stow cables neatly in the component)
- Insert large nut into “Part-08”
- Screw quick release from the outside
- Solder motorcycle cables with Pogo Pins to “Part_at_rear_Test_10”
- Attach "Part_at_rear_Test_10" to the motorcycle
- with 2 original screws
- Mount quick release thread with ball facing down
- Use lock nut for securing
- Adjust height if necessary
12. Screw “License_Plate_Part_02” with “Part_08”
13. Mount license plate
14. Adhere reflector
15. Assemble everything → finished ✅
⚠️ Important Notes
- Post-processing (e.g., sanding) may be necessary
- When soldering no voltage on the cables
- Basic craftsmanship skills required
- Fit may vary depending on the printer
🧰 Used Components (Example)
- Reflector: https://www.amazon.de/dp/B0D4HZTWJ1
- Quick Release: https://www.amazon.de/dp/B0D7RZ4V1F
- Pogo Pins: https://www.amazon.de/dp/B0CVZWLNM2
- Heat Shrink Tubing: https://www.amazon.de/dp/B071D7LJ31
- Turn Signals: https://www.amazon.de/dp/B07JGPQDR6
- License Plate Light: https://www.amazon.de/dp/B0C66F6PX6
💡 Idea Behind the Project
The goal was to create a clean, reversible solution that works without permanent modifications and is robust enough for real-world use.
📏 Road Traffic Licensing Regulations Compliance
During construction, care was taken to ensure that all relevant requirements of the German Road Traffic Licensing Regulations (StVZO) are met:
- correct turn signal spacing
- permitted license plate angle
- prescribed reflector alignment
➡️ Thus, when assembled, the holder is generally suitable for road traffic, provided that all installed components are also approved.
License
You shall not share, sub-license, sell, rent, host, transfer, or distribute in any way the digital or 3D printed versions of this object, nor any other derivative work of this object in its digital or physical format (including - but not limited to - remixes of this object, and hosting on other digital platforms). The objects may not be used without permission in any way whatsoever in which you charge money, or collect fees.
Comment & Rating (9)