Search models, users, collections, and posts

BambuLab P2S to H2D/H2C Nozzle Wiper Upgrade

GIF
GIF
GIF

Print Profile(1)

All
P1S
X2D
X1 Carbon
P1P
H2D Pro
P2S
A1
X1E
H2C
X1
H2S
H2D
A1 mini
A2L

PLA / PETG / ABS - 0.2mm layer, 4 walls, 25% infill
Designer
1.1 h
3 plates
5.0(8)

Open in Bambu Studio
Boost
102
402
34
5
98
70
Released 

Bill of Materials

Bambu Filaments
Select all
ABS Black (40101) / Filament with spool / 1kg
ABS
x1
Black(30105) / Filament with spool / 1kg
Black (10101) / Filament with spool / 1kg

Description

>>> “Follow” my profile for future updates! <<<

Boost Me (for free)

One "🚀 Boost" = One "Thanks" for the designer!

Looking for Cardboard Spool adapters for eSUN, Elegoo, Polymaker or OTHER brands?

Check the full collection here: Collection link

Also check my Fidgets Collection which is constantly getting updated.


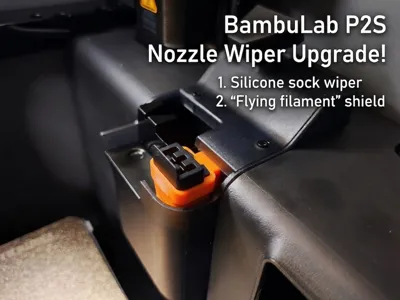
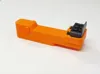
BambuLab P2S to H2D/H2C Nozzle Wiper Adapter Holder


Upgrade your BambuLab P2S with this adapter holder to use H2D or H2C nozzle wipers, which are not natively compatible with the P2S.


The H2 wipers offer a clear advantage: they feature an extra silicone shield that wipes the nozzle’s silicone sock during cleaning, reducing filament “fly-off” onto the build plate — a common issue with the P2S. Additionally, the wiper is slightly larger than the stock version, improving overall nozzle cleaning efficiency.


It’s recommended to print the holder with high-temperature filaments like PETG or ABS. That said, I ran long-term tests using PLA, and it performed perfectly — even during ABS prints.


Installation is simple: 


  1. Purchase a compatible H2D/H2C Wiper
    1. BambuLab store link: H2D/H2C Nozzle Wiper
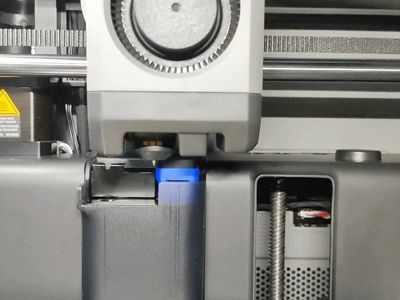
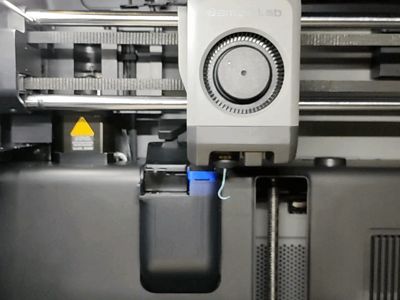
  2. Install H2D/H2C Nozzle Wiper Adapter Holder into your P2S Printer (A step-by-step video-guide is included in model images)
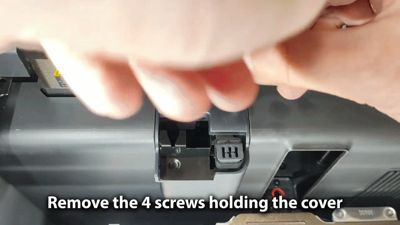
    1. Remove the screws from the wiper lid
    2. Take out the lid (you have to hold poop-chute in open position and rotate lid by 90 degree while lifting it up. see the example in video)
    3. Take out old wiper holder
    4. Insert the upgraded holder
    5. Put back the lid (again, hold the poop-chute and rotate while lifting down. see the example in video)
    6. Secure lid with the screws.


Also Check out my latest models:

Twisty Spiral Star Fidget

https://makerworld.com/en/models/2662379-twisty-spiral-star-fidget


Impossible Passthrough Triple Helix Fidget

https://makerworld.com/en/models/2594425-morf-worm-squishy-waffle-fidget


Membership

💸 Commercial Licenses: Click ‘Join’ to sell physical prints of my designs. Higher tiers allow you to use my photos and videos to help grow your brand and save time!

Join


Comment & Rating (34)

(0/1000)

Pinned by Designer
Print Profile
PLA / PETG / ABS - 0.2mm layer, 4 walls, 25% infill
Excellent design and functionality. Easy print in PETG. Thank you.
(Edited)
The profile uploader has replied
profile
1
Reply
Thank you!
(Edited)
0
Reply
Boosted
Print Profile
PLA / PETG / ABS - 0.2mm layer, 4 walls, 25% infill
The print turned out very well, I printed it in black ASA because I think it's more practical in this situation. Since I'm still waiting for the wipers, it's not installed yet, so there are no photos yet. Addendum Everything seems to fit, and I hope I've put it back together correctly ^^. The new part looks different from the original (a replica of the original part would of course be another point in its favor). How well it works in the end and whether it really brings anything remains to be seen.
(Edited)
The profile uploader has replied
Show original
profile
2
Reply
Thanks for the review. I agree, black color is the best for that location, but for the "illustration" purposes I had to use colourful ones :) Please add photos once you finish your setup!
0
Reply
any special reason why it didn't achieve 5-stars?
0
Reply
Boosted
Replying to @delphir :
Hello. I thought that one less star would be an incentive to recreate the model based on the original part, thus coming as close as possible to the original. This was not meant to diminish or detract from your idea. The 5 ⭐️ will follow with a boost 😉
(Edited)
Show original
1
Reply
Print Profile
PLA / PETG / ABS - 0.2mm layer, 4 walls, 25% infill
(Edited)
The profile uploader has replied
profile
1
Reply
Thank you! can you please share a photo of your print?
(Edited)
0
Reply
Replying to @delphir :
Done
(Edited)
profile
1
Reply
Replying to @user_136362963 :
thank you! you can use a flame torch to cleanup the stringings on the inner surface
0
Reply
Print Profile
PLA / PETG / ABS - 0.2mm layer, 4 walls, 25% infill
Printed great and easy to install. Great model thanks ! Printed in Sunlu Black Matte PETG.
0
Reply
you should put the wiper as a BOM, it'll earn you money, and show this to more people
The designer has replied
designer
1
Reply
Thanks for your comment, unfortunately wipers can't be added into BOM list. I would really appreciate if you can rate the model and share a photo of your upgrade! :)
1
Reply
Replying to @delphir :
oh ok, I'll order one, then print and review, I think this deserves more attention
designer
1
Reply
Replying to @Elijahsprints :
yeah, somehow BBL hides this from the community :)
0
Reply
I think this should work fine, I have found it a little tight to the sliding part and thus stops it moving. I will take a file to it till it moves freely
The designer has replied
0
Reply
what filament did you use? I printed mine in PLA and ABS - both slides in freely with zero force (you can see it on the video too)
0
Reply
Replying to @delphir :
Hi, I printed the petg version. I have opened it in fusion, cut it at the "head" and moved that over to the right 0.25mm. Cant test it yet because I'm in the middle of a long print. Not sure if it will still fit, but it really doesn't need much. I will let you know how it turns out. There may be slight differences in the printers themselves too.
0
Reply
Replying to @delphir :
I tried 0.25mm and it did work but was still touching and slowed down the return on the spring. I made one 0.5mm and that works fine. Yet to try it printing as I dropped one of the small screws from the plastic panel and it seems to have gone inside the printer... So I think I'm going to have to do some major dismantling before I turn it on. That will have to wait till tomorrow.
0
Reply
@delphir is there any chance you could make one for the X2D? I printed this one thinking it would work but once I took it apart, I realized that the X2D has a spring mechanism attached.
(Edited)
The designer has replied
0
Reply
Thanks for the heads up on fitment (incompatible) with X2d. I printed one in petg-cf with PLA support and it came out really well but wasn't sure if it would fit either.
0
Reply
unfortunately I don't have an access to X2D printer.
0
Reply
do it work for x2d
0
Reply
No, this version does not, the X2D's nozzle wiper has a spring mechanism attached to it.
0
Reply
Great Model. Thanks for your skills and effort in mking it available.
The designer has replied
designer
1
Reply
thank you!
(Edited)
0
Reply
@Delphir do you happen to know if this is compatible with the X2D?
The designer has replied
0
Reply
unfortunately I don't have an access to X2D to verify this...
0
Reply
Print Profile
PLA / PETG / ABS - 0.2mm layer, 4 walls, 25% infill
wow this thing works amazing thank you!
The profile uploader has replied
0
Reply
thanks for the review! :)
0
Reply

License

If you want to use this model commercially, please join my membership.
Join Now
This user content is licensed under a Standard Digital File License.

You shall not share, sub-license, sell, rent, host, transfer, or distribute in any way the digital or 3D printed versions of this object, nor any other derivative work of this object in its digital or physical format (including - but not limited to - remixes of this object, and hosting on other digital platforms). The objects may not be used without permission in any way whatsoever in which you charge money, or collect fees.