1:64 Miniature Suzhou Garden Space V1


Print Profile(6)

Description
Boost Me (for free)
Thank you for your likes!
Printing and Installation Instructions:
1. Many parts are printed on a small scale, so be careful when disassembling them
2. Installation requires super glue
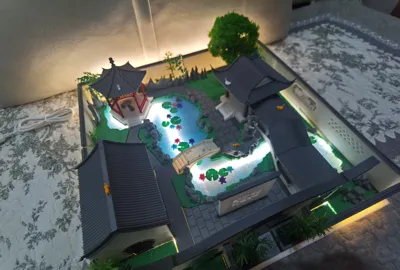
3. You will need to purchase a 2m long USB linear filament light
5. Core material recommendations are as follows:
Mahogany (13204) Bambu PLA Wood or Dark Night Red (11202) Bambu PLA Matte
If you prefer a darker look, choose Mahogany; if you prefer a brighter look, use Dark Night Red. Brighter reds are not recommended. The version in the photos uses Dark Night Red
Jade White (10100) Bambu PLA Basic
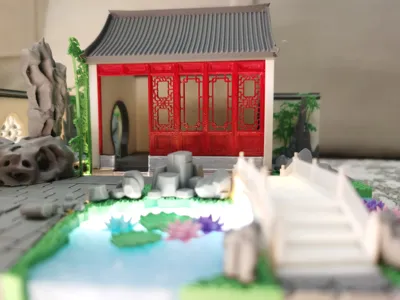
For the lamp base and enclosure material, Jade White is strongly recommended. It's not too stark white, perfectly capturing the 'pink wall' aesthetic, and provides just the right amount of translucency
For the roof, choose a dark, almost black grey, known as 'ink-wash tiles'. For the paved stone scenery, use light grey. For the building base, use matte white or a greyish marble. For the water features, use transparent
Creative Notes:
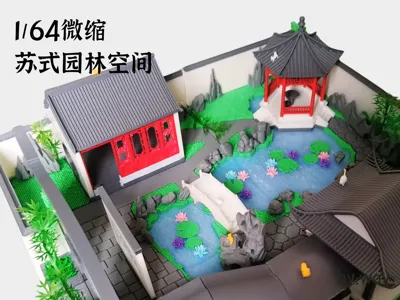
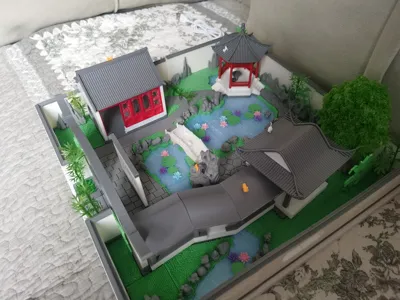
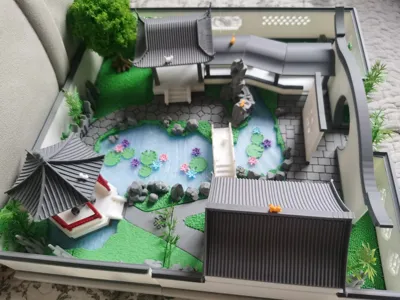
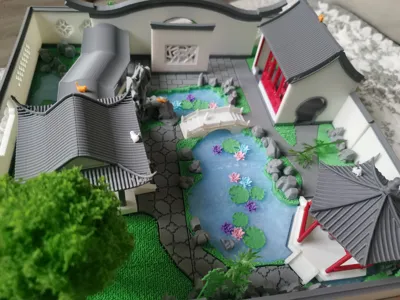
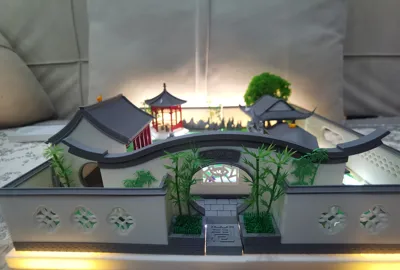
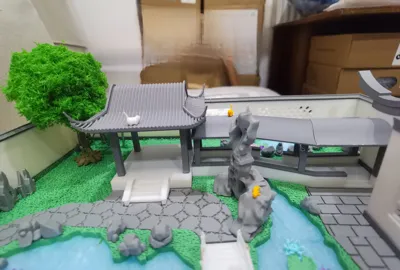
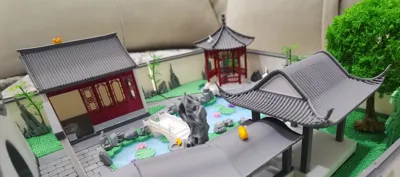
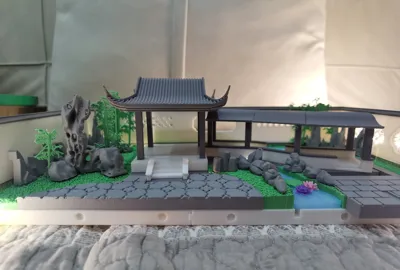
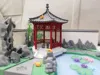
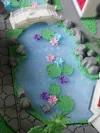
The beauty of Suzhou gardens lies in their pavilions and towers
in their small bridges and flowing water, in their 'pink walls and ink-wash tiles'
They also feature Taihu stones, which are 'lean, wrinkled, perforated, and translucent'
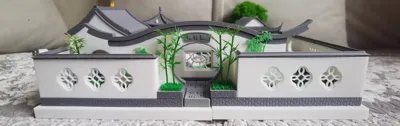
gentle cloud walls and winding corridors
exquisite flower windows and flower streets
and, more importantly, the spaces created by the combination and transformation of these elements
borrowed scenery, framed scenery, and changing views with every step
I have attempted to interpret all of the above using 3D printing technology
About Scale:
1:64 is a classic scale for die-cast cars, offering a perfect balance of ease of handling and detail presentation
Common scales in architecture are 1:50 and 1:100. I once tried using these scales to interpret garden spaces with 3D printing
However, at 1:100 scale, individual details were severely lacking. At 1:50 scale, details were sufficient for individual elements, but interpreting an entire space became too large
1:64! This scale truly caught my eye
I reconstructed all model details to adapt to this unfamiliar scale for the architectural industry, and it brought me a pleasant surprise
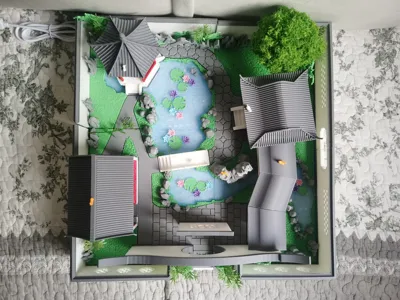
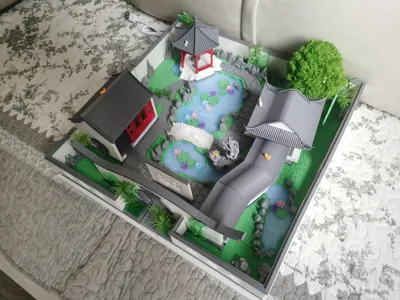
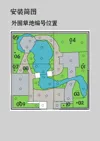
This 1:64 miniature project has an overall print size of approximately 310*310, which is roughly equivalent to 20 meters square in the real world
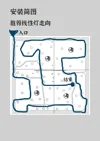
It is also divided into 3 independent modules. If the overall size is too large, you can choose to print your favorite module. If you wish to complete the full set, you can always print the remaining parts later
The assembly process is like putting together a puzzle. The landscape elements can be arranged according to your preferences
You can also combine it with other miniature landscape pieces, compatible with all 1:64 miniature items
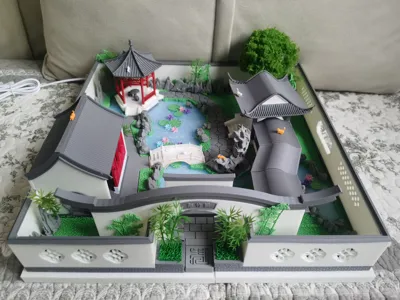
Lighting Design:
The design principle is to avoid direct lighting and use hidden light sources
Therefore, the 'wall-washing light' technique commonly used in architecture was adopted
Users will see diffused light from walls or scenery
further enhanced by backlighting from translucent or highly transmissive materials
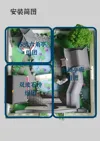
Print Profile:
I tried interpreting grass and water ripple textures in the slicer software
Special overhang and fuzzy skin surface parameters were used to interpret the grass
A wood grain modifier was used to interpret the water ripples
I experimented with appropriate scales for printing suspended corridors to reduce part disassembling and lower installation difficulty
I also attempted reasonable part separation to minimize supports and avoid damage to small models when removing supports
Numerous print tests were conducted before arriving at the current version
Despite this, the printing and installation of this project still present some challenges, but the joy of success is also doubled
If you encounter any problems during printing or have any good configuration suggestions, you are very welcome to send me a private message
Documentation (3)
License
You may create derivative works based on this object, provided that all such derivative works are published exclusively on the MakerWorld platform and include proper attribution to the original creator. You may not share, upload, host, distribute, or publish this object—or any derivative work of this object—on any other digital platform, marketplace, or distribution channel. Commercial use of this object and any derivative works is strictly prohibited. This includes, but is not limited to, selling, renting, sublicensing, or using the object in any context in which you receive monetary compensation or other financial benefits.
Comment & Rating (2)