Electric Card Launcher - Rapid Fire Swish Swish Swish


Print Profile(1)

Description
Boost Me (for free)
If you also like this model, please boost me! ( •̀ ω •́ )y
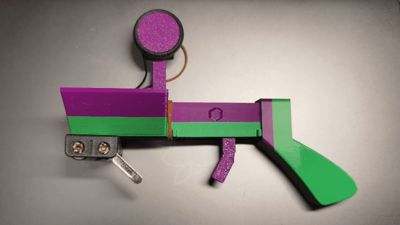
Model Introduction:
First, I want to thank everyone for their love for the manual card launcher I previously released—it successfully made it into the top 30 trending models, which truly made me happy for several days. However, due to the limited speed of the manual version when loading and adjusting cards, I began exploring solutions for automated card launching. Ultimately, I created this model using the principle of friction. While it's not perfect, it doubles the fun of launching cards, and everyone is welcome to download and print it!
The accessories required for this model are mostly mini 4WD car parts. This allows for the reuse of idle mini 4WD cars at home and also makes it convenient for players to purchase, preventing incompatibility issues with motors and other electrical components due to size differences.
Accessories required for the model: 1 rubber band, for trigger reset; 1 mini 4WD motor, the higher the speed, the better the launch effect; 1 mini 4WD tire, to be placed over the friction wheel (30mm outer diameter) for launching cards. The greater the friction on the tire surface and the tighter it fits on the friction wheel, the better the launch effect; 2 AA batteries; 1 battery compartment; 1 pair of wires.
Tip:
1. You can also directly use the mini 4WD car's own wheels instead of the friction wheel, but the card launching effect will be affected;
Assembly Steps:
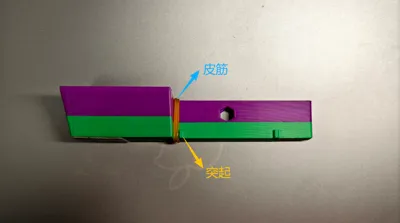
1. First, place the rubber band over the main body of the launcher, securing it inside the 'protrusion'.

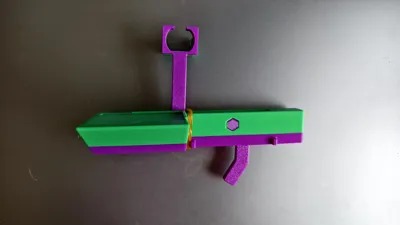
2. Pass the trigger (motor compartment) through the center of the launcher's main body from top to bottom, place it over the rubber band, and align it with the hole for the hexagonal shaft.
3. Install the hexagonal shaft. Once installed, when the trigger is pulled, it should rotate around the hexagonal shaft and reset under the tension of the rubber band.

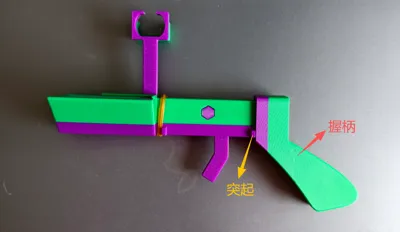
4. Install the grip. Simply slide it onto the tail end of the launcher's main body. Once installed, the grip should fit snugly behind the 'protrusion' at the tail.

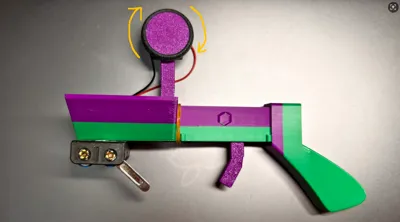
5. Install the motor into the motor compartment, glue the battery compartment to an appropriate position at the bottom of the launcher, connect the wires, and ensure the friction wheel direction is as shown in the figure.

6. Connect the power, place playing cards one by one in the designated position, pull the trigger, and launch!

Welcome to visit:
PS: Feel free to visit my homepage often, you're sure to find something you need (●'◡'●)
Homepage link: https://makerworld.com.cn/@Pbreak
License
You shall not share, sub-license, sell, rent, host, transfer, or distribute in any way the digital or 3D printed versions of this object, nor any other derivative work of this object in its digital or physical format (including - but not limited to - remixes of this object, and hosting on other digital platforms). The objects may not be used without permission in any way whatsoever in which you charge money, or collect fees.
Comment & Rating (0)