Bolt End Caps - Screw-On


Print Profile(1)
Description
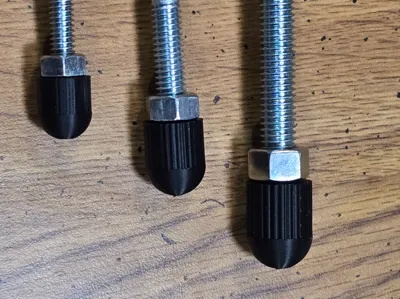
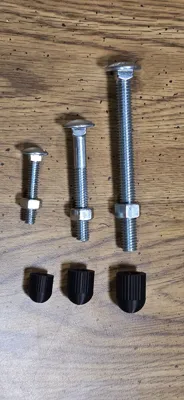
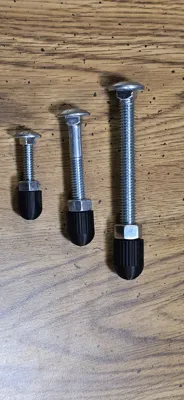
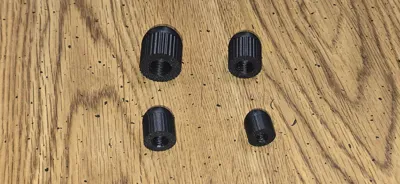
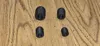
The profile provides screw-on bolt end caps for Imperial (UTS) sizes of bolts: 1/4", 3/16", 3/8", 7/16", 1/2", 9/16", 5/8" and 3/4". They are sized to cover a length of exposed bolt equal to twice the diameter of the bolt.
I recommend using TPU or PETG, but the profile is set up for PLA to make printing from Handy easier. To change the filament type, you will need to open in Studio, change the filament type, and re-slice.
If you want a press-on nut cover for UTS/Imperial nuts, check out my other model here: https://makerworld.com/en/models/2561509-imperial-hex-nut-bolt-covers
GENERATE YOUR OWN CUSTOM BOLT COVER
This OpenSCAD script was modified from the Screw Generator Openscad script by Jason Koolman which can generate standard bolts, nuts and washers. The modified script will generate a closed end nut for a wide variety of ISO/DIN and UTS (inch-based) bolt sizes - all fully parametric and customizable. It lets you select the bolt size and then enter what length of exposed bolt you want to cover. It also lets you control the diameter and the knurled characteristics of the nut from smooth to coarse knurls for better grip.
Click on Customize to open the generator.
Under General
1. Select a Bolt Size
Supported Metric sizes: M2, M2.5, M3, M4, M5, M6, M7, M8, M10, M12, M14, M16, M18, and M20
Supported UTS (Imperial) sizes: #4, #6, #8, #10, #12, 1/4, 5/16, 3/8, 7/16, 1/2, 9/16, 5/8, and 3/4
2. Select Thread
Course or Fine threads. A custom thread is also an option which can be controlled through “Pitch." If you don't select custom, ignore the Pitch setting.
Under Custom Nut Parameters
1. Enter Cavity Length
This is the maximum length of bolt that will fit into the cover. If you leave it set to 0, it will default to 2x the diameter of the selected bolt size.
2. Set Knurl Depth
This determines how deep the knurling is on your bolt end cover. It is set to 0, you bolt end cover will be round and smooth. If it is set to -1, it defaults to 1/20 of the bolt diameter which gives a fairly small knurl size. You can adjust this to give larger or smaller knurls if desired.
3. Thread Clearance
This provides additional clearance for 3D printing. It is suggested that you leave this at its default setting unless you are having issues.
4. Diameter Scale
This sets the diameter of your bolt end cover. A setting of 1 makes it the same as the long dimension of a hex nut for that bolt. As you increase it, it gets bigger.
Render and Export
Generate your bolt end cover at the desired resolution and export it for slicing and printing. For small bolt sizes, it is important to use a (extra) fine layer height to achieve better detail and fit.

Comment & Rating (6)