Azeron Keyzen Thumb Riser


Print Profile(0)
Description
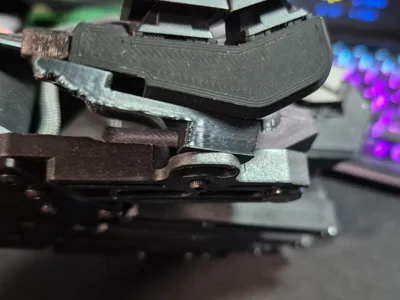
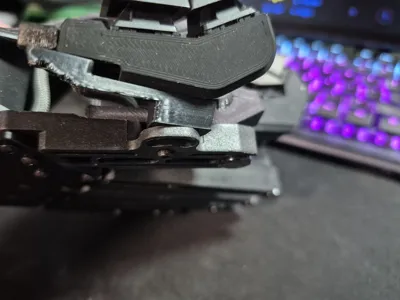
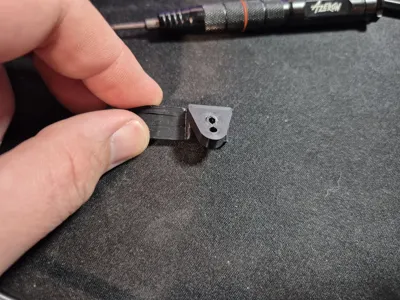
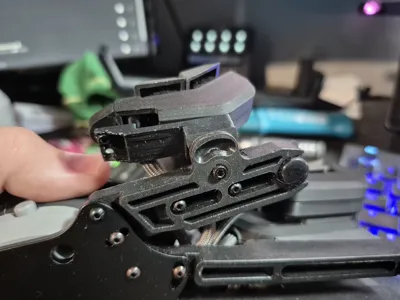
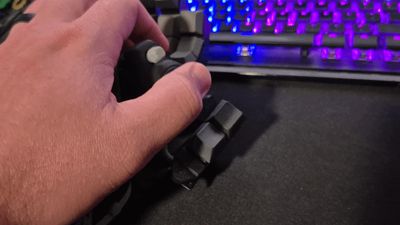
This is a custom riser I made for the Azeron Keyzen to move the thumb keys higher, closer and angled in a more ergonomic way. The Keyzen is a good game pad but it lacks some of the customization found with the Cyborg series. One of my biggest issues with the design was the thumb keys. If you try to use them as intended in the promotional images they're difficult to reach and become practically useless. The next best thing you can do is leave them fastened along the side of the palm rest, which is the way they are shipped out. This felt better to me but it was far to low to be "just right".
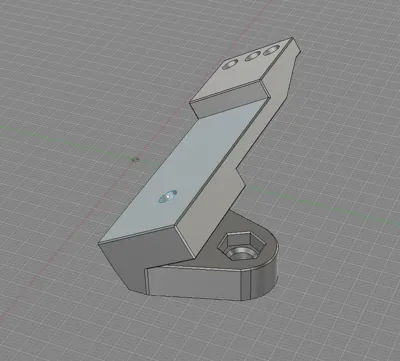
So I took a 90deg furniture bracket and bent it into a sharper angle and began the experimentation process. This is what ultimately led me to getting a 3d printer.

After months of designing, testing and collaboration on the Azeron Discord I feel I am finally ready to publish it for others to print and use.


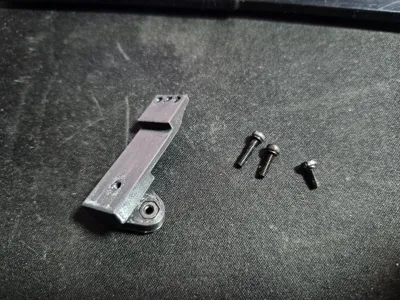
This will require three 2.5m screws and one 2.5mm nut or 2.5mm heat insert for installation.
One 2.5x6
One 2.5x8
One 2.5x10

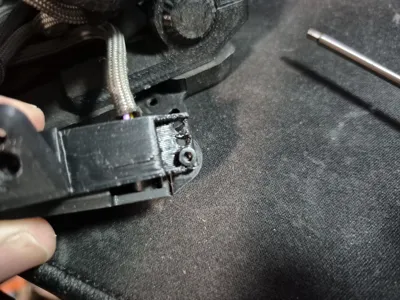
Begin by pressing the 2.5m nut into the nut press fit hole. It has a slight chamfer that should make the press easier. If you prefer to use heat inserts there's a hole for that below the nut press hole and it's chamfered as well. I used the nut method in my personal model seen in the provided images.
The next step requires you taking the 2.5x10 screw and threading it through the bottom of the model in the hole next to the nut/insert hole. It may be a little snug but it should thread through the base and into the angled riser. Once the screw makes it a few mm out the top, place it so that it screws into the bottom of the Thumb Key Body and tighten it till snug, do not over tighten.

If it's too tight or the screw head is larger than I designed for I provided a .step file of the model so that you can alter the size. You will still need to use 2.5m screws as that is what they Keyzen Thumb Body is threaded for.
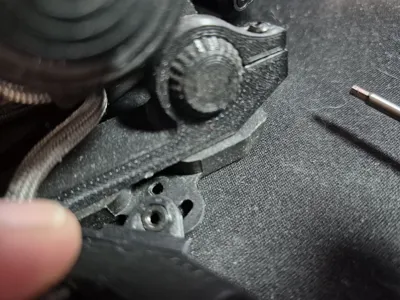
Next you will need to adjust the angle. I've provided 3 holes that will help align the Body into 3 potential angles. I suggest picking the middle one and rotating the hole at the tip of the Body so that it aligns. Then slotting the angled tip of the Riser Base into the base of the Keyzen and testing it. If it doesn't feel right then rotate it to the hole that feels like it would be appropriate. Once you have your pick thread the 2.5x6 screw through and thread it into the Thumb Body. The hole angle distance don't seem like they'd change much but you'd be surprised how much a difference a few mm make to the fingers.

Finally flip it over and insert the angled tip of the base into the slot the Thumb Body would originally slot into. You'll take the 2.5x8 screw and slot it through the hole and into the pressed nut. If you use the heated insert method a 2.5x6 should be enough but I haven't tested it with this model.


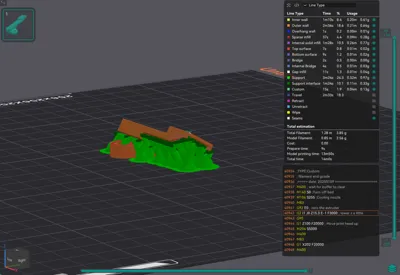
Recommended Print Settings:
Material - PLA+ or PETG
Layer Height - 0.2
Wall Loops - 3 (2 may be fine but I chose 3 to add extra strength)
Sparse Infill Density - 15%
Top/Bottom Surface Pattern - Monotonic Line (My personal preference to leave smooth surfaces)
Support - Tree Slim or Organic
Brim/Mouse Ears - Optional, I didn't use one.
I recommend printing it on the base.

Comment & Rating (0)