Search models, users, collections, and posts

Extended desk drawer with multi storage

IP Report

Print Profile(1)

All
P1S
P1P
H2D
X1
X1 Carbon
H2D Pro
P2S
H2S
H2C
A1
X1E
X2D
A2L

0.2mm layer, 2 walls, 15% infill
Designer
20.5 h
8 plates
4.9(26)

Open in Bambu Studio
Boost
1229
4276
43
56
1.5 k
366
Released 

Bill of Materials

Bambu Filaments
Select all
Matte Ash Gray (11102) / Refill / 1kg
Matte Charcoal (11101) / Refill / 1kg
Matte Ivory White (11100) / Refill / 1kg

Description

Boost Me (for free)

Boost are very appriciated, it help to cover cost on future projects. Thank you

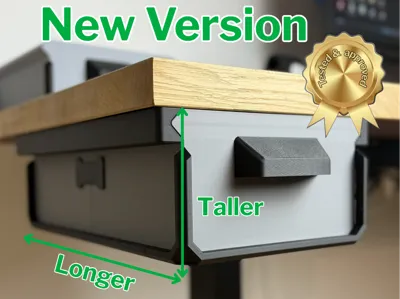
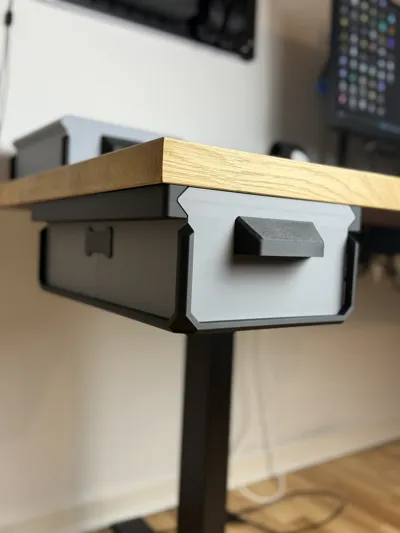
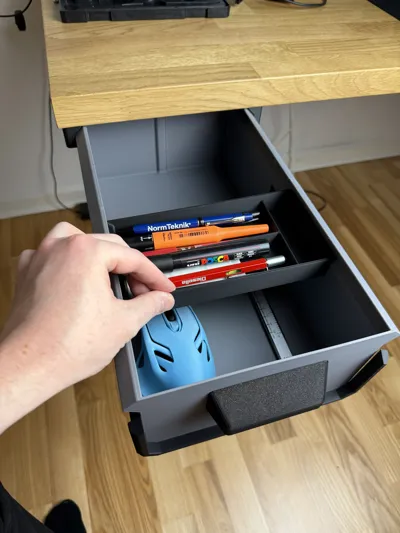
This is my new version of the Drawer with multi storage.


This model is now, longer, taller, and soon comes with accesories such as a gridfinity base.


The inside box measurements are:  371mm (L) x 115,5mm (H) x 198mm (w)


The outside measurements are: 375mm (L) x 120,25mm (H) x 248mm (included rails) (w)


Things you need:


GLUE! to glue it all togeather (make sure to take your time gluing the pieces togeather to achive the best result)


6-8 screws to mount up into your table. (holes are Ø6 counter sunk)


I really hope you guys will love this design.


Glue Guide


Step 1.

3 connectors in the bottom of the box (make sure you dont use the ones for the side, they have a small edge)

Step. 2

Only Glue this area on the side connectors

Step 3.

Make sure to click in the side connector properly, until they are flush on the inside of the box.

Step. 4

Hold it firm until they dry.

Step. 5

Glue the 3 pins in to the handle, and apply some glue on the area around the pins.

Step. 6

Put alittle glue on the holes on the box, before attaching the handle. Hold it firm until it dry.

Step 7.

Assembly the slide rails, using the 4 small pins. Glue them into one side. (BE SURE YOU ORIENTATE THE RAILS CORRECT)

Step 8.

Put some glue on the surfaces that need to combine,

Step 9.

Connector and hold them firm until they dry.

Step 10. 

This is how its suppose to look, after this you are ready to install the box. its a good idea to try hold the rails onto the box so you know how the rails fit before you try install them (make sure you start with the correct rail, then after that hold the box into the rail, and attach the last rail.)

Comment & Rating (43)

(0/1000)

I’ve already printed 10 of these — very convenient to use. I decided to experiment with thinner walls and remodeled it. The result is about 30% less filament usage per print. Considering that most users will store lightweight items, you may consider to make such optimization.
5
Reply
Please share? 😊
0
Reply
Is it possible to upload the model as a whole? I would like to print it completely without gluing.
Show original
1
Reply
It'll be way too big to print as a whole
0
Reply
Not for my Qidi max 4, I have a 390x390 print plate
Show original
0
Reply
Same. I have a Neptune 4 Max
0
Reply
how much weight does it hold ? is it floppy ?
1
Reply
This is ALMOST exactly what I am looking for. A large pull out tray I can add under my table. Unfortunately, the width is too big as I can only use the overhang on the sides of the table to mount it, as there is a support beam that runs the width of the table up to the last 190mm. Can anyone help me on how to modify the width to 190mm but keep the depth and length the same?
The designer has replied
0
Reply
I think you should be able to slice/cut it in the slicer program and then merge/combine it again. “on the length. on both side before the handle”
0
Reply
what material did you use?
The designer has replied
0
Reply
I used PLA, you can see In the Bill of material list.
0
Reply
interested in a slim one with a tray for loose pens sd cards and usb sticks, A5 size 45mm deep.
(Edited)
1
Reply
Print Profile
0.2mm layer, 2 walls, 15% infill
brilliant
0
Reply
Boosted
Print Profile
0.2mm layer, 2 walls, 15% infill
Super
Show original
0
Reply
Could you please tell me why you decided to make the dowels separate parts instead of making them part of the handle, meaning just protruding pins on the handle? The same question applies to the dowels for the drawer slides
Show original
0
Reply
Print Profile
0.2mm layer, 2 walls, 15% infill
love the system, fits well under the desk, it would be great if it snapped together. may need to make extra plate for braces to glue inside the rails
(Edited)
0
Reply

License

This user content is licensed under a Standard Digital File License.

You shall not share, sub-license, sell, rent, host, transfer, or distribute in any way the digital or 3D printed versions of this object, nor any other derivative work of this object in its digital or physical format (including - but not limited to - remixes of this object, and hosting on other digital platforms). The objects may not be used without permission in any way whatsoever in which you charge money, or collect fees.