
Battery Buddy


Print Profile(10)


Description
| Important notice: I have restored this page because this design is under a Creative Commons license and deserves to be shared - and attributed properly. However, please understand that I do not regularly check comments or messages on MakerWorld. I encourage you to find me on Printables or visit lucky13toys.com. |
Give your dead AA battery a new life as a fun articulated figure!
Named by Dr Operator!
Instructions
Two print profiles are provided with all parts. The first one is at 100% scale and fits a AA battery. The second is at 179% scale and fits a standard glue stick (should fit both the Bambu glue stick and the Kores stick that comes with Prusa Printers).
A printable AA battery is also included if you don't have one. Try adding a filament change for the colored top!
To fit other cylindrical items, simply measure the object's diameter in mm and divide by 14, then scale all parts by that amount. For example, the glue stick is 25mm in diameter, so 25/14 = 1.79 = 179%. Scaling below 100% may be tricky.
The hands are compatible with Lucky 13 series accessories. If you're scaling up the parts, apply the same scale to the accessories.
Print settings
If you've printed any of my other jointed figures, you should be familiar with the recommended settings.
| Material | ABS, ASA, or PETG |
| Layer height | 0.15mm |
| Infill | 20%, rectilinear |
| Supports | none |
| Brim | none, unless you encounter bed adhesion issues |
PLA is not recommended because it will “creep" over time and cause the joints to go floppy.
Assembly
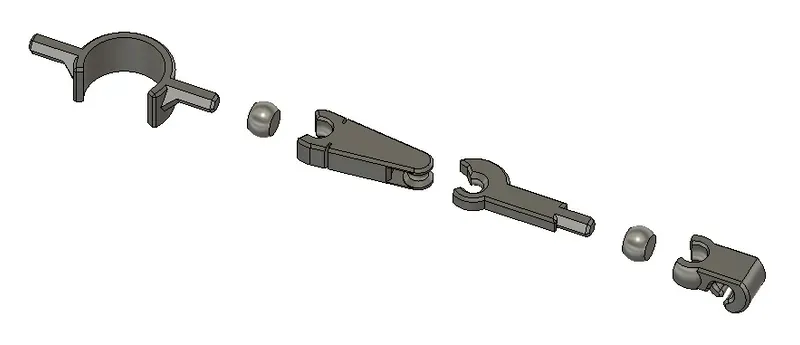
Push the balls onto the corresponding pegs on the waist, chest, and lower limb parts. Snap the limbs together as shown. Clip the waist and chest onto the battery.
Please be sure to include proper attribution when sharing or selling this design.
Want to support future projects with a one-time donation? Make a PayPal donation here!
License



Comment & Rating (527)