Search models, users, collections, and posts
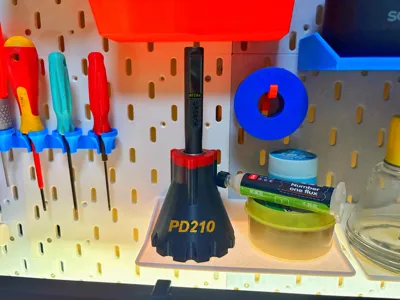
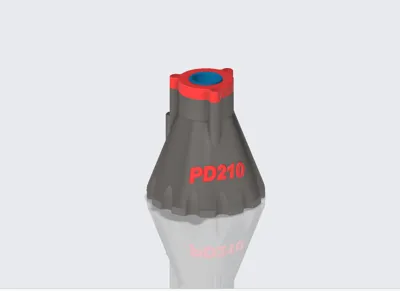
PD210 Soldering Iron Sleep Stand + Soldering Iron Tip Storage
IP Report


Print Profile(1)
PD210 Soldering Iron Sleep Stand + Soldering Iron Tip Storage
Designer
2.3 h
2 plates
Open in Bambu Studio
Boost
1
0
0
0
0
0
Released
Description
Content has been automatically translated.
Boost Me (for free)
Welcome to my model, I wish you happy printing! I would really appreciate your support if you could boost me!
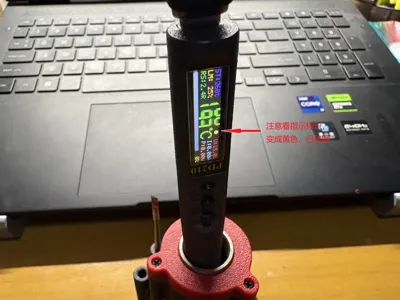
PD210 Soldering Iron Sleep Stand + Soldering Tip Storage
PD210 Soldering Iron Holder with Sleep Function and Storage for 3 Additional Soldering Tips
Printing Suggestions:
- The base does not need to be two-color printed after painting; simply print it in a single color and then paint the text with acrylic paint or an acrylic pen, which saves printing time and avoids wasting filament
Bill of Materials:
- Bushing, 16mm inner diameter, 20mm outer diameter, 15mm long, magnetically permeable material, bearing steel optional x1
- Bushing, 13mm inner diameter, 17mm outer diameter, 10mm long, metal material (stainless steel optional) x1
- N52 Magnet, 6mm diameter, 3mm thick x7
- M2 Screw, 8-12mm length x3
- Steel balls or other small items (for counterweight, optional) several
Assembly Instructions:
- Insert the two bushings into the sleep sleeve; the larger bushing should extend 1.5-2mm above the sleeve to prevent accidental damage to the print when inserting the soldering iron, and the smaller bushing should be flush with the sleeve
- Insert the magnets, ensuring they maintain the same polarity, for example, all North (or South) poles facing inwards
- Insert counterweights into the hollow space inside the base
- Install the assembled sleep sleeve into the base, put on the top cover, and tighten the screws
Note: The bushings and the sleep sleeve are an interference fit; a hammer may be required for assembly. If it is too tight, it is recommended to adjust the hole compensation and reprint


License
This user content is licensed under a Standard Digital File License.
You shall not share, sub-license, sell, rent, host, transfer, or distribute in any way the digital or 3D printed versions of this object, nor any other derivative work of this object in its digital or physical format (including - but not limited to - remixes of this object, and hosting on other digital platforms). The objects may not be used without permission in any way whatsoever in which you charge money, or collect fees.
Comment & Rating (0)