
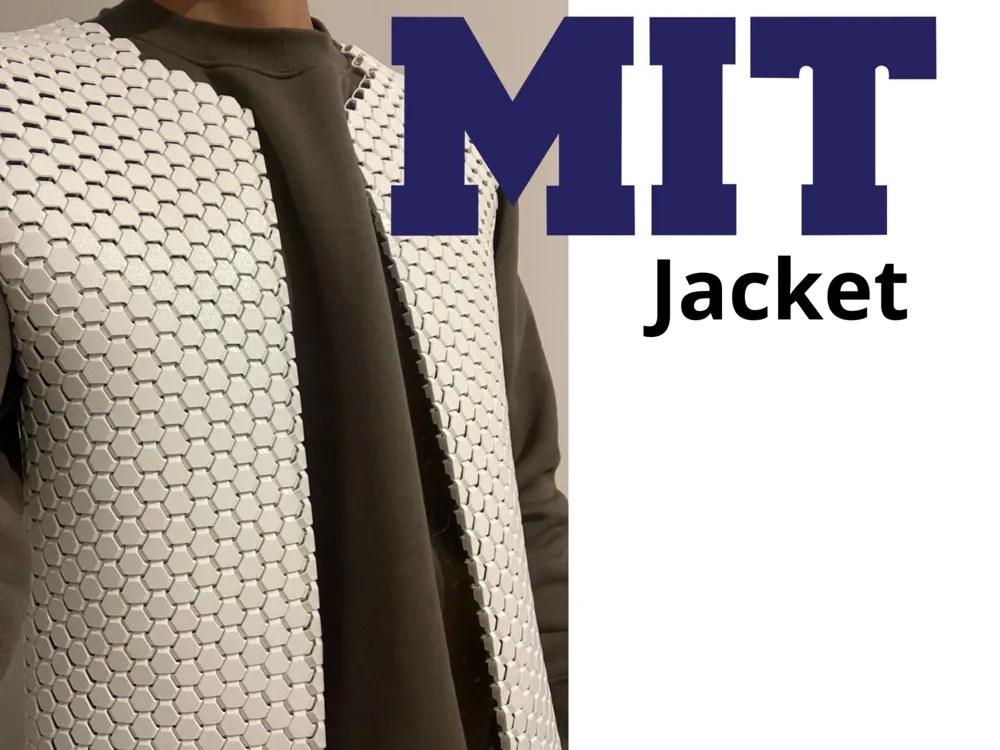
MIT Fabric Wearable jacket

Print Profile(1)

Description
Futuristic TPU Coat — Guide & Essential Information
Thank you for your support
First of all: thank you. The success of the original futuristic hexagonal mesh went far beyond what I expected. Your downloads, feedback, and enthusiasm directly motivated this project.
As promised, here is the next step: a full coat based on this design.
You can find here the official video for a better understanding of the projet :) https://drive.google.com/file/d/14A9kNiQpicvJZVe5OqAuAkw-85-mogwd/view?usp=drive_link

Before you start (read carefully)
This is an intentionally ambitious project. It is not a quick print or a simple assembly.
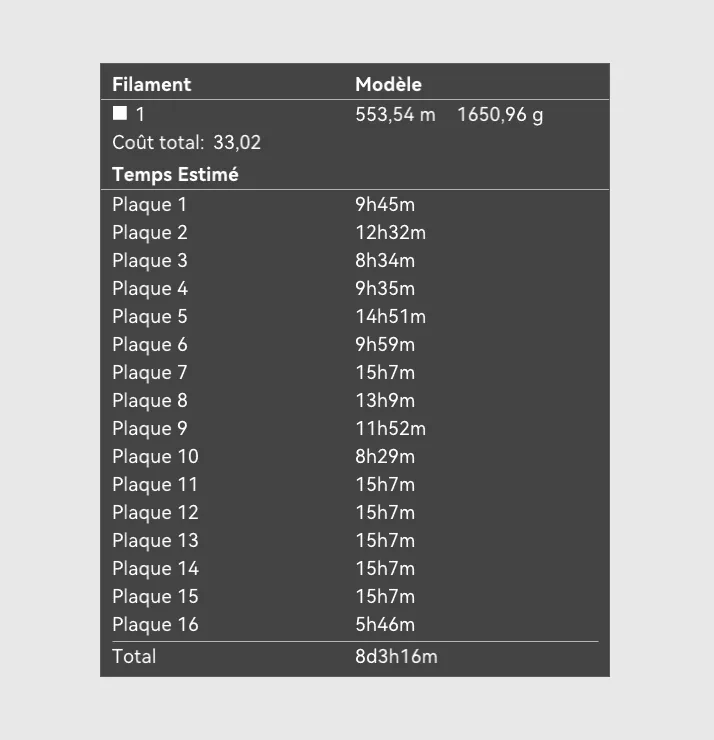
- Total print time: over 200 hours
- Material usage: about 1.5 kg of TPU
- Assembly time: at least 10 hours
- Required tool: a 3D pen (≈ €40)
This implies:
- a relatively high cost
- significant time investment
- patience and precision
This project is intended for people ready to fully commit.
Why TPU?
The choice of TPU is not aesthetic, it is functional.
A rigid material would make the coat:
- uncomfortable
- difficult to wear
- poorly suited for movement
TPU provides:
- real flexibility
- better ergonomics
- adaptation to the body
It is a necessary choice to make the piece wearable.
Material preparation
TPU is sensitive to moisture.
- Drying is recommended before printing
- Reference: about 2 hours of drying (minimum tested)
Even partial drying significantly improves print quality.
Parts organization
The coat is made of many modular pieces.
- Each element is identified by a letter and/or number
- Each piece corresponds to a specific area of the coat
- The full structure emerges once everything is assembled
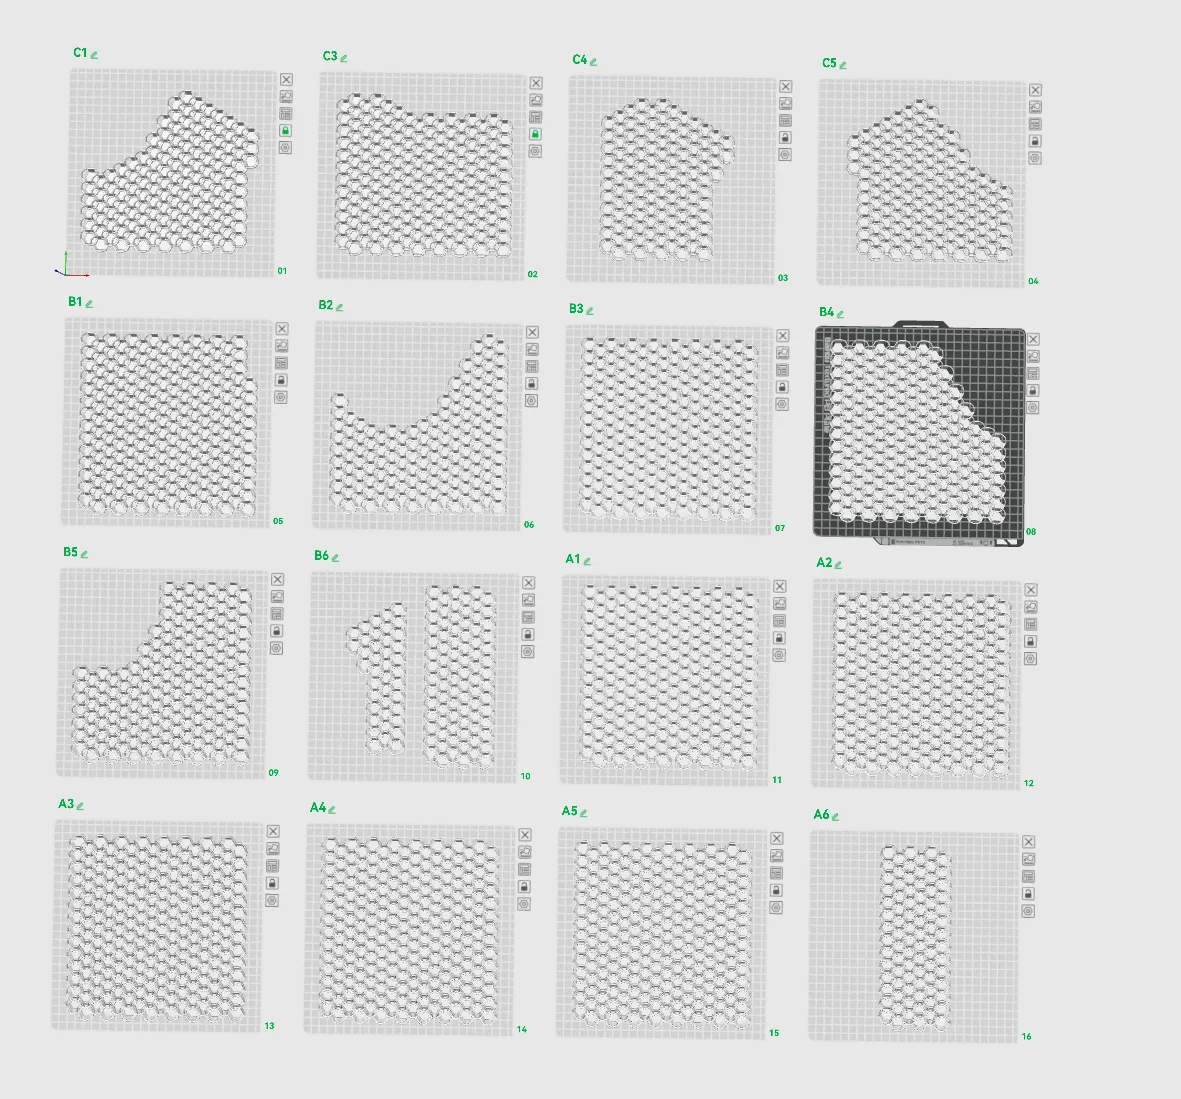
It is strongly recommended to:
- organize parts after printing
- follow a progressive assembly logic
Assembly technique (detailed method)
The assembly is based on reconstructing the mesh.
- Analyze the mesh
Carefully study the hexagonal structure. You need to understand how patterns align and connect. - Prepare the parts
Using scissors, cut the outer edges of certain mesh sections to allow connections. - Repositioning
Reassemble the pieces in the correct orientation, maintaining pattern continuity. This step is similar to a puzzle: alignment must be precise for the mesh to make sense again. - Welding with a 3D pen
Once everything is properly positioned:- weld the cut areas using the 3D pen
- reinforce joints if necessary
The 3D pen works very well with TPU (no temperature issues observed), allowing clean and solid bonding.
⚠️ This is the most technical step: take your time.
Closing system
The coat uses magnets for closure.
- Quantity used: 60 magnets
- Dimensions: 5 × 3 mm
They must be integrated carefully into the structure to ensure a clean and effective closure.
Size adjustment
The coat was originally designed for my body size. As a result, adjustments will very likely be necessary.
In my case:
- the coat was too large after assembly
- I had to remove about 15 cm of width on each side (rib area)
- this required removing a significant number of modules
Implications:
- the coat may be too large or too small depending on your body
- adjustments are almost always required
The modular design allows this flexibility:
- remove pieces to reduce size
- add pieces to increase size
Creating a custom-fitted version
For those who want a perfectly fitted coat:
- import the original mesh into Fusion 360
- scale or recreate a larger version of the mesh
- design the coat shape using a pattern
This approach gives full control over dimensions but requires some experience with 3D modeling tools.
Customization
The design is modular and adaptable.
- ability to swap individual hexagons
- color variations for unique patterns
- visual and structural customization
Conclusion
This coat is an experimental, complex, and demanding piece. It is not a plug-and-play project, but a progressive build that requires involvement and rigor.
If you have any questions or run into issues, feel free to ask in the comments.
Take your time — the result is absolutely worth it.
License

You shall not share, sub-license, sell, rent, host, transfer, or distribute in any way the digital or 3D printed versions of this object, nor any other derivative work of this object in its digital or physical format (including - but not limited to - remixes of this object, and hosting on other digital platforms). The objects may not be used without permission in any way whatsoever in which you charge money, or collect fees.


Comment & Rating (88)