Self Jumpscare Machine


Print Profile(1)
Description
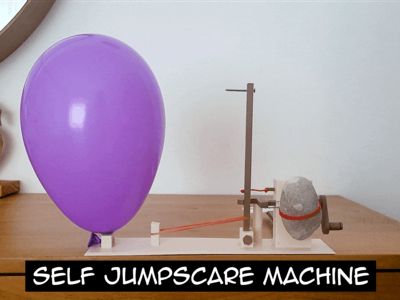
Self Jumpscare Machine
The Self Jumpscare Machine is a small fully mechanical prank device designed to scare… the person who activates it.
Simply turn the small crank to set the mechanism in motion. From that moment on, the sequence is inevitable… and a few seconds later you’ll understand why you probably shouldn’t have done it.
This project is inspired by classic Rube Goldberg chain reaction machines and is designed as a fun experiment in simple mechanics, built almost entirely with 3D printed parts.
All main components are 3D printed, but a few common household items are required to complete the mechanism.
Required Materials
In addition to the printed parts, you will need:
- cyanoacrylate glue
- string
- 2 rubber bands
- 1 washer
- 1 small stone
- 1 nail
- 1 balloon
Assembly
This project requires assembling multiple printed parts and a basic level of manual skill and precision.
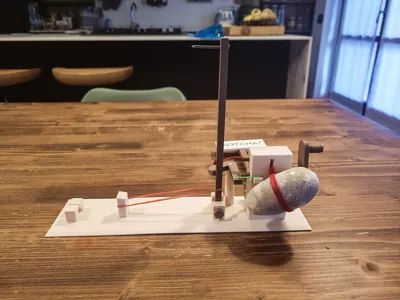
1. Structure Assembly
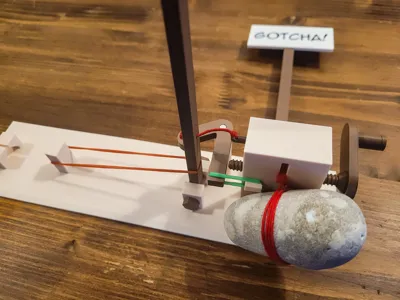
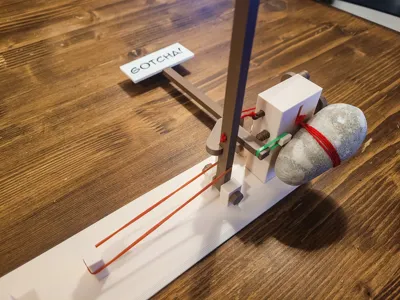
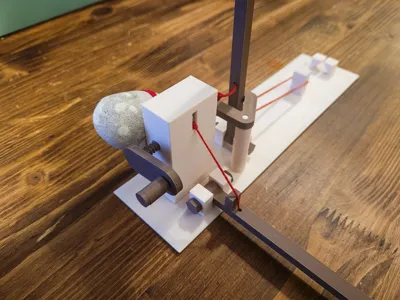
Start by assembling all printed parts using cyanoacrylate glue, following the reference images.


Make sure that:
- all parts are properly aligned
- moving components can move freely
- no glue residue interferes with moving parts
2. String Setup
Once the structure is complete, proceed with the trigger system:
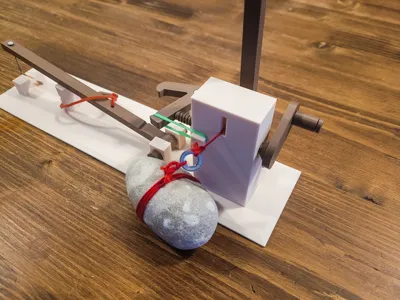
- First string: connect the top arm with the nail to the small trigger cylinder
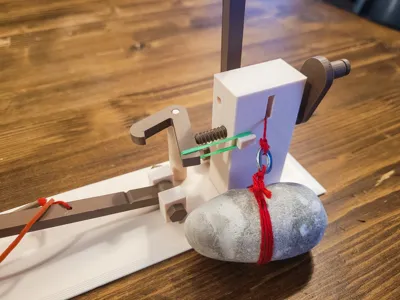
- Second string: connect the “gotcha” sign arm to the stone, which acts as a counterweight


⚠️ Important:
Between the string segments, insert a washer (or a small hollow cylinder) with:
- maximum outer diameter: 12 mm
- inner hole diameter: greater than 4 mm
This component is essential for proper release of the mechanism.

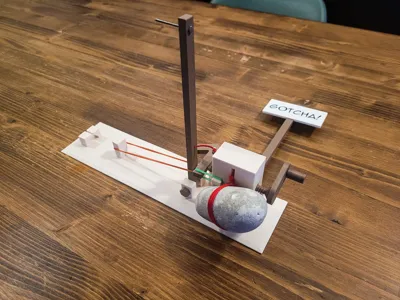
3. Final Components Installation
Complete the setup by installing:
- the nail into its dedicated hole
- the two rubber bands, slightly under tension
- the balloon, positioned correctly for the final effect

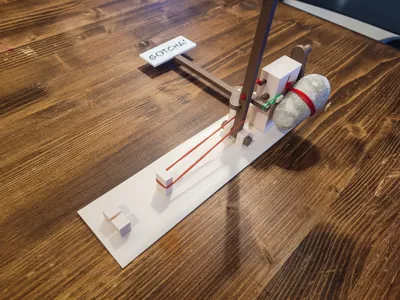
4. Tuning
Before use, some fine-tuning may be required:
- adjust rubber band tension
- tweak string length
- ensure a smooth and reliable trigger
A bit of trial and error is normal—it’s part of the fun 😉
Once completed, the machine is ready for its one true purpose:
to betray the trust of whoever decides to turn the crank. 😈
License
You shall not share, sub-license, sell, rent, host, transfer, or distribute in any way the digital or 3D printed versions of this object, nor any other derivative work of this object in its digital or physical format (including - but not limited to - remixes of this object, and hosting on other digital platforms). The objects may not be used without permission in any way whatsoever in which you charge money, or collect fees.
Comment & Rating (5)