Search models, users, collections, and posts

Flashforge AD5M Top Mount Spool Adventure 5M

Print Profile(1)

All
A1
X1
H2S
H2D Pro
H2C
P1P
X2D
H2D
X1 Carbon
P2S
X1E
P1S
A2L

0.2mm layer, 2 walls, 15% infill
Designer
3.7 h
1 plate

Open in Bambu Studio
Boost
32
71
12
1
133
11
Released 

Description

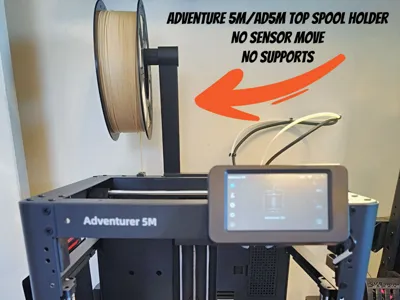
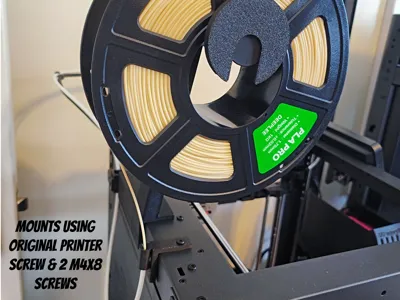
A simple and clean top-mount spool holder for the Flashforge Adventure 5M (AD5M) that installs without relocating the filament sensor and prints with no supports required.

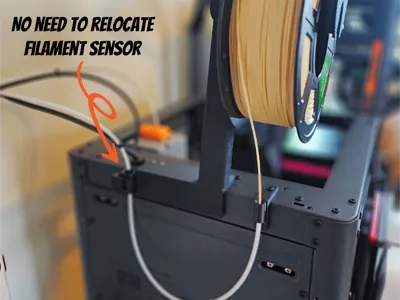
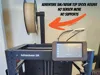
This design relocates the filament spool to the top of the printer, improving the filament path while keeping the setup compact and tidy. A PTFE filament guide feeds directly into the Adventure 5M filament sensor, preventing sharp bends and helping ensure smooth filament feeding.

The mount installs easily using common hardware and the original screw that holds the PTFE tube guide, making installation quick and straightforward.
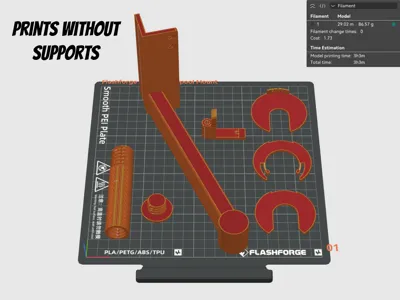
 

No supports required
No filament sensor relocation needed
Top-mount spool position for cleaner filament routing
Uses the original Adventure 5M PTFE tube screw
Integrated PTFE filament guide for smooth feeding
Quick and simple installation

Hardware Required:

M2 × 2 screws (for mounting the bracket)
Extra PTFE tubing for the filament guide
Original Adventure 5M screw used to secure the PTFE tube


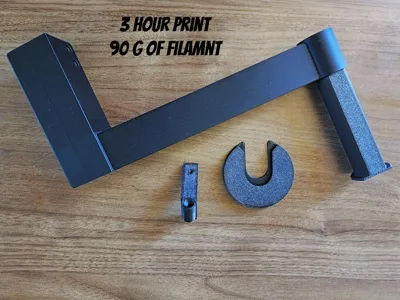
• Approx. 90g of filament
• Roughly 3 hours print time


Layer Height: 0.2 mm
Wall Loops: 2
Infill: 15%
Supports: None required

Installation Overview:

  1. Print the parts using the recommended settings.
  2. Mount the bracket to the top of the printer using M2 × 2 screws.
  3. Insert the PTFE tube guide and secure it using the original Adventure 5M screw.
  4. Add PTFE tubing to guide filament from the spool into the sensor.
  5. Mount your spool and start printing.

Clip Assembly:

  1. Apply glue between the 3 clip layers (smallest one in the middle)
  2. Load your spool
  3. Snap onto the end of the spool arm

Compatible With:
Flashforge Adventure 5M
Flashforge AD5M 

Want some of the same digital designs for other uses like printing on T-Shirts, posters and more? Check out my Etsy shop: https://www.etsy.com/shop/FluidGraphix
 

Boost Me (for free)

Your support means the world to me and helps keep the daily design flow alive. Please be sure to like & follow me!  :)


I love seeing prints! Please comment and leave a pic of your print!

Comment & Rating (12)

(0/1000)

The impression is great. I used the same screws as for the rear coil support and had no problems. The nut that closes where the coil is located is a little difficult to turn, but it eventually goes on without needing to force it. I had to think long and hard about how the clips went, but I finally figured it out. I place them on the locking screw, with the smallest clip in the middle of the other two. The only problem is that I couldn't get them to stick together, so I had to use glue. It has saved me a lot of space and made it more comfortable I used Basic PLA.
(Edited)
0
Reply
Does the black wire ever get caught on the spool or holder? Can you use this to direct feed into the extruder instead of using the PTFE tube and filament sensor?
The designer has replied
0
Reply
No issues here in all the time I have been using it. I do not know if feeding right into the extruder would be a good idea, as you need enough play in the filament to not cause issues.
1
Reply
Replying to @FluidGraphix :
Other top load spools seem to recommend that? Especially when working with TPU. Thoughts?
0
Reply
Replying to @user_4127992988 :
Recommended feeding right into the extruder? Please feel free to give it a try, I would love to hear how it works out for you. I am going to use mine as I designed it as it works really well and I have had no issues with it.
0
Reply
It's ok, I guess this works. This does not use M4 screws, they are smaller, possibly m2. Ordered m4 screw and they are absolutely too big, they fit in every other open hole on this printer except the two that are needed. Directions not super clear on how the half circle "safety clips" work, they are not mentioned, and they continue to fall off the spool holder. Don't recommend, find one that may work better.
(Edited)
The designer has replied
0
Reply
Thank you for the feedback! You are right about the retainer spool clip, and I will get that updated. This is one of the first prints I designed and uploaded to Makerworld, and I am still learning as I go.
1
Reply
Replying to @FluidGraphix :
id like to know how the clips work im having trouble
0
Reply
Replying to @user_3419179612 :
I have updated the description with how the locking ring Clip works. And here it is as well. :) Locking Ring Clip Assembly: Apply glue between the 3 clip layers (smallest one in the middle) Load your spool Snap onto the end of the spool arm Hope that helps!
0
Reply
would this work for the AD5X?
The designer has replied
0
Reply
Technically it would as both the 5M and the 5X use pretty much the same frames, but the AD5X has an AMS and the spools mount on the side so I am not sure what the benefit would be.
0
Reply
this is going to be convenient on my ad5x when i want to sawp a 5th color out real quick. thanks!
0
Reply
No more