
Pocket Screwdriver Kit v2


Print Profile(1)

Description
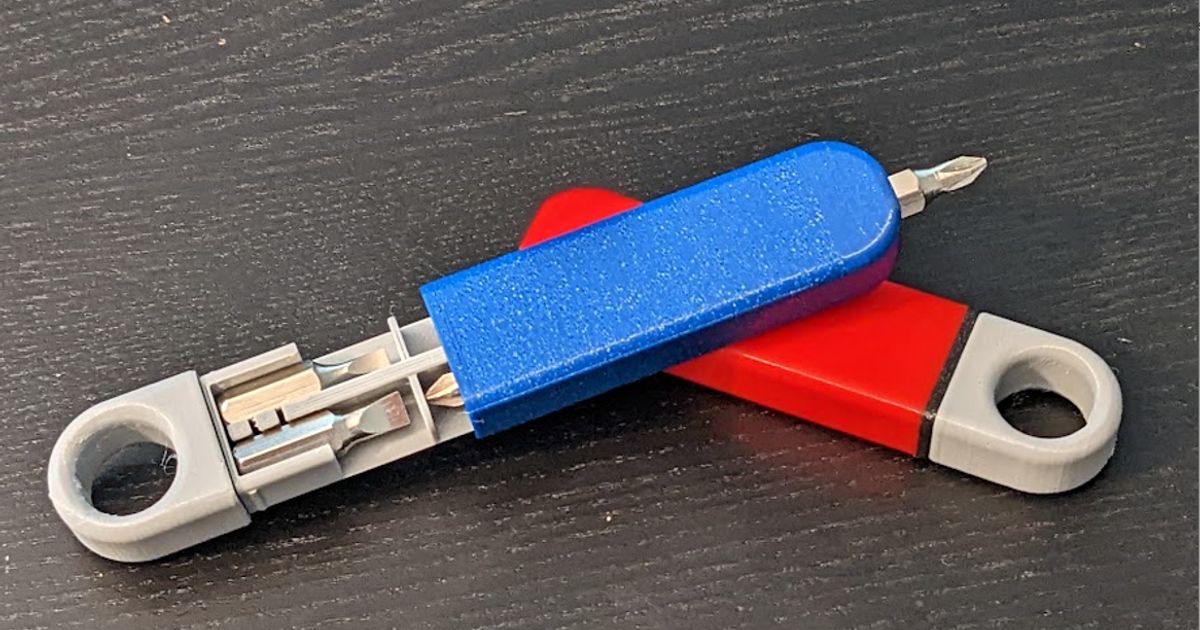
Introducing v2 of the popular Pocket Screwdriver Kit! Holds straight ¼" / 6mm bits, up to ~ 1" / 25mm in length. This version was re-built from scratch to correct some irritating deficiencies in the earlier model, particularly:
- NO GLUE REQUIRED! The handle and bit holder now feature a permanent snap fit, so you don't need to fuss with gluing parts together.
- EMBEDDED MAGNET! There is now proper space to embed a 6x2mm disc magnet in the end. (Amazon.com example)
- Optimized dimensions and tolerances for consistent printing
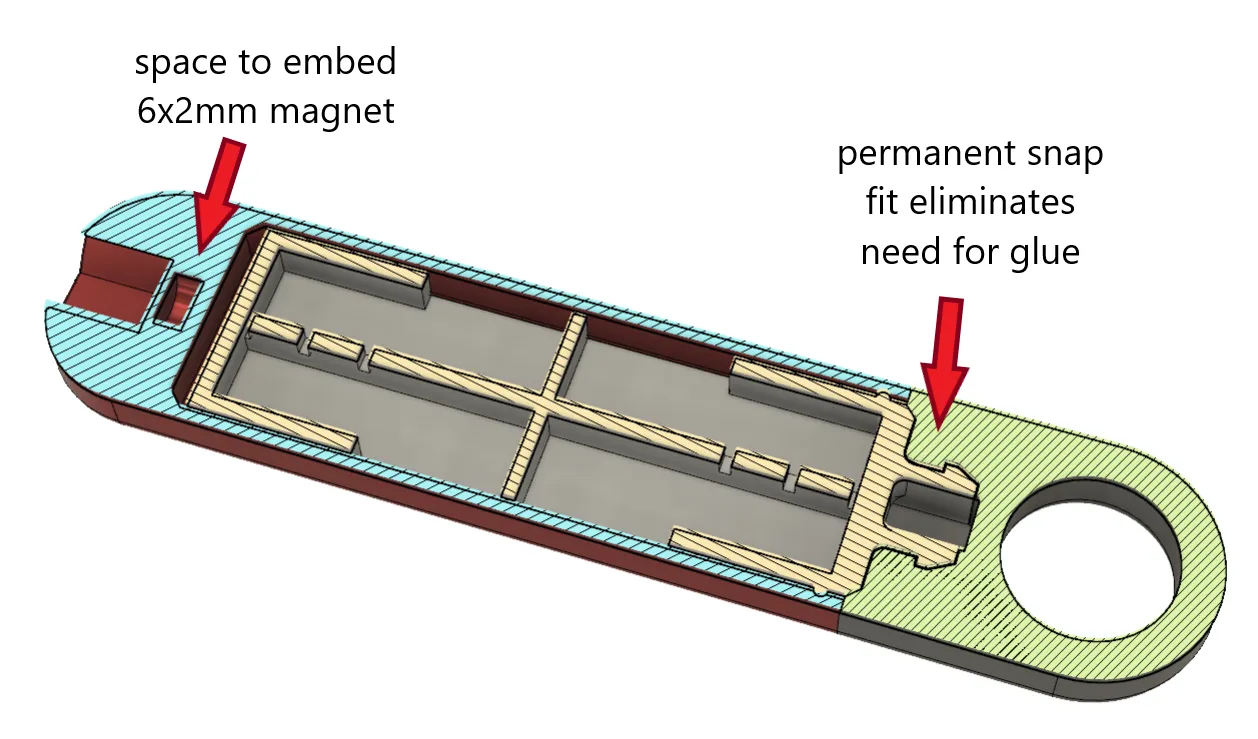
Also uploaded is the parametric Fusion360 .f3d file if you'd like to make customizations.
Boost Me (for free)
If you appreciate the model, I'd be grateful for a boost of support!
Print Instructions
Print with a 0.4mm nozzle and a layer height of 0.2mm. Some areas and tolerances are likely to be too tight with a wider nozzle or untested layer heights. It should still work, but the fit may be less than ideal.
The model consists of three parts:
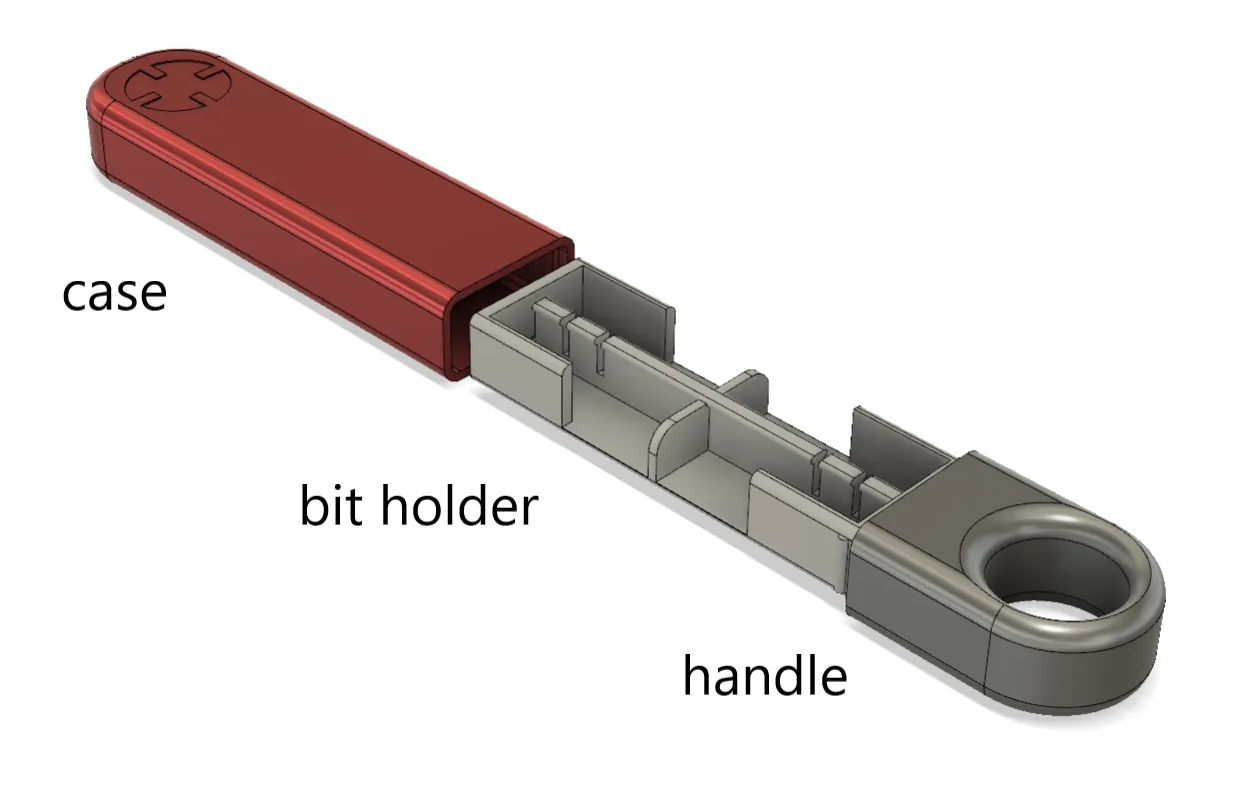
- The bit holder should be printed flat. The case and handle should be printed vertically.
- A brim is recommended for the case.
- 3 perimeters and 15% infill is sufficient for most use.
- Pause the case at layer 314 (for default case) to insert 6x2mm magnet.
An important note on tolerance
Tolerance has been designed to be a best possible fit for as many situations as possible. Different printers, different filaments, and even different bits will factor into your experience. I have “standard” ¼-inch (6.35mm) bits that vary as much as 0.05mm in width, which makes a noticeable difference in this model.
All this means there is a pretty good chance your bits will fit a little loose or a little tight. Let me know if you need an adjustment!
Assembly
The bit holder snaps into the handle. It is meant to be a firm and permanent fit, so it takes a bit of force to get it together.
I have found it easiest to use the case to press the bit holder and handle parts together:
| 1. Insert the bit holder into the case, with the snap hooks pointed out. | 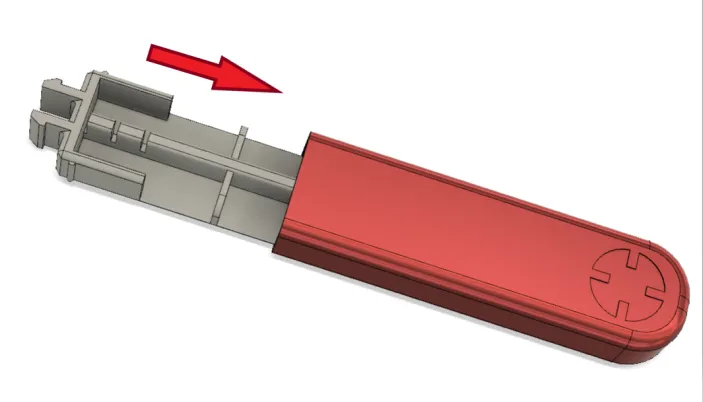 |
| 2. Push the snap hooks firmly into the handle and push straight in until it snaps. Push straight! The snap hooks can break if you do not apply pressure evenly. | 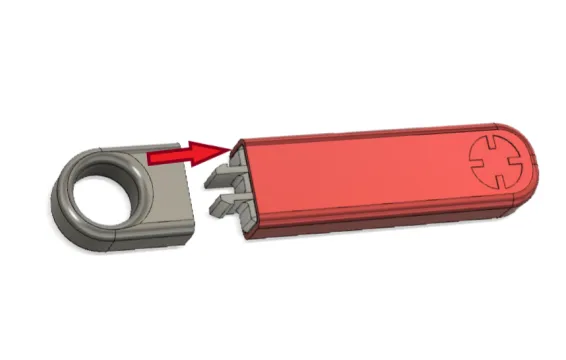 |
| 3. Pull the bit holder out of the case and set the case aside. Using a table or other firm surface, gently press the handle straight down on the bit holder to close the small remaining gap. | 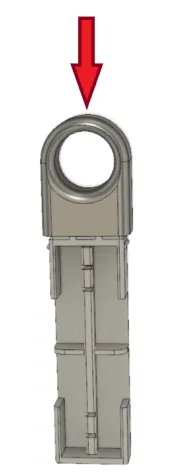 |

“Critical feedback is always appreciated”
Comments and pictures of previous makes are what motivated me to create version 2 of this model. I am particularly thankful for those who point out what didn't work, or what could be better. Please post your makes and let me know how the model could be improved. Your feedback is what inspires creators to build and share, so keep it coming!
This remix is based on
License



Comment & Rating (36)