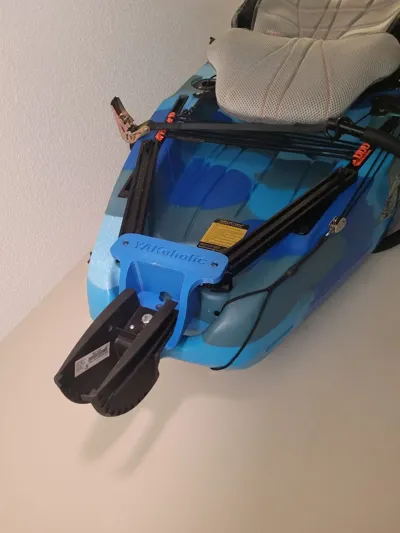
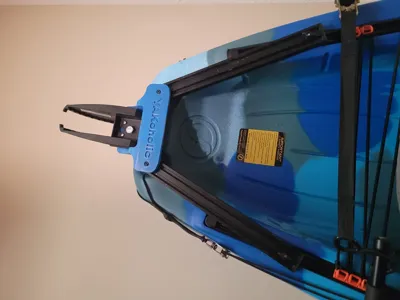
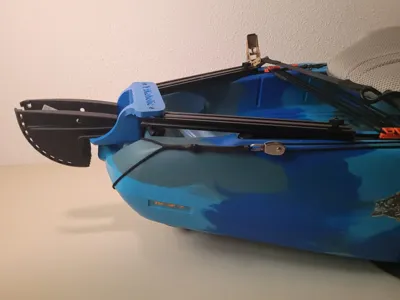
feelfree lure trolling motor mount


Print Profile(1)
Description
this is feelfree lure trolling motor mount I originally design it for my lure 10 v2 but I try my best to make it compatible with other feelfree kayaks modules and sizes that have a built in rudder hole mount. however its only been tested on feelfree lure 10 v2 and you may need different spacer piece which I can make it if you add the measurement in the comment of this post (***NOTE*** ***DISCLAIMER*** IM NOT RESPONSIBLE IF THE MOUNT DID NOT FIT OR WORKED ON YOUR KAYAK **************** BUILD IT ON YOUR OWN RISK************)
printing setting: 100% infill
Filament : PETG/PC/ABC ( Important note*** Do Not Use PLA or PLA+ for this mount except if you want to peddle your way back to shore without your motor lol )
I used ½" diameter bolt 4" long with locknut to bolt it in the rudder hole on my lure 10 v2
1 bolt 1/8" diameter 1: long
also you will need 2 rails ( 2040 Aluminum extrusion profile) the length depend on your feelfree module and size I used 15.5" on my lure 10 v2 just because that what I had on hand during build but it cold be few inches shorter or longer
2 M4 with locknut to mount the aluminum extrusion profile to the 3D printed mount
2 yak attach adapter for uni track or a DIY from a metal washer +2bolts+wing nut
License
You shall not share, sub-license, sell, rent, host, transfer, or distribute in any way the digital or 3D printed versions of this object, nor any other derivative work of this object in its digital or physical format (including - but not limited to - remixes of this object, and hosting on other digital platforms). The objects may not be used without permission in any way whatsoever in which you charge money, or collect fees.
Comment & Rating (3)