[SnapDen] Snapmaker U1 + IKEA Lack + Sunlu SP2


Print Profile(1)
Description
Boost Me (for free)
If this design was useful, a Boost is hugely appreciated 🚀 It helps more people discover the model and supports future updates. Thank you!
Boost Me (for free)
If this design was useful, a Boost is hugely appreciated 🚀
It helps more people discover the model and supports future updates. Thank you!
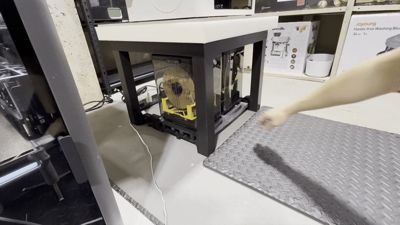
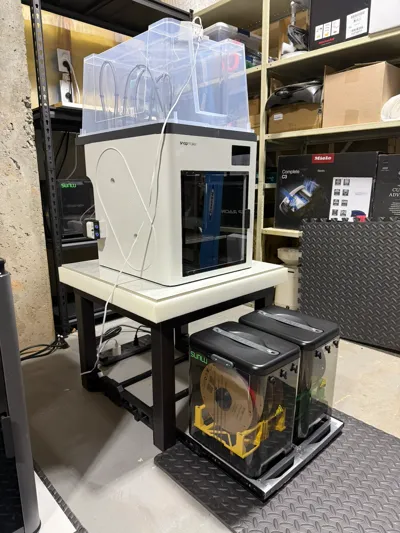
Since I've received my Snapmaker U1, I've been trying to find a solution for integrating it with some dry boxes, such that during the humid summer months I can know for sure that my filament stays dry.
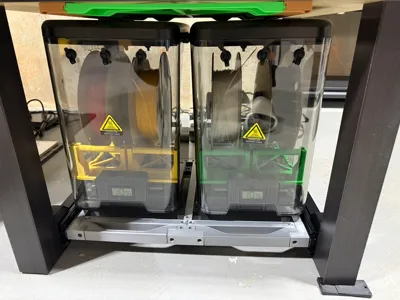
My goal was to use off the shelf dryboxes, and after searching around I settled on the Sunlu FilaDryer SP2. They work perfectly since they can hold two spools each, which means I only need to get two of those for the Snapmaker U1. At first I wanted to mount them on the side of the U1, but after test fitting and some rough sketches I find that in order to support them on the side, I need to use ridiculous amount of filament. And due to the position of the outlets on the SP2, it requires some really heavy bending of the PTFE tubes. So I gave up on that idea, and instead I designed this drawer system that mounts to an IKEA Lack table that many of us already have, and if not quite cheap to buy. And I call it the SnapDen, thanks BIQU for coming up with PandaDen lol.
Print recommendations
- Filament: All filament works, preferably with fiber reinforcement for rigidity.
- Layer height: 0.20 mm
- Walls: 4+
- Infill: 20–35% (Gyroid or Adaptive Cubic)
- Top/Bottom layers: 5+
Required Hardware
- M4x8mm Socket Head Screws *40 https://www.amazon.com/dp/B0BHQZHSLQ
- M4x6mm Button Head Screws *12 https://www.amazon.com/dp/B0CTH3PGM8
- M4x12mm Countersunk Wood Screws *8 https://www.amazon.com/dp/B0D3ZT51LW
- M4 Heat Set Inserts *52 (both M4x4x6 and M4x6x6 works) https://www.amazon.com/dp/B0DK1FGWZ5
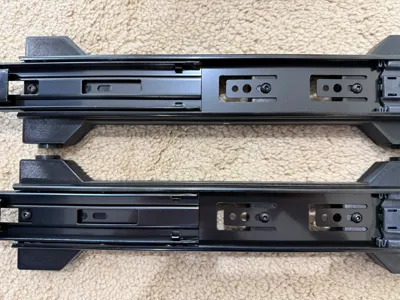
- VADANIA 16" Drawer Slides https://www.amazon.com/dp/B08NDHTF4S
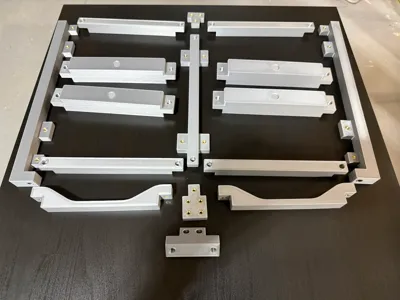
Assembly instructions
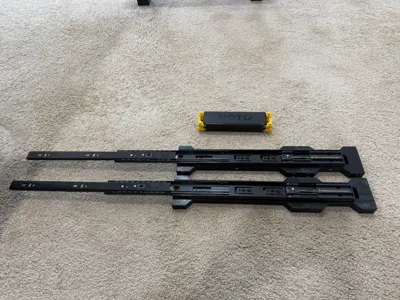
- Print all the parts on plates 1-3. Plate 4 is optional if you think you need some more rigidity.
- Install heat set inserts to all the non-through holes.
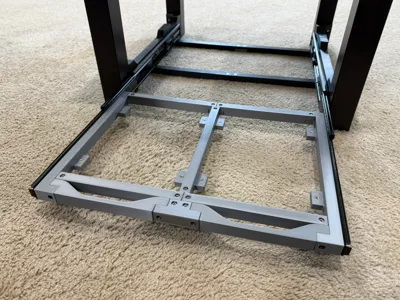
- The holes on the frame between the connector slots are for dowel pins.
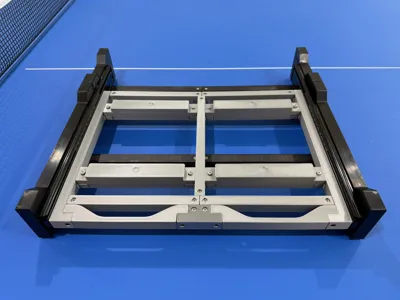
- Connect the Frame and Frame Extension using a dowel pin and two connectors.
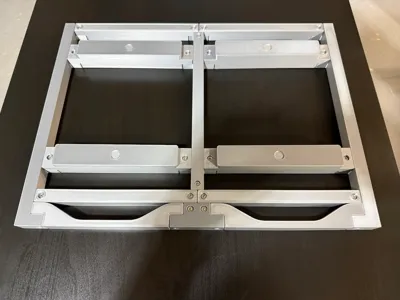
- Make sure to have the side with TWO heat set inserts on the same side. Those are used to mount the drawer system to the IKEA Lack.
Install the drawer slides onto the frame.


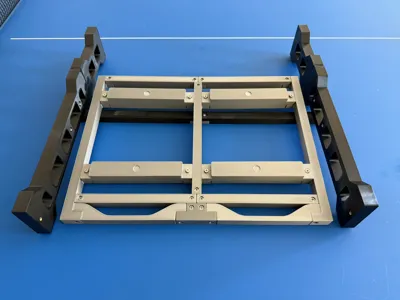
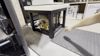
Assemble the drawer, see picture for reference for where everything goes.


Install the drawer to the drawer slides


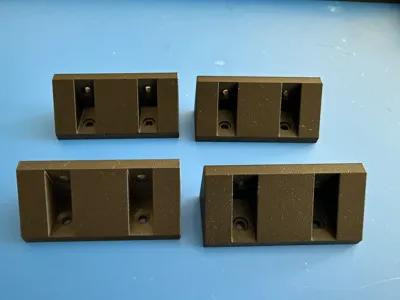
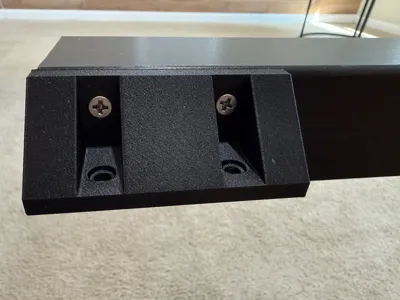
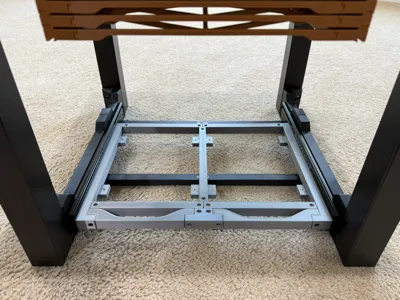
Install the corner brackets to the IKEA Lack. Align the edges of the bracket to the edge of the leg. Make sure to use the side that has the countersunk holes for the wood screws.


Mount the drawer system to the brackets.


Slot in the Sunlu FilaDryer SP2.


Boost Me (for free)
If this design was useful, a Boost is hugely appreciated 🚀 It helps more people discover the model and supports future updates. Thank you!
License
You may create derivative works based on this object, provided that all such derivative works are published exclusively on the MakerWorld platform and include proper attribution to the original creator. You may not share, upload, host, distribute, or publish this object—or any derivative work of this object—on any other digital platform, marketplace, or distribution channel. Commercial use of this object and any derivative works is strictly prohibited. This includes, but is not limited to, selling, renting, sublicensing, or using the object in any context in which you receive monetary compensation or other financial benefits.
Comment & Rating (4)