Sonoff Basic in Ikea Tertial lamp base.


Print Profile(4)


Description
 +
+
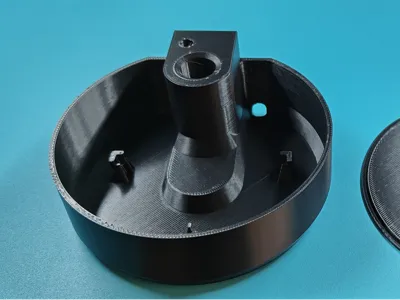
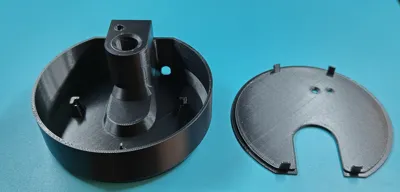
Combining the base (attached to the desk, etc.) of a lamp like the Ikea Tertial (and similar ones - mounted on a pin) with a place for the module (board from the module) of the Sonoff Basic (in all versions, and its cheap Chinese clones)
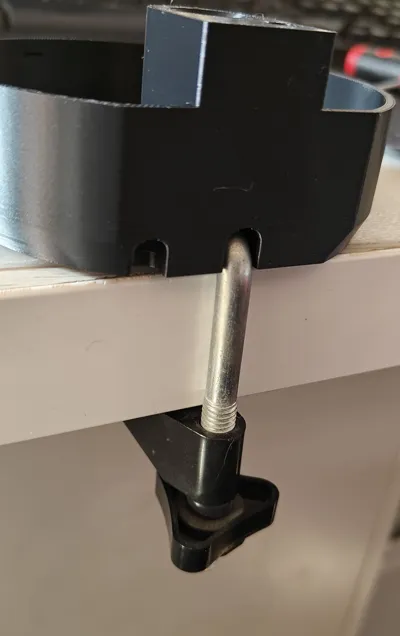
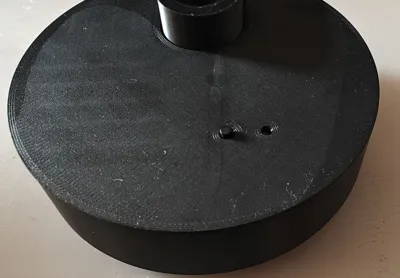
This base is attached to the desk with the original holder (bent rod with nut) from the original lamp base:

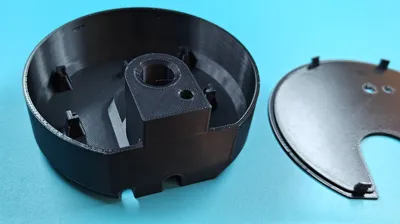
There's a hole on the back for inserting the power cord and the output cable to the lamp. :


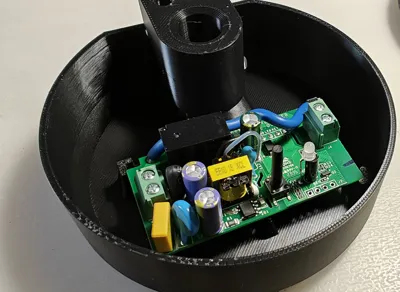
You can insert a PCB removed from a Sonoff Basic module (any version) or even a Chinese clone (a very similar housing, available for $1.99). However, I recommend the original Sonoff—it has a much better power supply, an ESP module that's easy to reprogram, and so on.
In the simplest version - the top cover has a hole that perfectly fits the original button in the module (and a hole above LED), just close the module with the cover - the button protrudes 2mm and you can use it to turn on/off the lamp.

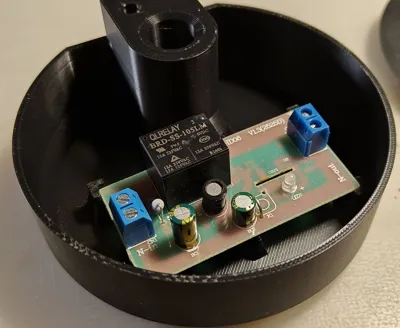
In a advanced version, you can shorten the original button (cut it with pliers) or completely desolder it, and insert a nice flat 16, 19, or 22mm button into the cover – with the "power on" logo or just an illuminated ring: 
and connect (by soldering) this button in place of tact-switch, and in place of LED on pcb (orginal led should be desoldered)
It's not visible in the photos, but the Sonoff board is slightly tilted, to prevent button interfering with the components on the board.
The protruding element (where the lamp is inserted) has an additional hole that extends all the way to the base. I made this for the temperature sensor (DS18b20), whose top should protrude slightly from the housing to measure the actual air temperature, not the housing temperature (which will always get slightly warm from the electronics, which would cause inaccurate measurements). Adding a temperature measurement function to the ESP firmware is trivial if you use your smarthome ecosystem (supla, esphome, tasmota, etc.)
Print it from PETg (at least) with 3walls and 20% infill, to withstand lamp weight.
Comment & Rating (0)