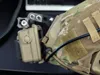
GoPro to NVG Mount Adapter Bracket


Print Profile(1)
Bill of Materials

- M4x12mm SCHS x 2: For mounting to helmet bracket
- M4 Washer x 2: For mounting to helmet bracket
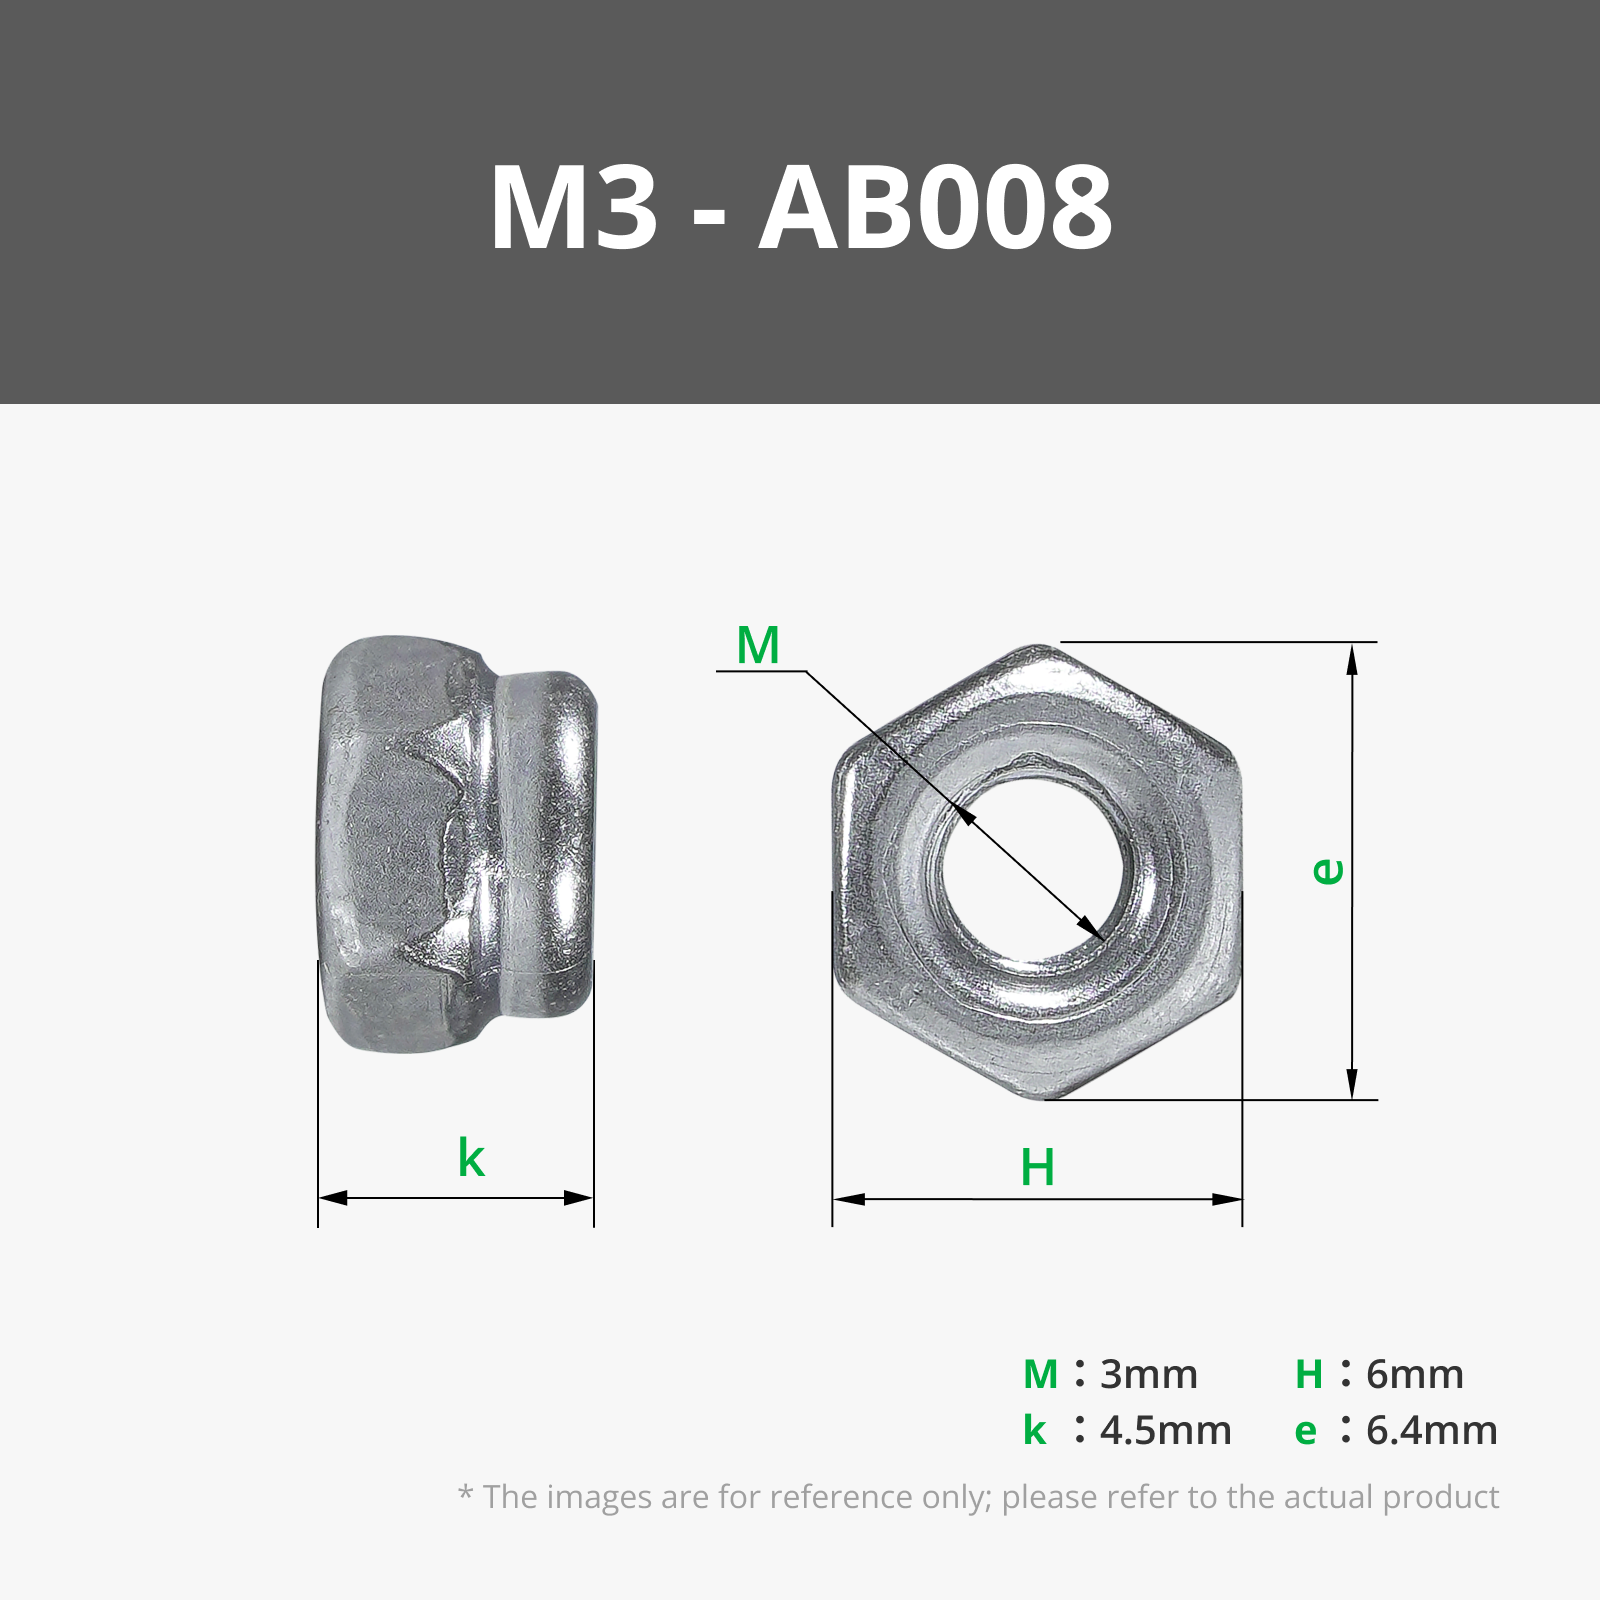
- M4 Hex Nut x 2: For mounting to helmet bracket. Non-locking.
- Threadlocker x 1: As required
Description
Boost Me (for free)
Please support the design and free publication of functional parts which return autonomy and control to the consumer. Every boost is greatly appreciated as it supports further time investment in creating these models!
- Note: This is a repost of an model from ~2016, availability of the external part has changed since then. Also, camera sizes have changed over the last decade.
- This is a GoPro style camera mount that securely mounts your camera to NVG helmet mounts to record your airsoft games or other adventures.
- Print in the orientations provided in the print profile - no supports are required. When assembled, the layer lines are oriented perpendicular to other parts, reinforcing the entire assembly making it very robust.
Components & Vitamins
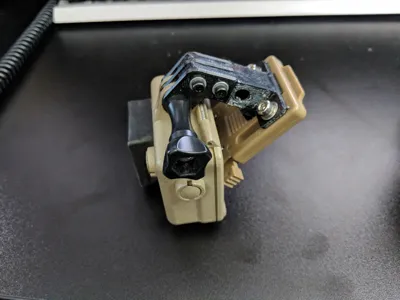
- The main ‘vitamin’ component - formerly sold as an “Emerson” branded NVG mount adapter on Aliexpress.
- The Emerson search term no longer seems to yield the component, however I found another source (non-affiliate link): https://www.aliexpress.com/item/1005004702246425.html
- You will also require a long stemmed M5 bolt, or a GoPro style bolt with M5 nylock nut to connect the camera to the adapter. Depending on your camera you may need to print a longer custom one.
- See the bill of materials for M3/M4 components.
Printing and Assembly
- Print in an impact-resistant plastic. You never know when you're going to bump into things when playing action sports.
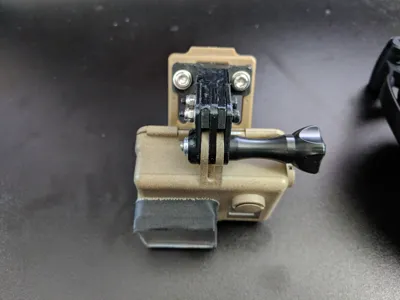
- Assemble the body with the left/right plates as pictured. See bill of materials for the M3 components.
- Note: this was designed for a GoPro Hero 3, if your camera is different, you may need to print the left and right plates mirrored, and assemble it mirrored. For my camera I wanted the bolt on my left to keep the right hand free at all times in case it needed to be tightened in the middle of gameplay.
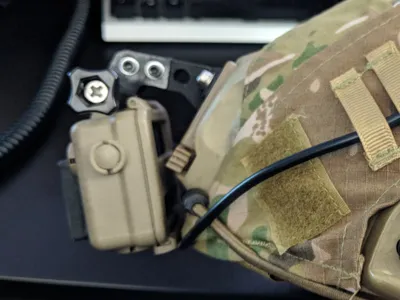
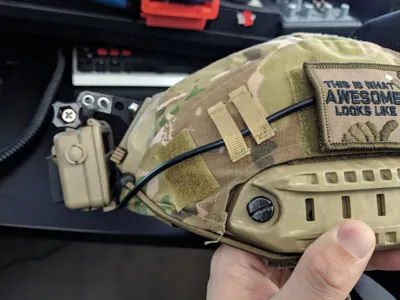
- Mount the assembled parts to the NVG bracket mount using the M4 hardware specified in the bill of materials.
- Mount the NVG bracket to your helmet and check for fitment. You may need to make adjustments depending on your helmet.
- If the M4 nuts on the back of the mount protrude too far and prevent the mount from clicking into the bracket, you may need to add space by re-mounting the bracket with a few washers as shims to give it a bit more room. Reproduction helmet mounts vary in quality and design tolerances, YMMV.
- Consider using shock cords to secure your GoPro if needed - I never needed it, but if your particular action sport playstyle is more vigorous (eg: speedsoft, paintball with sliding behind bunkers) you may require it.
Boost Me (for free)
Please support design and free publication of functional parts which return autonomy and control to the consumer. Every boost is greatly appreciated as it supports further time investment in creating these models!
License
You shall not share, sub-license, sell, rent, host, transfer, or distribute in any way the digital or 3D printed versions of this object, nor any other derivative work of this object in its digital or physical format (including - but not limited to - remixes of this object, and hosting on other digital platforms). The objects may not be used without permission in any way whatsoever in which you charge money, or collect fees.
Comment & Rating (0)