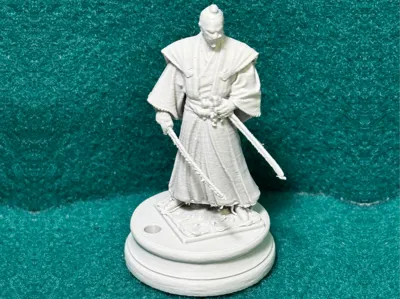
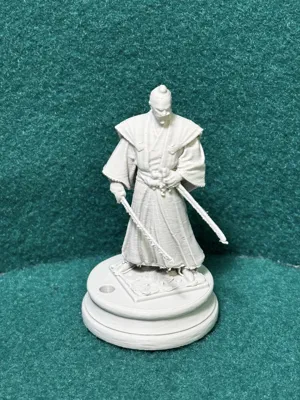
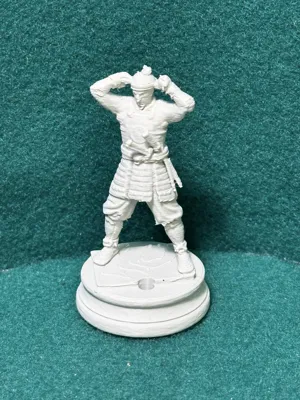
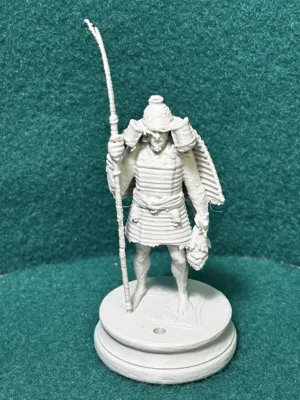
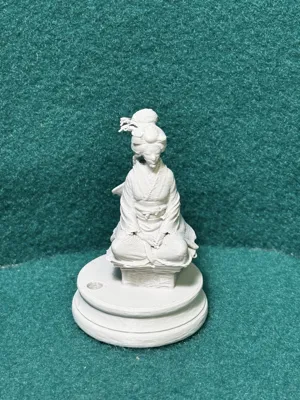
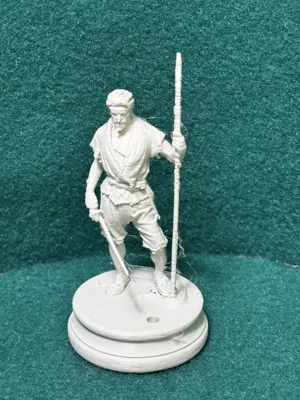
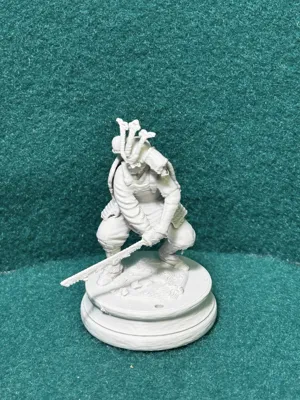
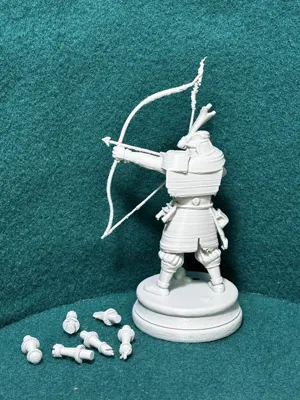
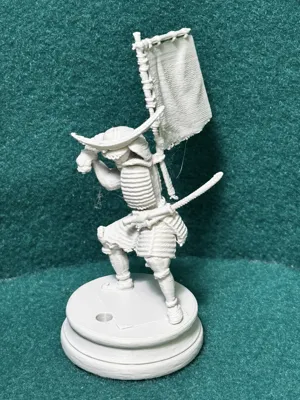
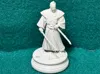
Samurai Warriors Chess Set


Print Profile(1)
Description

Samurai Warriors Chess Set
A disciplined army shaped by duty, hierarchy, and precision.
This Samurai chess set draws from the structure of feudal Japan, where every role carries purpose—from the calm authority of the Daimyo to the quiet readiness of the Ashigaru. Each piece is designed with clear silhouette and historical influence, allowing the board to read instantly while still rewarding closer inspection.
Armor, posture, and stance all reflect a culture built on order and responsibility. Even at rest, these figures feel prepared.
👉 This set is designed as a direct counterpart to its opposing army—each reflecting a different way of thinking about structure, movement, and control on the battlefield. Find the Mongol set HERE.


For this themed chess set I chose not to assign specific chess ranks to the characters. Instead, I provide two versions of each Samurai figure:
• One solid model
• One model with a hole designed to accept a small chess piece
You decide which character becomes the King, Queen, Bishop, Knight, Rook, or Pawn.
There are two simple ways to set this up.
Method 1 — In the slicer
1. Place the Samurai model and the miniature chess piece on the build plate.
2. Select both models and choose Merge.
3. Move the miniature chess piece into the hole of the Samurai base.
4. Adjust position as needed (up, down, left, right).
5. Resize the miniature if necessary.
If you resize the miniature chess piece, remember to apply the same scale to all the other mini pieces so the set remains consistent.
Repeat this process for the remaining holed models.
Method 2 — Test fitting after printing
1. Print one holed Samurai model and one miniature chess piece.
2. Test whether the mini fits into the hole.
If the fit is not correct:
• Return to the slicer
• Adjust the size of the miniature slightly larger or smaller
• Reprint only the miniature and test again
Once the fit is correct, apply the same scale percentage to all the remaining mini chess pieces.

That’s it.
You assign the ranks.
You are the Daimyo.
~ Clyde
⚠️ Print & Handling Notes
These models include fine, delicate details.
A strong filament is recommended — or anneal your set for additional strength (see below).
Bambu Studio Settings
Printer Settings
• Nozzle Diameter → 0.4 mm
• Compatible Material → PLA+
Filament Settings
• Nozzle Temperature (first layer) → 205 °C
• Nozzle Temperature (others) → 200 °C
• Bed Temperature (first layer) → 60 °C
• Bed Temperature (others) → 50–55 °C
• Cooling Fan:
◦ Layer 1–2 → OFF
◦ Layer 3+ → 100%
Quality
• Layer Height (Standard) → 0.20 mm
• Initial Layer Height → 0.20 mm
• Line Width → 0.45 mm
• Elephant Foot Compensation → 0.15 mm
Speed
• First Layer Speed → 20 mm/s
• Outer Wall Speed → 35 mm/s
• Inner Wall Speed → 50 mm/s
• Infill Speed → 50 mm/s
• Travel Speed → 120 mm/s
Acceleration / Jerk
• Default Acceleration → 1000 mm/s²
• Outer Wall Acceleration → 500 mm/s²
• First Layer Acceleration → 300 mm/s²
• Travel Acceleration → 2500 mm/s²
• Jerk (XY) → 8 mm/s
Strength / Infill
• Wall Loops → 3
• Top Layers → 4
• Bottom Layers → 4
• Infill Density → 20%
• Infill Pattern → Gyroid
• Sparse Infill Anchor Length → 5 mm (🔔 Note: increase to 10 mm if you see weak infill connections)
Skirt & Brim
• Skirt Loops → 3
• Skirt Distance → 2 mm
• Skirt Layers → 1
Retraction
• Retraction Distance → 4 mm
• Retraction Speed → 40 mm/s
• Z-Hop → 0.2 mm
• Wipe While Retracting → Enabled
• Retract on Layer Change → Disabled
• Minimum Travel Before Retraction → 1.0 mm
Supports
• Support Style → Tree
• Top Contact Z Distance → 0.25 mm (detachable, fixed)
• Support Density → 15%
• Support Interface Pattern → Grid
• XY Distance → 0.5 mm
• First Layer Support Gap → 0.3 mm
♨️ ANNEALING — Hardening Your Chess Pieces
Annealing your PLA models can improve strength by 10 – 20 %.
If you plan to play with these sets regularly, annealing is highly recommended.
If your goal is display or occasional play, annealing is optional.
The appearance and finish remain unchanged.
🔗 More info: Annealing PLA Prints for Strength — Easy Ways (All3DP)
https://all3dp.com/2/annealing-pla-prints-for-strength-easy-ways/
Please note:
Because I’m retired and on a fixed income, I print these models at a smaller scale to save on filament. All of these models are printed at 60-80% of the model size.
Thank you! Thank you! To all of you who Boost my uploads. Because of YOU I can get my filament now from “Maker's Supply”, saving me from using real money.
These creations are made purely for the joy of sculpting and sharing. Printing at a reduced scale can sometimes affect the quality of fine details; printing at full or larger sizes will yield smoother, more refined results.
Also, as a 77-year-old maker with hands that sometimes have a mind of their own, I occasionally have to use a little hot-glue surgery to reattach delicate parts. Please handle models with care—especially thin necks, joints, and fragile connectors. Take a moment to study your model before removing supports… or you might find yourself reaching for the glue gun too! 🥲


License
You shall not share, sub-license, sell, rent, host, transfer, or distribute in any way the digital or 3D printed versions of this object, nor any other derivative work of this object in its digital or physical format (including - but not limited to - remixes of this object, and hosting on other digital platforms). The objects may not be used without permission in any way whatsoever in which you charge money, or collect fees.
Comment & Rating (0)