Ultimate Sorting Tray - Parametric Organizer


Print Profile(16)


Description
This model was designed using coffee, filament, and questionable life choices.
If it earned a spot on your printer, it might deserve a 👍 Like too. 😄
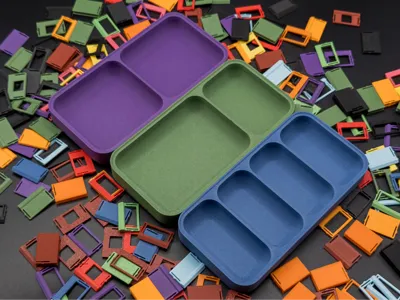
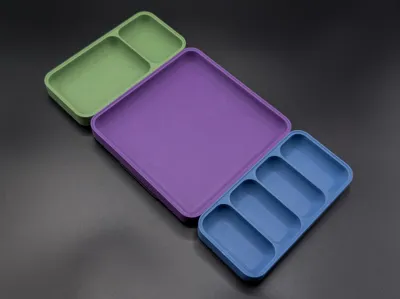
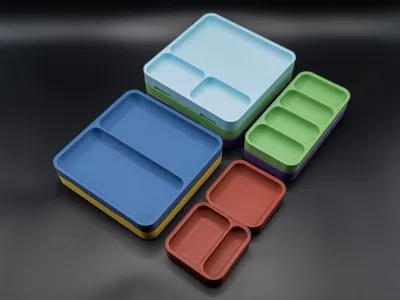
Ultimate Sorting Trays — Parametric Organizer with Custom Grid Layout and Connectors
Customizable sorting trays have been around for a while. This is the version that gets everything right.
Fully configurable grid with cell merging, inner fillets, tray-to-tray connectors, and a lay-on lid.
Three base sizes and 16 ready-to-print profiles, or dial in exactly what you need through the Parametric Model Maker.
No supports needed. All parts are designed to print clean using bridging.
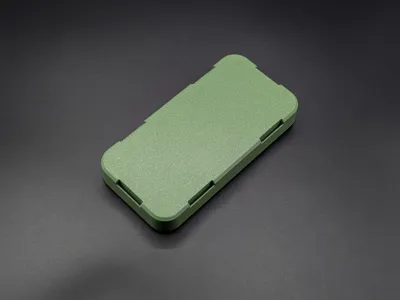
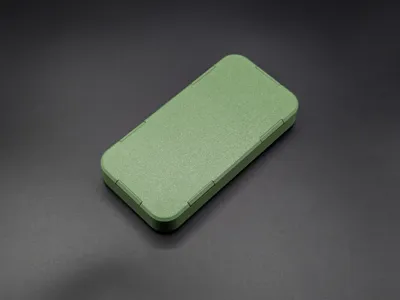
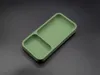
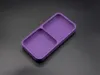
MODERN SHAPE
Every surface has been designed with generous corner radii and a softer overall profile. Something you would actually want to leave out on a desk, not just
hide in a drawer.

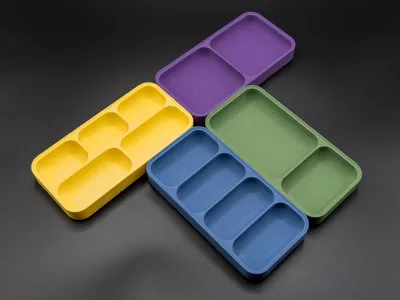
CUSTOM GRID LAYOUT
The grid is fully configurable. Set any number of rows and columns, then merge cells using colspan and rowspan to create larger compartments exactly where you need them. Or use the cell config string for complete manual control over every single compartment in the grid.
All inner walls have a 10 mm fillet by default. Small parts do not get wedged into corners and retrieval stays clean even when working with tweezers or gloves.
 |  |
READY-TO-PRINT PROFILES
Over 20 pre-configured grid variants are included as print profiles. Open them directly in Bambu Studio and print without touching any settings. Each base size comes with multiple layouts, from a single open tray to asymmetric merged-cell configurations for mixed small-part storage. Browse the profiles and download only what you need.
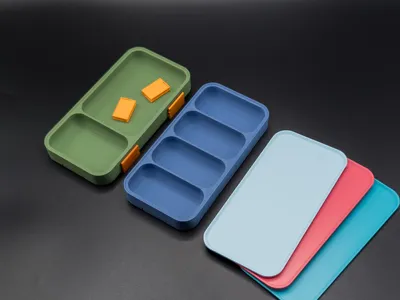
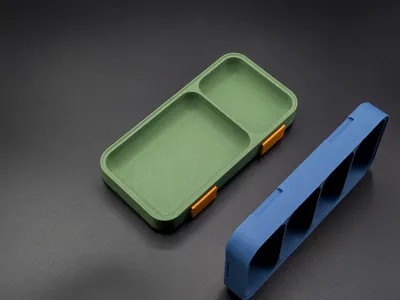
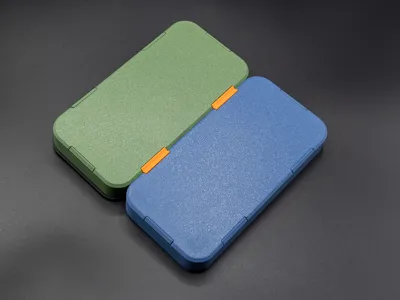
CONNECTING TRAYS
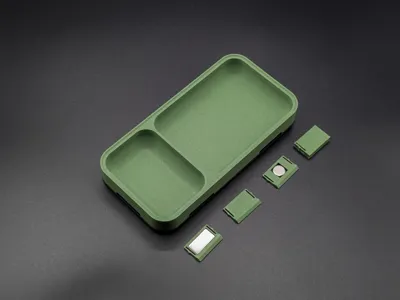
Individual trays become a system through two interchangeable connection methods. Each slot on the tray wall accepts either a connector or a magnet carrier, so you can use whichever suits your layout or mix both freely.
- H-Connector
H-shaped snap-in pieces bridge the gap between two adjacent trays and lock them into a solid, gap-free assembly. No glue and no tools required. The connectors can be replaced at any time without reprinting the tray, so your layout is never permanent. - Magnet Option
As an alternative, magnet carriers snap into the same slots and let two trays pull together through the wall. This works well for layouts where you want a softer connection or need to separate trays frequently. Keep in mind that the carriers have fixed positions, so it is worth planning your layout before. - Dummy Inserts
Any slot that is not used for a connector or magnet gets a dummy insert that fills flush with the wall for a clean, finished look.
The three base sizes are designed to fit together exactly. A 160×160 mm tray fits two 160×80 mm trays side by side, and a 160×80 mm tray fits two 80×80 mm trays the same way.
 |  |
LAY-ON LID
A flat lid rests on top of the tray walls and keeps dust and debris out when the tray is stored away or moved around. No clips and no hardware required.
Prints in one piece.
 |  |
WHAT'S IN THE BOX
Three base sizes — 160×160×20 mm, 160×80×20 mm, and 80×80×20 mm — each with the following print plates.
- Plate 1: Tray
- Plate 2: Tray (Plain - without connector slots)
- Plate 3: Lid
- Plate 4: Magnet Insert - 20×10×2
- Plate 5: Magnet Insert - 10×10×2
- Plate 6: Connectors
- Plate 7: Dummy Inserts
 |  |
Parametric Model Maker
This is a parametric model. Use the Customize button right here on MakerWorld to adjust every parameter, generate your custom tray, and download the
ready-to-print file. No additional software needed. You can adjust the tray length, width and height, the number of rows and columns, cell merges via colspan and rowspan, the inner fillet radius, corner rounding and magnet pocket dimensions.

Grid Config Guide
Use the cell_config parameter to define custom layouts and get full control
over every cell in the grid.
Syntax:
- The cell_config parameter uses this format: "column,row,colspan,rowspan"
- Multiple merged cells are separated by semicolons: "column,row,colspan,rowspan; column,row,colspan,rowspan"
Note: Always set the "columns" and "rows" parameters to define your grid size. The assembly view preview includes visual guides that show cell positions to help you identify columns and rows. There's also a simple merge option (colspan/rowspan) for the first cell, but cell_config will override it when used.
Example 1: Simple 2x2 merged cell in top-left corner
- columns: 4
- rows: 4
- cell_config: "1,1,2,2"
- Result: Creates a double-width, double-height cell at position (1,1)
Example 2: Multiple merged cells
- columns: 4
- rows: 4
- cell_config: "1,1,2,2; 3,1,2,1; 1,3,1,2"
- Result:
- Large 2×2 cell at top-left (1,1)
- Wide 2×1 cell at top-right (3,1)
- Tall 1×2 cell at bottom-left (1,3)
Example 3: Custom tool organizer
- columns: 3
- rows: 3
- cell_config: "1,1,2,3"
- Result: Creates one tall compartment (2 columns wide, 3 rows tall) for large items on the left, leaving normal-sized cells on the right for smaller tools
I hope you enjoy the design! Please leave a comment or rating if you like it and share your feedback!
Follow me on Instagram for unregular updates 😅.
License
You shall not share, sub-license, sell, rent, host, transfer, or distribute in any way the digital or 3D printed versions of this object, nor any other derivative work of this object in its digital or physical format (including - but not limited to - remixes of this object, and hosting on other digital platforms). The objects may not be used without permission in any way whatsoever in which you charge money, or collect fees.
Comment & Rating (58)