MiniMac MiniComputer/ExternalMonitor


Print Profile(1)

Bill of Materials


Description
Boost Me (for free)
🦊 If you enjoy this model, consider giving it a boost to support my work. 🦊
Membership
🦊 If you want to sell printed copies or support the creation of new models, join the membership. 🦊
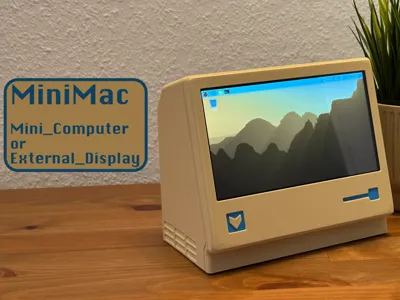
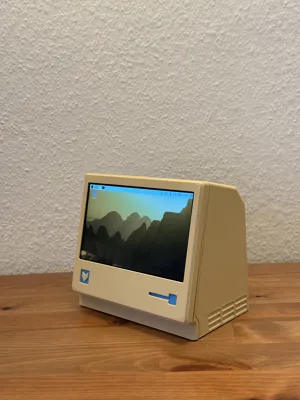
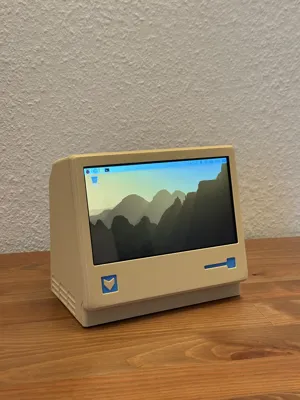
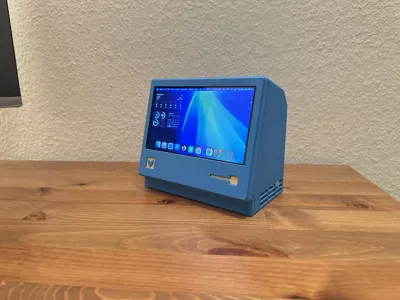
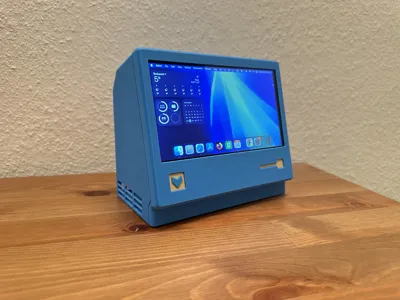
MiniMac
A stylish retro mini-computer inspired by classic designs.
It comes in two versions:
A. Mini touchscreen computer powered by a Raspberry Pi, or
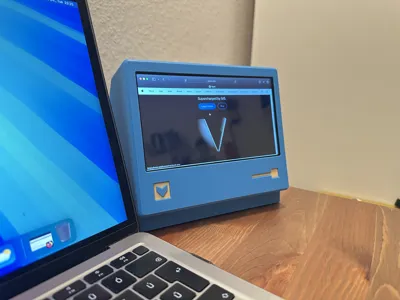
B. Compact external monitor for your main computer.
You will need this screen from Aliexpress:
https://www.aliexpress.com/item/1005007010531600.html
I bought the version without speakers, for 38 usd.
A
Mini touchscreen computer powered by a Raspberry Pi
If you want to build the mini computer, you will need a Raspberry Pi. I used a Raspberry Pi 5, but the screen should also work with the Raspberry Pi 4B and 3B+. Check the description of the screen to make sure your Raspberry Pi is compatible with it.
Instructions:
1. Put the LCD screen face down.
2. Attach the Raspberry Pi using the two adapters and the four provided screws.
3. Attach the inner frame to the screen using the two provided screws in the upper corners.
4. Put the assembly into the front panel.
5. Insert the logo and hole cover into the front panel. You can use glue if needed.
6. Attach the front panel to the housing.
7. Use four 3×8 mm screws to secure the front panel to the housing.
8. Connect the power cable.
9. Install the back panel.
10. Enjoy! :)
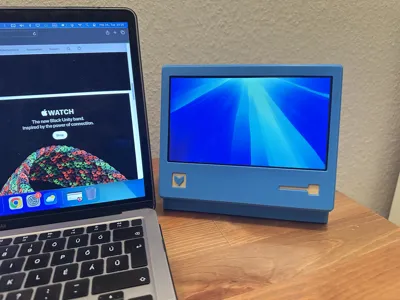
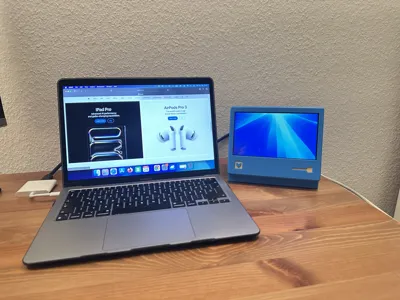
B, External Monitor,
If you want to use it as an external monitor, follow the same steps without attaching a Raspberry Pi, then:
- Connect the provided adapters to the screen.
- Connect a female HDMI to male HDMI cable to the HDMI adapter.
- Connect a female USB-A to male USB-A cable to the USB adapter.
- Connect the cables to your computer.
Check out my New Project:
https://makerworld.com/crowdfunding/263-shuffle-reorganizer
You may also be interested in my other models — you can check them out here:
https://makerworld.com/en/@EBengineering/upload
Here are some of my designs you may want to check out:
Apple Watch Charger Stand:
https://makerworld.com/en/models/996827
Retro Radio Magsafe Charger
https://makerworld.com/en/models/1203831
Wall Plug Generator
https://makerworld.com/en/models/2384864

License
You shall not share, sub-license, sell, rent, host, transfer, or distribute in any way the digital or 3D printed versions of this object, nor any other derivative work of this object in its digital or physical format (including - but not limited to - remixes of this object, and hosting on other digital platforms). The objects may not be used without permission in any way whatsoever in which you charge money, or collect fees.
Comment & Rating (5)