


Print Profile(1)
Bill of Materials


Description
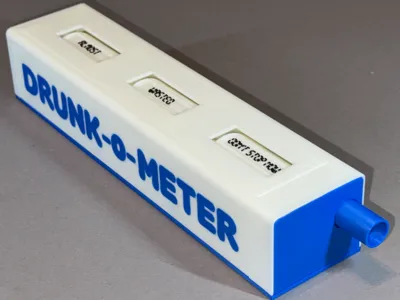
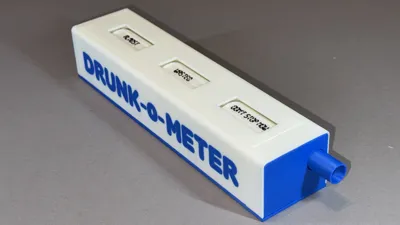
DRUNK-o-METER

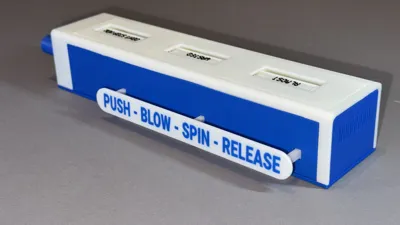
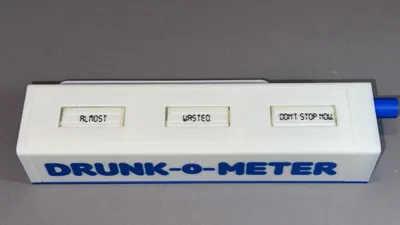
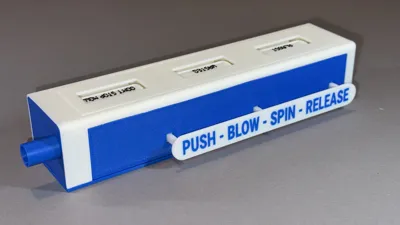
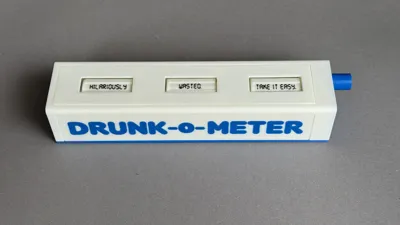
Every responsible home bar owner should have their own 3D-printed DRUNK-o-METER within crawling distance… Let the DRUNK-o-METER help you with answering one of life's great questions: Should I have another drink, or not? Simply push the button on the side, blow firmly into the mouth piece, let the drums spin, and then release the button. With 216 different outcomes such as “Hilariously tipsy. Don't stop now” or “Irresponsibly hammered. Seek help”, the judgement of this totally random breathalyzer is probably just as reliable as that of your drinking buddies.
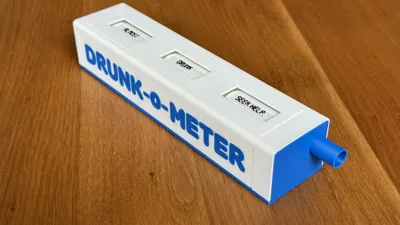
The DRUNK-o-METER is an interesting looking device, and is sure to the attract attention of your fellow drinkers (thereby giving you an easy entrance into talking about the joys of 3D printing)… Just put the DRUNK-o-METER in your home bar and see what happens. It can be integrated into a variety of fun drinking games, and for this purpose you can easily edit the text on the spinning drums.
Working principle
By blowing into the DRUNK-o-METER, forced air enters the internal air ducts and is distributed towards three different segments. In each segment the air flow is accelerated through a tapered nozzle. This high velocity flow is directed onto the jet blades, causing the turbine rotor to spin.

To ensure that the turbine rotors (a.k.a. drums) stop in a predefined position, and do not move unintentionally, the DRUNK-o-METER has been equiped with a “spring”-loaded locking mechanism (the spring is in fact an elastic band of your own choice). By default, the locking pin grips into a teethed section of the drum. By pushing the button on the side, all three drums are simultaneously unlocked and can be made to rotate by blowing into the mouth piece.

Printing tips
The main body (plate 1) contains the internal main airduct and tapered nozzles that should remain free from support structures (as you will not be able to remove them, and they will restrict the air flow). But the body also contains features that DO require support while printing. I found that these two requirements can be simultaneously met when printing with 0.16 mm layer thickness (@high quality) and setting support structures to “tree/auto, 25° threshold angle”. If for some reason you want to change these settings, be sure to use BambuStudio to peek into the internals to ensure no supports will be printed there.
For best results, spread the various white parts over different plates (i.e. plates 1, 2, 3 as in the file). Especially the drums should remain free from any (co-printing) artefacts to ensure optimal smoothness and thus easy rotation.
For optimal dimensional repeatibility (i.e. the side panels fitting nicely into the main body), make sure to have the same orientation of the long side on the printing plate.
The mouth piece (plate 4) is to be printed with the cylindrical part facing down. This ensures that the assembly pins and contact surface are free from support remnants, thus assuring better air tightness. The mouth piece cover (plate 4) will hide any support remnants on the side of the cylinder.
Print parts that contain text (i.e. plates 5 & 6) with a 0.2 mm nozzle for best results. When you do not have a 0.2 mm nozzle, you could chose to make the tags (plate 6) by printing with ink on regular paper.
If you do not have an AMS, then paint the parts on plate 5 to a single color, and create your own tags (plate 6) by printing with ink on regular paper.
- The DRUNK-o-METER in the pictures is printed using Bambu Lab PLA Basic: Jade White (10100), Cobalt Blue (10604) and Black (10101). I might be biased, but it looks amazing…
Assembly instructions
Remove support structures as you would normally do. Pay special attention to the following:
- Do not forget to remove the support structures from inside the drums (i.e. between the jet blades and the support cross). Make sure to not damage anything while doing so.
- The main body has a few tricky parts to clear (see image below). [A] It is very important clear any remnants of support structures from the slot that guides the locking mechanism. The locking mechanism should slide through the slot almost frictionless. I find that scraping all four sides of the internal slot with a small screwdriver works very well. [B] It can be a bit tricky to remove the support structures under the tapered nozzle (on the side of the main body). You can use the “access holes” to make this easier. Put a little screwdriver through this hole, push against the support structures, and give it a few good taps.

Put the text tags into the slots of the drums.
- Make sure to orient them in the proper way (see image below).
- Put all tags from the same group into the same drum (i.e. almost, totally, dangerously, hilariously, surprisingly and irresponsibly go in the same drum).
If you find that a specific slot is a bit too tight for the tag, use scissors to remove a tiny sliver along the long edge. You do not want the tag to fold when sliding it into the drum, but it should require some force (to prevent it from sliding out over time).

- Place the drums in the main body. The fit is a bit snug, but I find the following works well: first slide the drum over the nozzle (left side of image below), then lift the drum on the nozzle side (e.g. using a small screwdriver) and next allow it to lower into its position (right side of image below). When in place, make sure the drum rotates easily! It may take a few good spins to smoothen out any printing remnants. If the drum does not spin smoothly (it should keep rotating for a while after you give it a good push), then take it out and visually inspect the drum's axis and the main body supports slots for any irregularities.

- Insert the locking pin into its place, and turn the assembly upside down. Use a regular thin elastic band to create the spring force (the pin should reliably return to its locking position, and pushing the pin out should thus require some force). You can either wrap the elastic around as many of the pins as needed to create sufficient tension (left side of image below), or you can tie a knot into the elastic and make it to size (right side of image below).

- Mount the front plate (where you blow) and end plate. For the front plate: first insert the mouth piece into the main body, then install the mouth piece cover.

Mount the bottom plate. Note that it is not symmetrical, so make sure to position it in the proper orientation (when its ends are flush with that of the main body).
- Now work on the button side. First mount the blue side plate. Then slide the slots of the button over the ends of the locking pins, making sure it is firmly attached. Because the top and opposite side are still open you can use a small screwdriver to push against the locking pins so that they can be firmly pushed into the button (represented by the arrows in the figure below).

- Mount the top plate and remaining slide plate, and your DRUNK-o-METER is fully assembled and ready to use. Party time!!!

Create your own drinking game
Feeling creative? You can easily create your own drinking game by changing the text on the spinning drums. Add names and instructions, or create your own scoring system… To do this:
- Open the 3mf file in BambuStudio
- Go to plate 6, and click on the text you want to change.
- Activate the “Objects” tab in the menu on the left
- Right-click on the “text_shape” of the object you selected, and choose “Edit Text”
- Change the “Input text”

Boost Me (for free)
Enjoyed this model? The please boost me, or should I say: booze me... Your boost helps the visibility of the DRUNK-o-METER and upcoming future creations.
Documentation (1)
License
You shall not share, sub-license, sell, rent, host, transfer, or distribute in any way the digital or 3D printed versions of this object, nor any other derivative work of this object in its digital or physical format (including - but not limited to - remixes of this object, and hosting on other digital platforms). The objects may not be used without permission in any way whatsoever in which you charge money, or collect fees.
Comment & Rating (0)