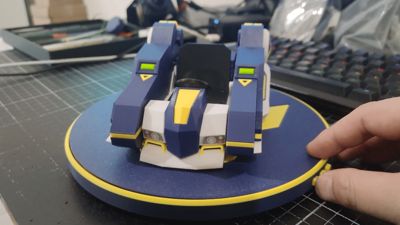
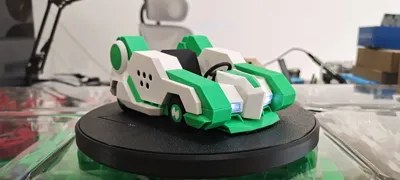
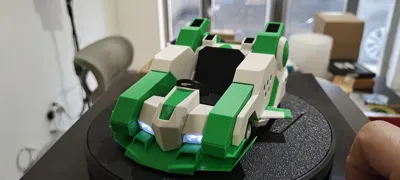
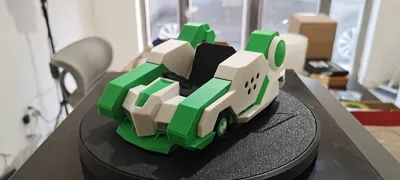
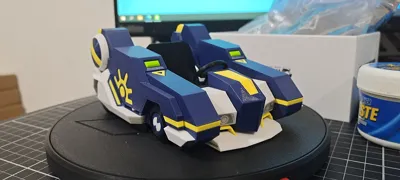
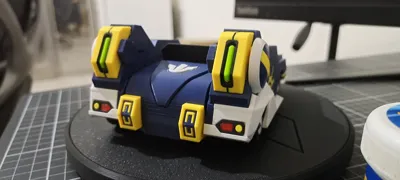
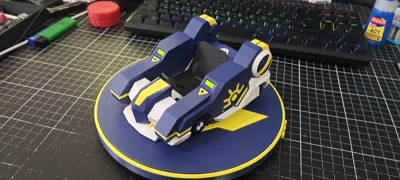
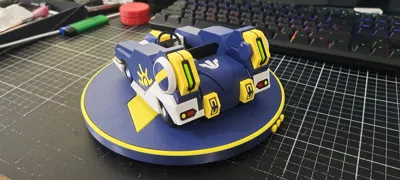
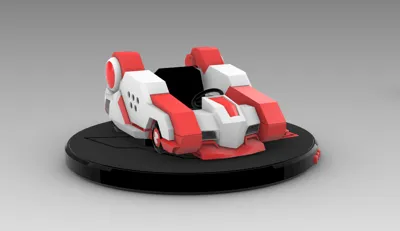
Marshmallow SR


Print Profile(2)
Description
Electrically deformable Marshmallow SR model figure, made with an FDM printer, model: Bambu Lab X1C+P1P, material used is PETG, PLA's sinkage rate may not perfectly fit the tolerance, and cannot combine with TPU, can achieve electric deformation with electronic control components
一一一一一一一一一一一一一一一一一一一一一一一一
It is recommended to print according to my 3MF pre-arranged and settings, I recommend using my pre-set filament, flow rate and K value need to be calibrated before printing, this will achieve a relatively perfect result, for parts on plate 20 and 21, you can enable filament features (diagonal seam type: contour) to improve surface print quality
一一一一一一一一一一一一一一一一一一一一一一一一
The parts on plate 5 should not be printed with matte materials
I have added pauses for the front side wing blade on plate 11, first pause, switch to 95A TPU, remember to purge cleanly before printing, second pause, switch back to PETG for printing
The base print on plate 22 is compatible with the open-source main control, if your main control is the quick-connect version, please do not print this plate, go to the replica group to download the quick-connect version
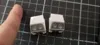
If you accidentally bought the MG90S aluminum gear servo shown above in the image, please use the parts on plate 25 for adaptation, note that it is not compatible with the iron gear servo below, please distinguish by gear color and shape
一一一一一一一一一一一一一一一一一一一一一一一一

一一一一一一一一一一一一一一一一一一一一一一一一
Please do not use print quality, such as poor bed adhesion, spaghetti, or even the requirement for multi-color printing as a basis for rating, finally, thank you very much for your support
一一一一一一一一一一一一一一一一一一一一一一一一
Materials needed for the car body: refer to the image below, note the distinction between knurled and smooth metal pins (non-knurled), Example: M2*25/2 knurled metal pin, 2mm diameter, 25mm length, /2 indicates a quantity of 2
一一一一一一一一一一
M2*22/3 knurled metal pin
M2*18/3 knurled metal pin
M2*14/4 knurled metal pin
M2*10/2 knurled metal pin
M2*8/1 knurled metal pin
M2*6 /1 knurled metal pin
一一一一一一一一一一
M2*25/2 smooth metal pin
M2*6/8 smooth metal pin
M2*4/2 smooth metal pin
一一一一一一一一一一
M2*8/20 self-tapping screws
一一一一一一一一一一一一一一一一一一一一一一一一
Using the above hardware, the basic manual deformation version can be made, the electric version requires other materials in addition to metal pins, please download to view and purchase

一一一一一一一一一一一一一一一一一一一一一一一一
TIPS: The red marked areas as shown in the figure need to be coated with long-lasting grease, this can solve most problems

Documentation (4)

License
You shall not share, sub-license, sell, rent, host, transfer, or distribute in any way the digital or 3D printed versions of this object, nor any other derivative work of this object in its digital or physical format (including - but not limited to - remixes of this object, and hosting on other digital platforms). The objects may not be used without permission in any way whatsoever in which you charge money, or collect fees.
Comment & Rating (46)