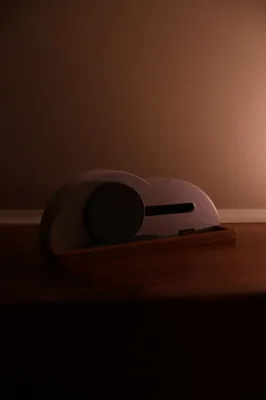
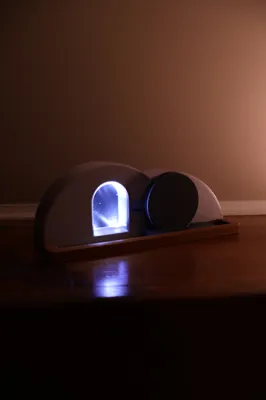
Empty Tomb Easter Night Light (BETA Files)


Print Profile(0)
Description
This is a fun design to make throughout the Easter month. It is ready to print but need some tweaks. I would love to have feedback on what would be better.
Check out my other models on Makerworld or Printables
Parts:
- 1x to 4x, 3mm LED
- wire
- glue
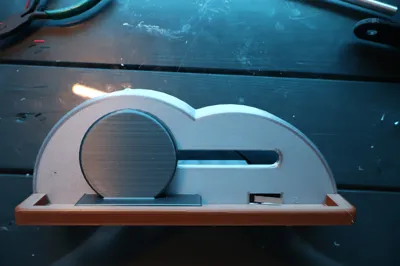
- 3D printed parts
- aluminum Foil
- 2x AAA batteries
- 6mm x 20mm x 10mm limit switch (H x W x D)

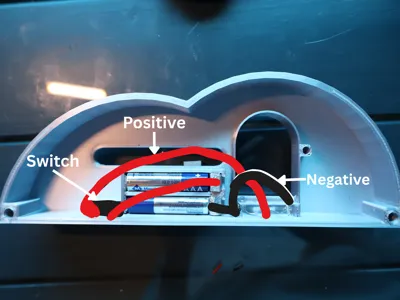
For wiring - 1. Cut a piece of aluminum foil. Fold the sheet over and over till it is about 8-10mm wide (The thickness can vary as long as the batteries still fit). Now repeat this 3x.
2. For the bottom piece of aluminum foil in the battery compartment, make sure it will fit in the slot. Finally put the foil in the back slot.
3. For the front battery connector they need to fold over into a slot. When you have made sure they fit take them out and poke a hole through both pieces (this will be where the wire goes) and do not put them back yet.
4. Take 1-4 3mm LED's and wire the all the positive sides together and all the negative sides together (I only used 2 LED's and it seemed plenty bright).
5. Strip the ends of some wire and take a limit switch (if the limit switch has wire you do not have to do this) and solder it through the wholes in the pin. It should be the two ends closest to where the button is. I am not 100% sure so you might need to troubleshoot it.
6. Put the button through the hole in the front and make sure that the shortest part lever is pointing out of the face and towards the whole in the front panel.
7. Now take the 2 pieces of aluminum foil with the with the hole in them and thread the positive side (Where the positive side of the battery will go) with the wire connected to the limit switch. Put it in the slot in the battery holder.
8. Take the positive pin of the LED's and solder it with the remaining wire of the limit switch.
9. Get the last piece of aluminum foil with the hole in it and poke the wire through it. Now solder it to the negative pins on the LED's. Put it in the slot in the battery holder.
10. Put the LED's into the 4 holes. You will have to bend the pins to fit it into the holes. You may need glue.

11. Flip the main part to the flat front.
12. Take the boulder slide and take the pin on the back and put it through the long narrow slot.
13. Next take the rail and put the 2 poles in the 2 holes. It might take a little bit of wiggling to get everything lined up. You need to put glue in the holes and then make sure that when you move the boulder it hits the switch and make a clicking sound.
14. Flip it to the back and take the part called the “tomb opening back” and put the peg in the hole with the flat bottom touching the flat ledge connected to the base (Glue is optional).
15. Take the boulder bolt and put the peg ing the hole of the boulder slide.
16. Put the AAA batteries in.
17. Take the “tomb back” and put the two pegs in the two holes in the conners.
18. Enjoy this 3D print and give any feedback and anything you might want to see in the second version.
Comment & Rating (0)