Ultimate DIY Mini Sander Attachment Toothbrushes


Print Profile(1)
Description
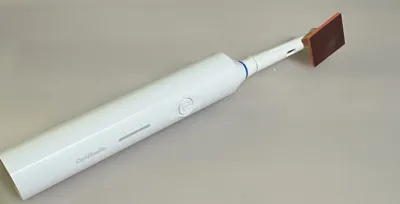
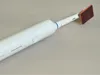
Turn a cheap electric toothbrush into a powerful mini detail sander! Perfect for 3D print finishing, model making, removing layer lines, and getting into tight corners.
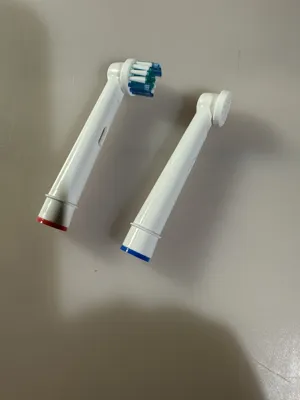
Why buy an expensive detail sander when you can build one for under 10 bucks? This attachment fits standard Oral-B brush heads (approx. 13.4mm outer diameter) as well as cheap third-party generic heads. (Tip: You can get a basic electric toothbrush at stores like Action for around €8.88!).
🌟 The Highlight: Quick-Swap Snap-In System!
The best feature of this design is the built-in locking pin (peg). The adapters are designed to securely snap into place. This allows you to quickly swap between different sanding shapes (circle, square, pointy) on the very same toothbrush head in seconds!
Boost Me (for free)
Boost me for free!
📦 What's Included?
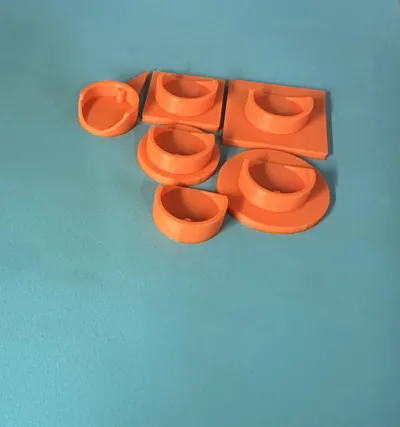
This set includes multiple pad shapes for every sanding scenario:
- 🟢 Circle Pads: 20 mm & 25 mm (Perfect for flat surfaces and general smoothing)
- 🟦 Square Pads: 20 mm & 25 mm (Great for straight edges and corners)
- 🔺 Detail Tip (Pointy): (For very tight spots and intricate details)
- 🛠️ Blank Base Holder: Want to design a custom shape? The blank adapter base is included! Just import it into Tinkercad or your favorite CAD software and add custom geometry on top.
🛒 Bill of Materials (What you need)
- An electric toothbrush (Oral-B or generic compatible)
- A pair of pliers
- A utility knife (Cutter)
- Superglue (CA Glue)
- Sandpaper
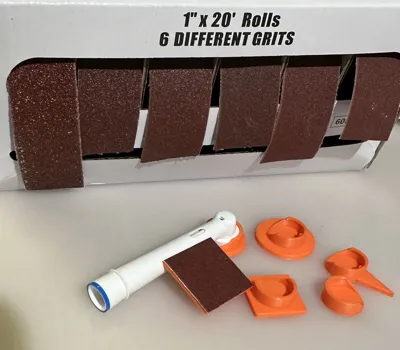
- Recommended: Velcro (Hook & Loop) tape and pre-cut 25mm sanding discs.
👉 Here is a cheap 25mm Velcro sandpaper set on Temu that fits perfectly!
🛠️ Step-by-Step Assembly Instructions
Step 1: Prepare the Brush Head
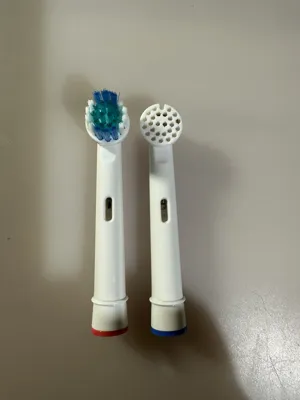
Take your new or used toothbrush head and use a pair of pliers to pull out all the nylon bristles. They usually come out quite easily. (See reference pictures!)
Step 2: Modify the Head for the Snap-In Feature
To make the 3D-printed adapter snap into place and transfer the oscillation movement, you need to make a tiny modification to the top of the brush head.
Using your utility knife, cut a small 2mm wide notch into the central bristle hole on the top. Why? This notch acts as the locking mechanism for the built-in peg on the 3D-printed adapters, allowing them to snap securely into place! Don't worry, the plastic here is very soft – it cuts easily and safely. (See reference pictures for the exact location).
Step 3: Attach the Sandpaper
You have two options here, depending on your workflow:
- Option A (The Velcro Method - Highly Recommended!): Glue a piece of Velcro (the hook side) to the bottom of the 3D-printed holder using superglue. Now you can easily attach and swap out standard 25mm Velcro sanding discs.
- Option B (The Permanent Method): Apply superglue directly to the bottom of the printed holder, stick a piece of regular sandpaper to it, and use scissors or a knife to trim the excess paper flush with the edges.
Step 4: Snap It On and Sand!
Simply push your new 3D-printed sanding pad onto the modified brush head until you feel it snap into the 2mm notch. Turn on your toothbrush and enjoy effortless sanding! Want a different shape? Just pull it off and snap a new one on.
🖨️ Recommended Print Settings
- Material: PLA, PETG, or ABS/ASA (PETG/ABS recommended for better heat resistance during sanding).
- Infill: 100% (Crucial! The part needs to be solid to withstand the heavy vibrations).
- Layer Height: 0.12 mm - 0.20 mm (Finer layer lines ensure the adapter fits snugly onto the brush head).
- Wall Loops: 3 or 4 for extra strength.
Happy Printing and Sanding! If you like this tool, please leave a like, a rating, and share your makes!
License
You shall not share, sub-license, sell, rent, host, transfer, or distribute in any way the digital or 3D printed versions of this object, nor any other derivative work of this object in its digital or physical format (including - but not limited to - remixes of this object, and hosting on other digital platforms). The objects may not be used without permission in any way whatsoever in which you charge money, or collect fees.
Comment & Rating (18)