Search models, users, collections, and posts
Textual LCD Desk Clock
IP Report


Print Profile(0)
Add the first print profile to earn points
Boost
1
0
0
0
0
0
Released
Description
Summary
A compact, hackable textual clock that shows human-friendly time phrases on a standard HD44780-compatible LCD. Buildable in a weekend: simple 3D-printed parts, straightforward fastenings, and open firmware for the ESP32. The project is ideal if you want a retro—yet customizable—desk clock you can tweak.
Full electronics, firmware and BOM are on GitHub: https://github.com/Smengerl/LCD_Text_Clock
Key Features
- Human-friendly text time display on standard HD44780 modules
- ESP32 firmware with Wi‑Fi time sync and configurable display modes
- Modular 3D-printed enclosure designed for easy assembly
- Optional top-mounted buttons for menu navigation, settings, and user interaction
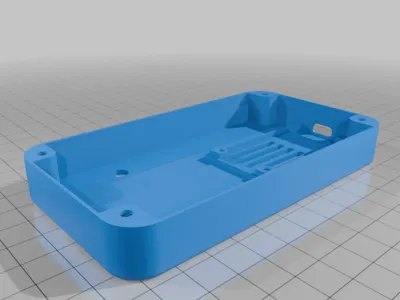
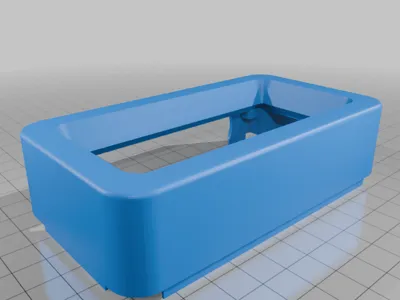
Printed parts:
- No push button version:
- lower_part_nobuttons.stl
- upper_part_nobuttons.stl - print upside down (face on built plate)
- push button version:
- lower_part.stl
- upper_part.stl - print upside down (face on built plate)
- pushbutton_cover.stl - try out which orientation works best for your printer
- pushbutton_base.stl - try out which orientation works best for your printer
Bill of Materials
- ESP32 development board (any compatible module)
- HD44780-compatible LCD module (16x2 or 20x4)
- Optional: I2C backpack or direct wiring to LCD (see repo)
- Optional: Tactile switches (x3–x4) for top-mounted buttons + button caps
- M3 screws (various lengths) and nuts or heat-set inserts / standoffs
- Power supply (USB / LiPo + power module) as required
- Jumper wires / headers
For the complete BOM and recommended part numbers, see the GitHub repository.
Print Settings
- Material: PLA recommended (PETG/ABS for higher strength/temperature)
- Rafts: No
- Supports: No
- Resolution: 0.20 mm (0.12–0.28 mm acceptable)
Notes:
- Button fit: test-print button cap; scale tolerance ±0.1–0.2 mm depending on your printer
- Consider fuzzy skin for outer perimeter
Assembly
Assembly Instructions
- Print all parts and remove supports; test-fit main parts (bezel, front cutout, button caps).
- Install tactile switches into the top case button cutouts (ensure correct orientation) and fit button caps.
- Mount the LCD into the bezel and secure the bezel to the case top (test-fit prior to final finishing).
- Fasten ESP32 to internal standoffs; route cables through provided channels. Connect the buttons to the ESP32 GPIOs per wiring diagram.
- Connect LCD to ESP32 per wiring diagram in the repo (power, data, contrast/pot if needed).
- Insert power module / battery and verify cable routing. Do a dry-fit of the assembled stack.
- Flash firmware to the ESP32 following the README instructions on GitHub and configure button functions if required by the software.
- Finalize assembly, then power on and test time sync, display modes and button-driven menus.

License
This user content is licensed under a
Creative Commons Attribution-Share Alike
Comment & Rating (0)