S51 Herzkasten Adapter with Quick-Change Connector


Print Profile(1)

Description
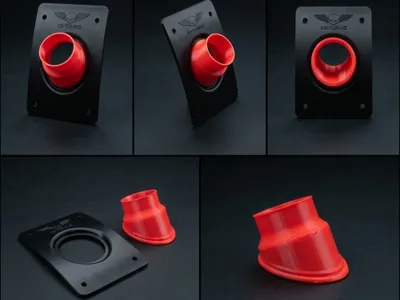
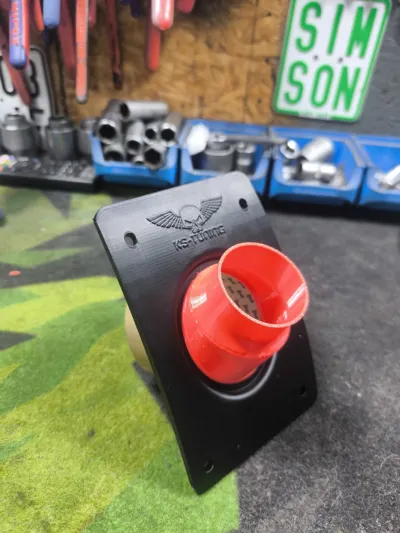
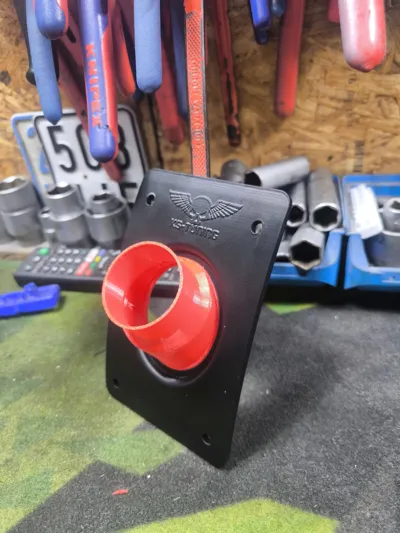
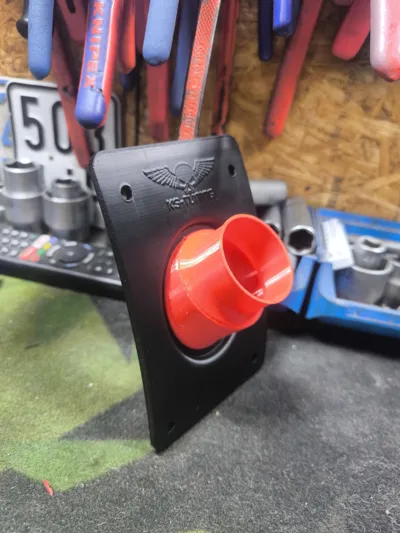
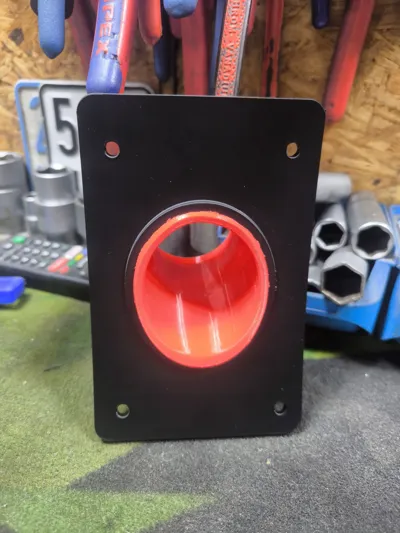
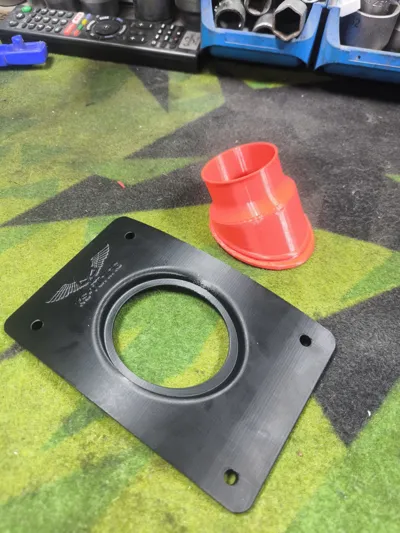
Simson Herzkasten Adapter with Quick-Change Connector (53mm)
This intake system for the Simson Herzkasten (S50, S51, S70) is the professional solution for all tuning engines. While rigid adapters often block access to the carburetor, this KS-Tuning design uses a smart, flexible TPU connector with an integrated groove.
🛠 The Highlight: The Groove System & TPU Flexibility
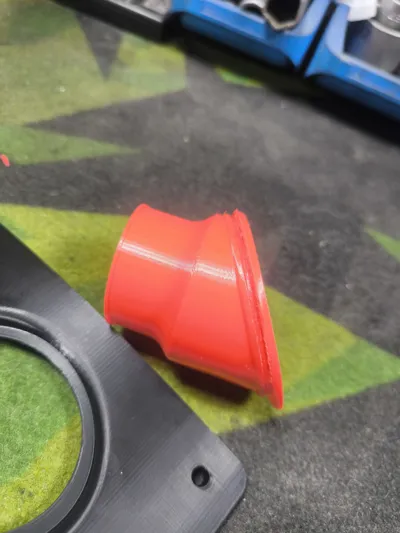
The red intake funnel is printed from TPU and features a precise, circumferential groove.
- Secure Hold without Adhesion: The funnel positively locks into the mounting plate. This creates a tight, vibration-proof seal
- .
- Maintenance Mode: Do you need to clean or re-jet the carburetor? Simply pull the TPU connector briefly out of the plate or push it to the side. You immediately have space to work without having to loosen the screws on the Herzkasten.
🏁 Compatibility & Outlook
- Current Model: Precisely designed for the Mikuni VM24 (and identical models).
- Fit: 53mm connection size for maximum airflow.
- Modular: Further connectors for other carburetor models are in development!
🔧 Important Assembly Notes
- Prerequisite: A Herzkasten extension is absolutely necessary for installation.
- Preparation: Generously mill out the original connection on the Herzkasten (53mm passage).
- Alignment: First, push the adapter, including the TPU connector, onto the carburetor. Align the system straight to the Herzkasten and only then mark the holes.
- Sealing: Use sealant between the adapter plate and the Herzkasten during final assembly (protection against false air!).
- Tolerance Compensation: If the adapter is too short/long due to frame tolerances, simply adjust the Z-dimension of the TPU part in the slicer.
🖨 Printing Recommendations & Post-Processing
- Mounting Plate: ASA or PETG, 40% Infill.
- TPU Connector: TPU (95A), 3-4 walls.
- ⚠️ Important Support Note: For a clean groove on the TPU connector, support is necessary. Since TPU support is difficult to remove due to the material, some diligence is required here. A sharp utility knife is absolutely necessary for a clean finish of the groove!
Boost Me (for free)
Support my work! 🚀 If you like this model and your print was successful, I would be thrilled about a boost! This helps me continue to develop free designs for the community. Thank you for your support!
License
You shall not share, sub-license, sell, rent, host, transfer, or distribute in any way the digital or 3D printed versions of this object, nor any other derivative work of this object in its digital or physical format (including - but not limited to - remixes of this object, and hosting on other digital platforms). The objects may not be used without permission in any way whatsoever in which you charge money, or collect fees.
Comment & Rating (5)