Search models, users, collections, and posts

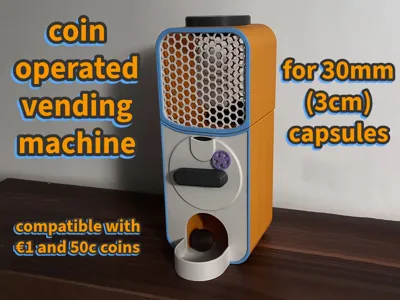
Coin operated vending machine

Print Profile(1)

All
A1
H2S
H2D
H2C
H2D Pro
P2S
X2D
A2L

0.2mm layer, 2 walls, 10% infill
Designer
26.1 h
11 plates
4.4(5)

Open in Bambu Studio
Boost
308
840
37
20
317
85
Released 

Bill of Materials

Bambu Filaments
Select all
Matte Mandarin Orange (11300) / Refill / 1kg
Matte Sky Blue (11603) / Refill / 1kg
Matte Bone White (11103) / Refill / 1kg
Dark Gray (33103) / Filament with spool / 1 kg
White (65104) / Filament with spool / 0.5 kg
List other parts
  • Pen spring x 1: A common spring found in any push-button ballpoint pen

Description

Boost Me (for free)

If you enjoy my models please consider boosting me as it means a lot :)

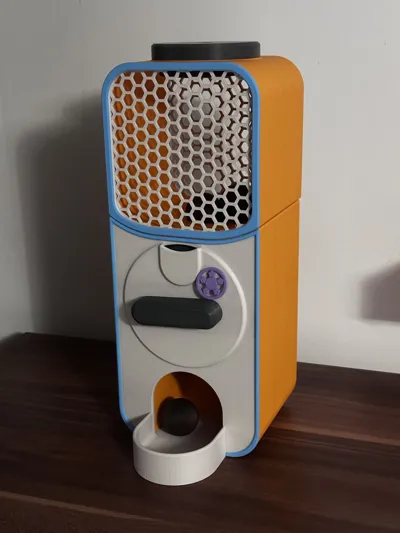
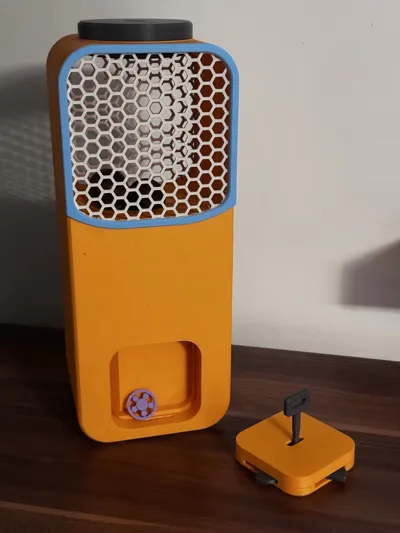
A simple coin-operated vending machine with a lockable lid and rear door for coin storage. I designed this so you can 3D print and assemble it yourself.

The vending machine supports capsules up to 35 mm, but it was designed and tested with 30 mm capsules in mind, as they are cheap and easy to buy in bulk online.

Parts needed

  • 1 spring from a regular pen (for the ratchet mechanism)

Optional

  • Small amount of glue (only if tolerances vary)

Capsules

  • 30 mm capsules recommended

The mechanism was designed to work with €1 and 50c coins, but it should be compatible with any coin between 23.25 mm and 24.25 mm in diameter.
You can also print and use the 23.5 mm coins provided in the print profile if you prefer.

Material recommendation

I recommend printing all mechanical parts in PETG for improved strength and durability as for the body PLA is perfectly fine.

you must use PLA support material or PETG as a interface for supports.

Spring installation

The only additional component required is a spring from a regular pen, which is used for the ratchet mechanism.

Cut the spring to the following lengths:

  • Left side: 10 mm
  • Right side: 13.5 mm

The spring should just fit inside the casing and apply only light pressure. If the spring pressure is too strong, the ratchet mechanism will become stiff and the coin may get stuck.

Assembly notes

The design was made to fully push-fit together, but depending on your printer tolerances and the filament used, you may want to add a small drop of glue in a few places if any parts feel loose.


I printed the prototype using the BambuLab Matte filament range and had no issues, but your experience may vary depending on your printer and settings.


  1. Slide the upper and lower body pieces together.


  2. Align the mesh frame inside the upper body and start pushing in the outer trim. When installing the trim on the mesh walls of the upper body, the fit will be tight. I found the easiest method is to insert three corners first, then line up the fourth corner. Place the body trim-side down on a flat surface and press down evenly to seat it fully without damaging the parts. Repeat this step for the other side.


  3. Assemble the ratchet mechanism and locks. See the pictures below for reference.


  4. Insert the catcher almost all the way in, leaving a few millimeters of space so the front cover can be installed more easily.


  5. Insert the ratchet assembly, making sure the rod is pushed back into the hole in the lower body and the ratchet components are compressed downward. The lid of the ratchet part should stick out slightly, as this will later fit into the lid.


  6. Insert the front lower plate so the rod passes through the hole and the plate sits in the small notches of the catcher, then push the catcher the rest of the way in.


  7. Push in the front trim of the lower body and attach the handle to the rod.


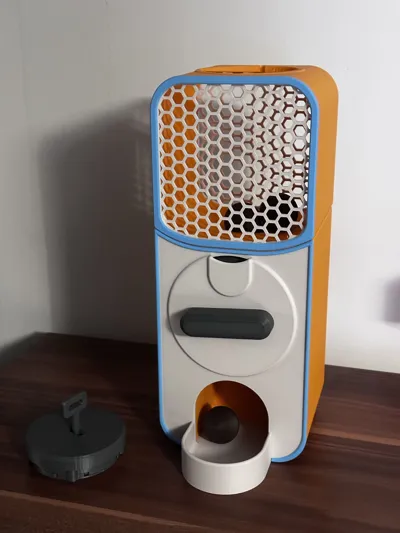
  8. Attach the lid and the coin door lock.
Lock assembly
Ratchet assembly

Feedback

If you discover any issues with the design, please let me know. I’m currently working on more mechanical prints, so I would really appreciate any constructive feedback.


Comment & Rating (37)

(0/1000)

Hello, I am new to 3d printing and my son and I are working on this model. Having trouble figuring out where/how these parts are installed.
The designer has replied
designer
1
Reply
hello, thank you for printing my model it means alot, the gear assembly goes together in this order. ball gear (open side faceing the back of machine), spacer, ratchet assembly (see description for assembly details), handle. i hope this helps, any further question please feel free to reach out.
(Edited)
1
Reply
Replying to @Yukiba :
Thank you for that!
1
Reply
Hello, I loved printing this project and I congratulate you for the little filament it requires, its printing time and the fact that there are no external parts to buy. However, I wanted to know if it is possible to make an adapter or a version that can accept larger capsules (the one in the photo is 2.7 inches) because I have many. I would also like to know if you authorize us to increase the capacity of the dispenser (or at least enlarge its volume and maintain stability) Also, a diagram should be made indicating the direction of the gears, as this would avoid deforming the PETG key in the future by mistake in the reverse direction which should correspond ^^. Otherwise, nothing to say except that you should not glue the cover of the turniquet because otherwise the Lower Trim will not fit correctly (my 2nd mistake x)). Looking forward to your answer
The designer has replied
Show original
0
Reply
hello, unfortunately this model is only compatible with up to 35mm capsules, if made any larger i would have to redesign the whole machine due to the coin mechanism.
0
Reply
Can someone please help me with the support settings, this is impossible to remove THANKS
The designer has replied
Show original
0
Reply
hello, use pla support material or PETG as a interface between the part and support for easy removal. I hope this helps
0
Reply
Print Profile
0.2mm layer, 2 walls, 10% infill
The profile uploader has replied
profile
1
Reply
sorry about the maximum capulse size but the colours you chose are fantastic. love the contrast :D
0
Reply
Will any US coins work like a quarter or a nickle?
The designer has replied
designer
2
Reply
I believe a Quarter would work as it is only 0.01mm wider than a 50c euro coin
0
Reply
ok thank you
1
Reply
is it possible you also create a printing file of coin for this machine?
The designer has replied
0
Reply
if you check picture 6 you will see the last plate is printable coins that is compatible with the machine, they are included in the print file 😊
0
Reply
Replying to @Yukiba :
super! thanks.
0
Reply
super good model
The designer has replied
designer
1
Reply
thank you 😁
0
Reply
Hello is your 50 Cent coin Australian or European? although good job on this machine.
The designer has replied
designer
1
Reply
its European 50c but 10c Australian coin should work as well as it is 23.6mm the tolorance for the mechanism is 23.25-24.25mm. thank you for the positive feedback
(Edited)
0
Reply
Hello, thank you for sharing your models! Do you have a trick for cutting or removing the support pieces added for printing? I can't seem to remove them, and when I force them too much, I break the piece. Thanks in advance!
The designer has replied
Show original
designer
1
Reply
hello, for the supports I used Bambulab PLA support filament as the interface layer for easy removal. if you do not have this then I suggest trying to use PETG as a interface layer
0
Reply
Great design. Absolutely horrible supports on the default profile, impossible to remove rendering it basically useless.
The designer has replied
0
Reply
you have to print with a interface layer either PLA support material or PETG, as seen here in the material list and in the print profile.
(Edited)
0
Reply

License

This user content is licensed under a Standard Digital File License.

You shall not share, sub-license, sell, rent, host, transfer, or distribute in any way the digital or 3D printed versions of this object, nor any other derivative work of this object in its digital or physical format (including - but not limited to - remixes of this object, and hosting on other digital platforms). The objects may not be used without permission in any way whatsoever in which you charge money, or collect fees.