Reflector Lamp - Moon Mars Water - Lamp Kit 001


Print Profile(4)

Bill of Materials


Description
Boost Me (for free)
Thank you for your support! 🥰
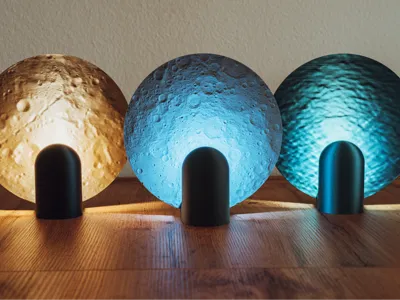
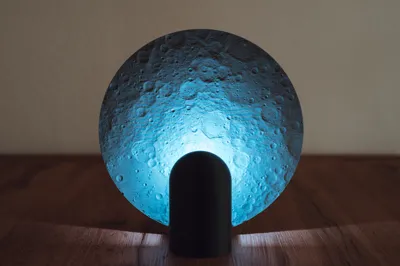
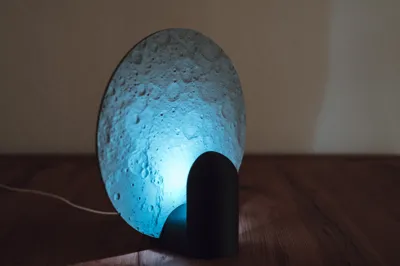
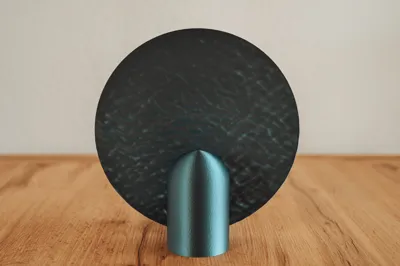
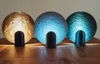
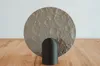
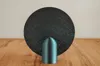
Following my Moonscape in a Modern Frame I have designed another modern lamp based on the light from Lamp Kit 001 being reflected by differently textured discs. Shining through with transparent filament is also conceivable.
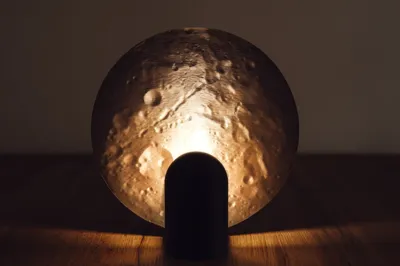
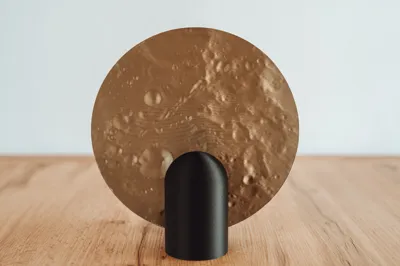
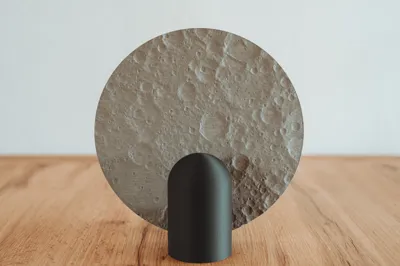
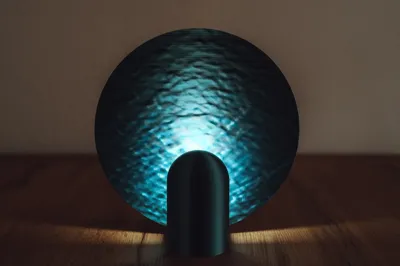
Currently available options: Moon, Mars and Water Waves.
🎨 Filament Recommendation:
There are almost no limits here. In the example images, I printed the moon surface in Bambu Lab PLA Nardo Grey, the Mars surface in kexcelled PLA champagne gold Metallic and the water waves in Bambu Lab PLA blue Metallic.
☝️ Printing Notes:
All reflectors must be printed upright. I recommend printing with additional supports. These are moved close to the model in the slicer and must slightly overlap. (already integrated into my profiles).
Please keep the ambient temperature constant during the printing of the thin reflectors. Otherwise, there is a risk of layer shrinkage, which could be visible later. Opening or closing the door during printing can have undesirable consequences.
Instructions:
1.) First, print the Base from the list.
2.) Now you can select one of the different reflectors (Moon surface, Mars texture or Water Waves)
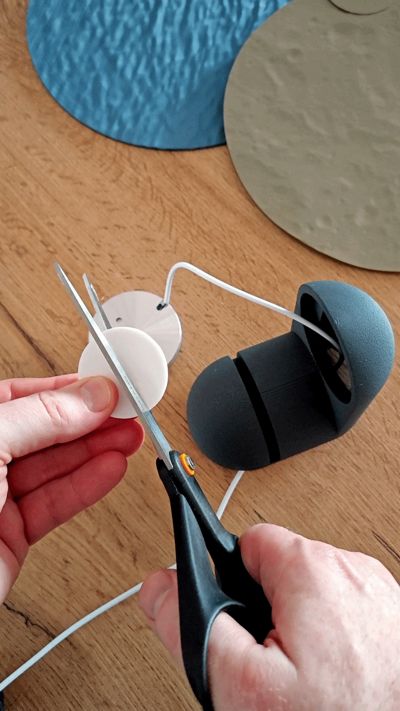
3.) Install the LED Lamp Kit MH001 in the Base. It may be necessary to cut the adhesive pad into two parts and stick them to the edge area. This is where most of the holding surface is.
4.) Insert the reflector into the Base.
Done! 😍
You can use a different reflector at any time. The look varies depending on whether you use metallic Silk filaments, matte filaments or multi-color filaments. Have fun experimenting with different filaments 🤩🥳 (for transparent filament for the reflector, be sure to set the infill to 0% or 100%, otherwise the infill pattern will be visible)
I would be very happy to receive your photo comments and a note about which filament you used.
If you have new ideas for further reflector texture plates, just write them in the comments!
In accessory stores, you can also find RGBW versions with remote control, which instantly turn this lamp into a stylish mood lamp 🤩


Membership
🚀 Get access to commercial licenses by having an active subscription. This includes all my actual makerworld models and future designs. You’re welcome to sell physical prints of my designs.
License
You shall not share, sub-license, sell, rent, host, transfer, or distribute in any way the digital or 3D printed versions of this object, nor any other derivative work of this object in its digital or physical format (including - but not limited to - remixes of this object, and hosting on other digital platforms). The objects may not be used without permission in any way whatsoever in which you charge money, or collect fees.
Comment & Rating (5)