Vintage Cigarette Lamp


Print Profile(1)
Bill of Materials


Description
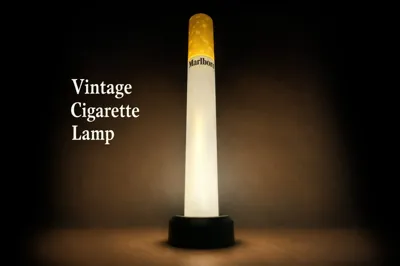
Bring a warm, retro glow to your desk or shelf with this stylized cigarette lamp. The design is clean and modular—three printed parts around a COB LED strip, powered via USB‑C. The yellow “filter” cap acts as a soft diffuser, while the white tube spreads light evenly along the body.
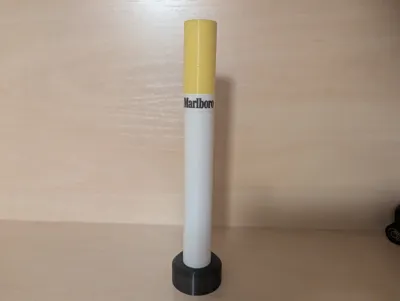
Size: ~230 mm overall height (with base)
Printed parts: 3 (Base, Tube, Filter)
Features
- Simple 3‑part print: Base, Tube (diffuser), Filter (tip).
- USB‑C power: Compact USB‑C adapter PCB hidden in the base.
- COB strip lighting: 200 mm COB LED strip for uniform glow (no LED hotspots).
- Magnet alignment: Small D5×1 magnets to connect the LED strip to the top
- Screw‑secured: Two M2×4 cylinder‑head screws to mount the USB-C PCB
Note on trademarks: The pictured label area can be left blank or customized with your own graphic/decal. Any brand logos are for decorative/personal use only—do not redistribute trademarked artwork.
Bill of Materials (BOM)
Printed Parts
- Base — Geeetech Black PETG
- Tube (diffuser) — Geeetech White Matt PLA
- Filter (tip/diffuser) — Geeetech Yellow PETG
Hardware & Electronics
- 2× M2×4 mm screws (cylinder head)
- 1× USB‑C adapter PCB (5 V output) Link
- 1× COB LED Strip Light, 200 mm Link
- 5× magnets D5×1 mm (also others can be used) Link
- Heat‑shrink tubing
- Wires to solder the COB LED Strip to the adapter
- 3D-Print Glue
For the label i used the Niimbot D110 with transparent labels, you can also use every other labelling machine.
Print Settings (recommended)
General
- Layer height: 0.20 mm (0.16 mm for extra‑smooth tube)
- Perimeters: 2
- Infill: 10–15% (Gyroid)
- Supports: Only for the base
- Brim: 3–5 mm brim for the tube to avoid edge lift (for the tube and filter)
Material Choices
- Tube (White Matt PLA): PLA diffuses nicely and prints crisp.
- Base (Black PETG): PETG adds heat resistance and weight.
- Filter (Yellow PETG): PETG gives a warm tint and resilience; translucent works best.
Part Orientation
- Base: Print upside down and support the area where the tube will be places
- Tube: Print upright for concentric layer lines and even diffusion.
- Filter: Print upright; enable if you want a smoother cap.
Assembly (add your detailed steps here)
High‑level overview (for now):
- Mount the USB-C adapter PCB into the base with the M2 screws

- Insert the COB LED Strip Light from the top of the base

- Solder the LED Strip to the PCB with two small wires (VCC and GND)
- Use 4 magnets and heat-shrink them onto the tip of the LED Strip (use clue to secure LED strip to the heat shrink tube)

- Add 1 magnet to the top of the filter in the prepared cutout
- Glue the Filter and the tube together
- Add your lable (optional)
- Insert the LED strip into the tube until the magnets naturally attract and align
Boost Me (for free)
Comment & Rating (4)