Paracord lanyard anchor


Print Profile(1)
Description
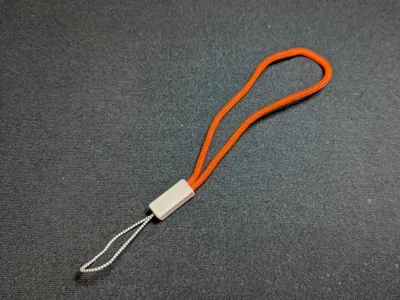
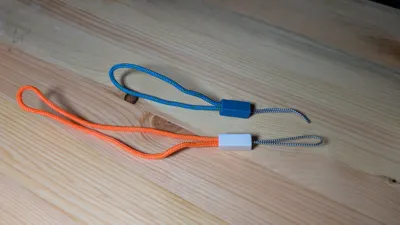
Make your own perfectly-sized lanyard loop.
Assembly instructions below.
Required items:
- thick paracord (3mm is default, can be adjusted in customizer)
- thin paracord (1mm is default, can be adjusted in customizer)
- optional items:
- straightened paper clip, or length of wire
- cyanoacrylate glue (OPTIONAL! Glue is technically not needed)
Notes:
- Paracord thickness may vary depending on type/brand of paracord or utility cord. I recommend taking measurements with calipers (or a good ruler) to get the actual thickness of the material. If the cord compresses by more or less than 50%, adjust the smush_factor to match.
- The cover will snap into place, and can be popped off by pulling on the thicker cord while holding onto the case part. Depending on wall size (default 1mm), the cap retention snaps may tolerate being replaced only a couple times. If the cover stops snapping in place, just apply a little CA glue to keep it in place (permanent-ish-ly).


Assembly instructions:
1. Cut a length of your thinner cord (default 1 mm) that is at least 6-8 times the length of the case. This will give you enough rope to cow hitch the cord around a keyring for example. If you intend to hitch the cord to larger objects, make this cord longer.

2. Slide the ends of the skinny cord through the holes in the hinge part of the jaw piece. Tie the ends of the cord together. I find a simple overhand knot is enough. Pull the loop end of the cord so that the knot sits in the bend of the jaw. When tying the knot try to leave the ends as short as possible.


3a. (If you HAVE a paper clip or wire: SKIP TO STEP 4)
3b. (If you DON'T HAVE a paper clip or wire) Take an extra length of the skinny cord and thread it through the hole in the end of the case. Pass this cord through the loop of cord you tied in step 2. Thread the cord back through the case and out the small hole. (Continue to step 4->5b)


4. Take the two free ends of the thick cord (default 3 mm) and place it between the teeth of the jaw by sliding them in from the sides.

5a. Take the straightened paper clip or wire and put a small hook/bend at one end. Pass it through the hole at the end of the case. Hook the skinny cord and pull it through the case and out through the small hole.


5b. Pull skinny loop of cord through the case using the helper cord set up in step 3a.
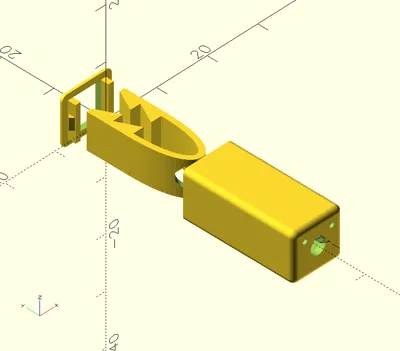
6. Make sure the jaws are oriented correctly so that it slides in easily. The bottom of the case has two small dots on the side that is up/down. The jaws should open left/right according to this orientation, and the cover clips should also sit left/right.

7. If retention_wedge is enabled, you may feel a slight click as the jaws pop past the nubs.
8. Thread the thicker cord loop through the cap and slide it down to the case. Make sure it is oriented correctly and press down. You should feel a click as the cover snaps into place. In normal use, the cover should not come off, but if you want a more secure/permanent solution, you can put a tiny smear of cyanoacrylate glue on the cover before snapping it into place.


DONE!

Comment & Rating (5)