Search models, users, collections, and posts

Air Filter Bambu Lab H2D, H2C, H2S

Print Profile(3)

All
H2D
H2D Pro
H2C
H2S
P1S
X1E
A1 mini
P2S
P1P
X2D
X1 Carbon
A1
X1
A2L

0.16mm layer, 2 walls, 15% infill
Designer
39.3 h
4 plates
4.2(9)

0.2mm layer, 2 walls, 10% infill
Designer
1.2 h
1 plate
5.0(1)

0.16mm layer, 2 walls, 15% infill
50.3 h
7 plates

Open in Bambu Studio
Boost
49
149
42
4
68
30
Released 

Description

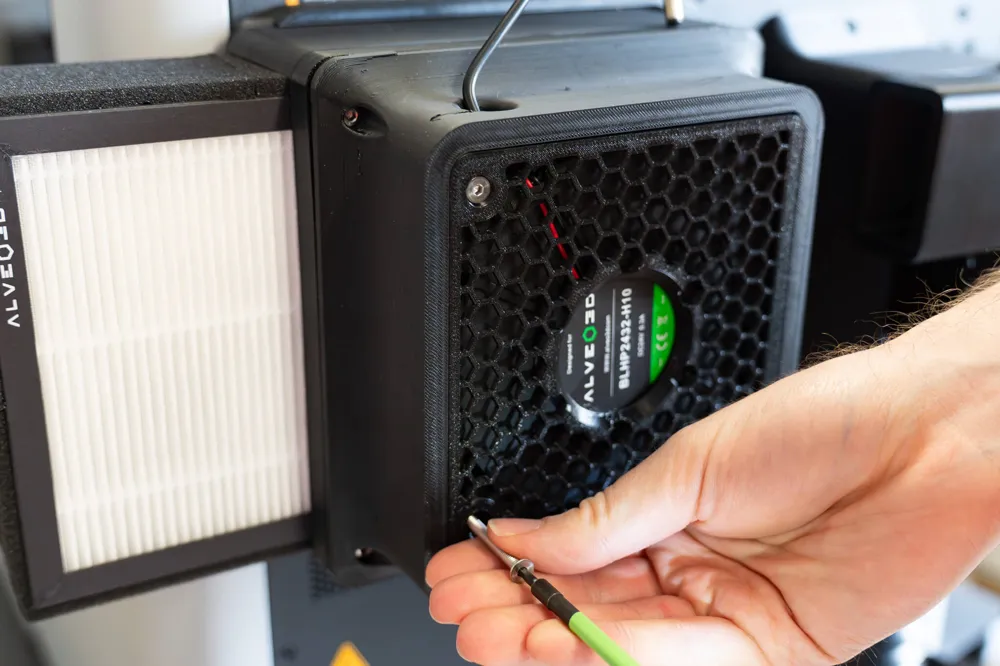
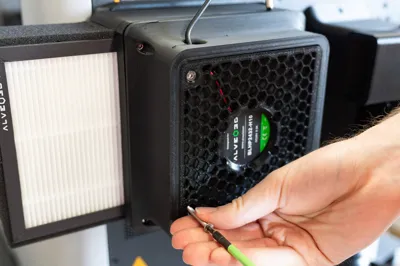
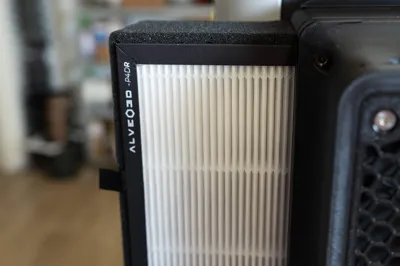
HEPA14 + Activated Carbon Filter for the Bambu Lab H2 Series

The Bambu Lab H2 series filtration kit allows you to 3D print your own kit using the provided STL, STEP files.

It significantly reduces ultrafine particles and VOC (volatile organic compound) levels, ensuring a safer and healthier working environment around your 3D printer.


We recommend printing all parts with PETG filament and a 0.4 mm nozzle for the best results.


Key Features

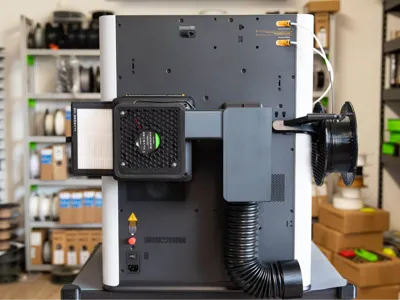
  1. Compatible with the Bambu Lab H2 series.
  2. Allows you to 3D print your own kit using the provided STL file.
  3. Efficient air purification with a HEPA14 + activated carbon filter.
  4. Remote control for easy and convenient operation.
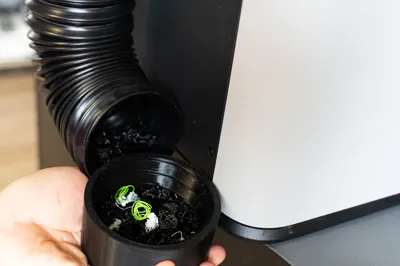
  5. Doubles as a bin to collect filament waste.


For more information: https://www.alveo3d.com/en/product/bambu-lab-h2-series-filtration-hepa14-activated-carbon/


Documentation (1)

Assembly Guide (1)
manual_kit_bambulab_H2S_H2D_H2C_EN _correct.pdf

Comment & Rating (42)

(0/1000)

isn’t the exhaust vent closed during abs/asa etc? when it’s heating chamber? how will it work?
The designer has replied
designer
1
Reply
Hi, this is a circular air system. When you print with ABS or ASA, the hot air is recirculated back into the chamber. When you print with PLA or PETG, you can unplug the second part of the system (which sends air into the chamber).
0
Reply
Replying to @user_200582047 :
for circular air system the air must have intake and outtake right? During materials that require heated chamber, the fan fins are closed on H2 series no? Trying to understand...
0
Reply
Replying to @user_806808912 :
Hi, To install the kit, remove the fan fins. You can find more information in our manual
0
Reply
Print Profile
0.16mm layer, 2 walls, 15% infill
prints very well. The part for the air duct slides into the required position. pla open, petg half open, the rest closed. works well. 100% not sealed due to the sliding process, but I would say 98-99%. the smell is significantly reduced or gone. Caution. Temperatures in the printer can rise. hm, it's a pity that it has to be switched on manually. The sliding also has to be done manually. Still great. printed with extrudr petg and denn's profile
Show original
0
Reply
Feedback by customer
0
Reply
Hi! How does your filtration system ensure that the airflow of the added fan matches the airflow of the internal fan in the Bambu Lab Printer, so that it neither pulls more air than the printer pushes nor restricts the airflow, which could otherwise create suction or back pressure and increase mechanical stress, wear, or noise on the printer’s internal fan?
The designer has replied
0
Reply
We chose to install the system outside the enclosure to avoid any potential conflict with the machine's internal mechanical components, while ensuring optimal air-pressure management. Our fan compensates for the air resistance of our filter, so the airflow is almost the same with or without the filter.
(Edited)
0
Reply
Thanks for your reply. I understand that your fan compensates for the airflow resistance caused by the filter. However, how do you ensure that the airflow of your external fan matches the airflow produced by the printer's internal fan? In other words, how do you prevent the system from either pulling more air than the printer pushes or restricting the airflow and creating back pressure on the internal fan?
0
Reply
Replying to @7krajcar :
We developed multiple prototypes to optimize the balance between inlet and outlet airflow.
0
Reply
Print Profile
0.16mm layer, 2 walls, 15% infill
Support Issue:I ran the print profile without modifications. The part "H2D_kit_4_1" is missing supports, so it didn't print correctly. Really disappointed considering the price of the accompanying kit, I thought the profiles would be optimized and functional!
Show original
0
Reply
Print Profile
0.16mm layer, 2 walls, 15% infill
prints correctly, a little difficulty with assembly, I had to scrape a bit to get a screw to pass and forget the allen key and switch to the electric screwdriver which prevented me from sending everything out the window. since installation is done and 150h of printing since, night and day for smells thank you!
The profile uploader has replied
Show original
0
Reply
Hello, perhaps you have printed the first version. After the update, I think the problem has been fixed. Great, we are happy to know that the kit works well
Show original
0
Reply
Replying to @user_200582047 :
Printed 3 weeks ago/1 month max file taken that day, I don't know if you have modified it since but it works that's the main thing
Show original
0
Reply
Replying to @tilk0 :
Can you share some photos of the kit here please? Thanks again for your feedback
Show original
0
Reply
I like to purchase one of these kits
The designer has replied
0
Reply
Replying to @user_200582047 :
i am sorry i am in the us what is the price
0
Reply
I printed the model. For the Fan Locations part, I tried at 0.6 and at 0.4, but the nuts don't fit well in the bottom one. You still have to rework it quite a bit. And also regarding the 12mm M4 screws that come with the pack, I had to order 14mm M4 screws so they could fit in easily and hold properly. Because otherwise, as soon as there's a bit of play, it's not practical. Conclusion: printed at 0.4 and not at 0.6. We receive two rings at the ring, but in the model we only use one now. The PDF doesn't reflect the latest model, which no longer uses an O-Ring, probably because they're already sticked well enough. Printed in PETG.
(Edited)
The designer has replied
1
Reply
Hello, firstly, thank you very much for your very useful feedback. You are right to print at 0.4.In fact, you printed using an STL file that had a small issue. We uploaded a new version 2 days ago after some users reported the same problem as yours. With the updated file, the screw issue should now be fixed, and we recommend printing model at 0.4 mm. Again, a huge thank you for your help. Please don’t hesitate to share some photos of your prints with us. We always love seeing how our system works for our users. Happy printing!
0
Reply
Print Profile
0.16mm layer, 2 walls, 15% infill
(Edited)
The profile uploader has replied
0
Reply
Hello, thank you for your review. But why 4 stars instead of 5?
Show original
0
Reply
Replying to @user_200582047 :
Just charged it to 5 stars: I had to upscale 0,8% to match Bambu ABS shrinkage. Will upload this profile after my last print of everything fits fine 👍
0
Reply
Replying to @user_2990922146 :
That's great! Please upload your print profile! Huge thanks
(Edited)
1
Reply
Print Profile
0.2mm layer, 2 walls, 10% infill
Printed without problems, good fit on the hose
The profile uploader has replied
Show original
0
Reply
Hello, great! Can you change your last comment, please, to 5 stars?
Show original
0
Reply

License

This user content is licensed under a Standard Digital File License.

You shall not share, sub-license, sell, rent, host, transfer, or distribute in any way the digital or 3D printed versions of this object, nor any other derivative work of this object in its digital or physical format (including - but not limited to - remixes of this object, and hosting on other digital platforms). The objects may not be used without permission in any way whatsoever in which you charge money, or collect fees.