the M2x2 - a Mac mini M4 Case


Print Profile(1)
Bill of Materials


Description
Overview
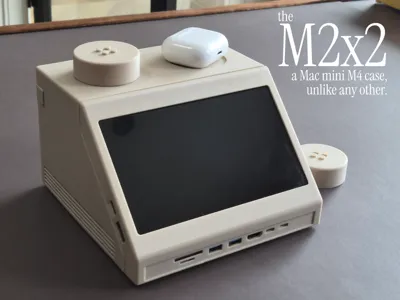
“What if you could combine the silicon power of today with the playfulness and charm of the past?”
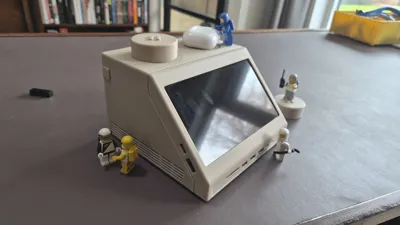
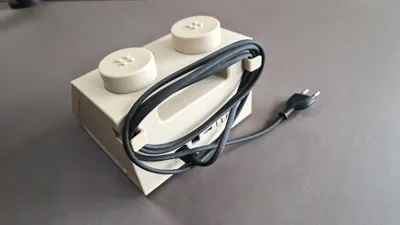
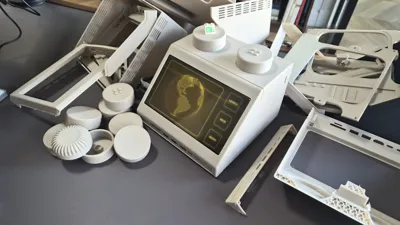
Transform your Mac Mini into a stunning, ~10:1 scale functional version of the iconic computer brick. Blending the aesthetics of the classic Macintosh from the 80s with the playfulness and modularity of the well-known brick system, the M2x2 is a multi-part and modular enclosure that celebrates classic industrial design while housing modern tech.
Key Features
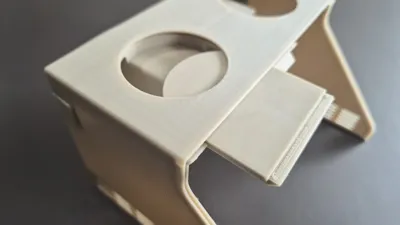
- Connectivity: Quick access to USB-ports and an SD-card reader on the front
- A version of the faceplate without ports is also included in the print profile
- Portability: Fold-out wings on the back for wrapping the power-cord (inspired by older MacBook chargers) and the integrated handle makes it easy to carry it around
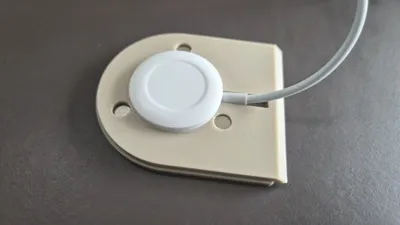
- Modularity: Choose your own functional studs:
- Apple Watch / AirPods Qi wireless charger
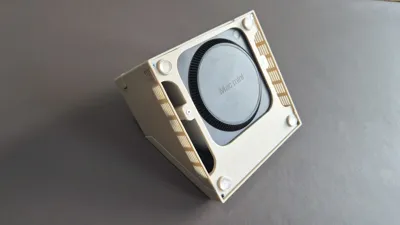
- Volume control / rotary encoder
- Modules with and without brick-compatible studs on top
- Multiple versions of the studs and their mounting shelves are included in the print profile, select the ones that you want to use and delete the others (or print all of them if you want to mix and match)
Boost Me (for free)
If you want to see more models like this, please boost :)
Materials
In addition to the Maker Supply parts listed above, you will also need the following to build your own M2x2:
- 7" IPS Touch Display: https://nl.aliexpress.com/item/1005006881529484.html
- Cheaper alternative: https://nl.aliexpress.com/item/1005008238815241.html
- USB-C Hub: https://nl.aliexpress.com/item/1005008567785865.html
- Apple Watch / Airpods charging cable: https://nl.aliexpress.com/item/1005009120979763.html
- Rubber feet: https://nl.aliexpress.com/item/1005010145628742.html
Assembly
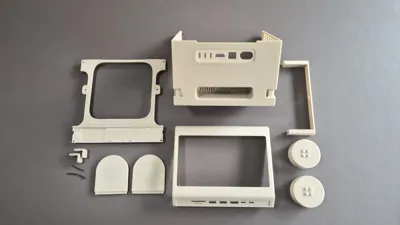
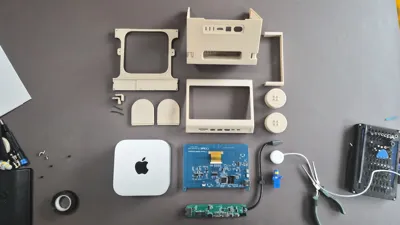
After printing all the parts, the assembly should be pretty self-explanatory, but you can find a step by step guide below:
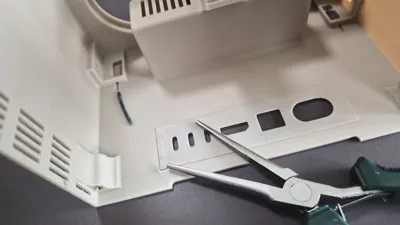
- The fold-out wings are connected to the main body by using a scrap piece of filament.
- Cut of two pieces of filament of your favourite color (will not be visible on the outside) of ~5cm (2 inches)
- Place the wings in the closed-position in the dedicated slot
- Use some needle-nosed pliers to insert the scrap piece of filament in the body and push it through till it doesn’t go any further
- For disassembly it is easier if the piece of filaments is a bit oversized, but you could also cut it flush if desired
- Insert the display into the front of the case. Depending on the tolerances of the print and the exact display you’ve purchased you might have to use two or four heat-set inserts and screws, but for me it is a friction-fit
- Make sure that the ports on the side line up with their respective holes
- Use a little bit of glue to attach the cover for the I/O on the back of the main body, make sure to use the correct orientation! Viewed from the inside of the case, the USB-c ports should be on the left
- Choose which stud-shelves that you intend to use and slide them into the slots on the main body
- Depending on your configuration, place the magnets/Qi-charger in the shelves. They should be friction-fit, but optionally you can use some glue for them
- Use a soldering iron to place the heat-set inserts in the dedicated holes
- 4 for the display (optional)
- 1 for the U-shaped bracket
- 4 for the bottom plate
- Use one of the screws to attach the U-bracket to the center of the body
- Remove the PCB of the USB-hub by pulling the black part around the ethernet-port sideways
- Slide the back of the PCB into the slot on the bottom of the case
- Optionally add little drops of glue to the bottom of the ethernet and/or usb-ports to secure it into place
- Slide the front of the case into the slots of the main body (friction-fit)
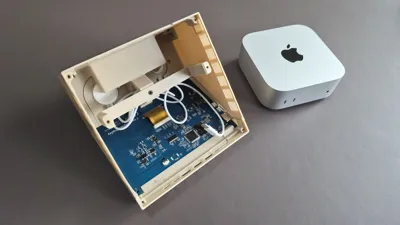
- Place the case upside down and gently insert the Mac mini
- Connect the USB-cables of the USB-hub and/or the Qi-charger to the front ports of the Mac mini
- It’s quite a tight fit and you might have to bend the cable a little bit
- Put the bottom plate into place and fasten the 4 screws to connect it to the body
- To raise the Mac mini a bit and improve the airflow, you can attach the four circular discs with some glue
- Add some rubber feet to the discs
- Turn over the case and magnetically attach the studs on top
- Connect the (power) cables and see if everything works as expected
- All done! You now have your very own M2x2 command center!
License
You may create derivative works based on this object, provided that all such derivative works are published exclusively on the MakerWorld platform and include proper attribution to the original creator. You may not share, upload, host, distribute, or publish this object—or any derivative work of this object—on any other digital platform, marketplace, or distribution channel. Commercial use of this object and any derivative works is strictly prohibited. This includes, but is not limited to, selling, renting, sublicensing, or using the object in any context in which you receive monetary compensation or other financial benefits.
Comment & Rating (6)