Search models, users, collections, and posts
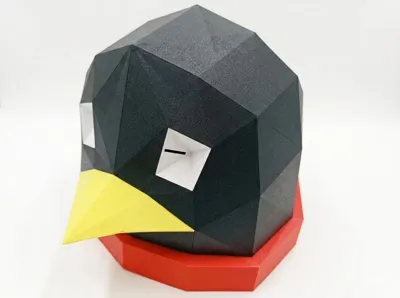
Low-poly style penguin helmet (no AMS required)
IP Report


Print Profile(1)
0.2mm layer, 2 walls, 15% infill
Designer
15.9 h
15 plates
Open in Bambu Studio
Boost
2
7
2
0
0
1
Released
Description
Content has been automatically translated.
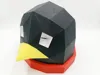
Low-poly Penguin Helmet
The connection method was generated by the kilomelo/3d_printed_paper_craft: Turning low-poly models into paper craft, but 3D printed! project
Boost Me (for free)
This is my first time modeling and printing a complete work, if you like it, please support me
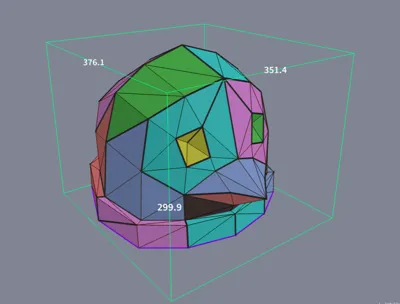
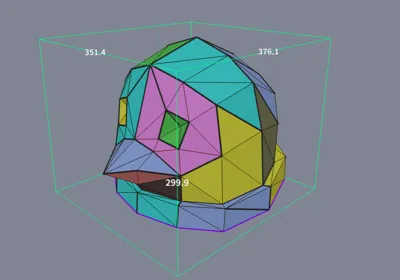
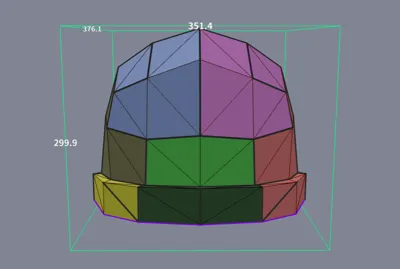
Dimensions
External dimensions: 351.4 x 376.1 x 299.9 mm (Overall, it's a bit large; you can even wear over-ear headphones underneath, but it looks quite rounded)
Since the penguin's head shape is flat and round, it may not sit stably when worn
Printing Instructions
- It's best to print test pieces first to determine the appropriate gap size for the connectors (too large and they will be loose, too small and they will be difficult to install). In the print profile, only a complete pre-arranged printing plate for 0.18 mm gap connectors is provided (multi-color multi-part printing for one plate; if you don't have Bambu Lab AMS, please manually skip parts and print multiple times). For other connector sizes, please arrange them on the printing plate yourself. When removing connectors from the printing plate, be careful as they might fly off!!!
- Printed using Bambu Lab P2S. If using a smaller 3D Printer, to maintain the overall size, please import the original low-poly penguin into the kilomelo/3d_printed_paper_craft project for re-segmentation, then print
- The assembly order can refer to the printing plate order (connectors need to be printed in advance). Essentially, print each segment in order from left to right, top to bottom, and front to back (from the outside towards the bottom of the helmet)
- If you are concerned that internal connectors will be visible through light-colored parts, when connecting different colors, prioritize using a lighter color for the connector. For example, where yellow and black parts connect, use yellow for the connector color
- At the color block joints, some gaps might appear due to printing dimensional inaccuracies of the connectors. You can dynamically adjust the connectors according to your situation. Prioritize larger ones, then try smaller ones to avoid getting them stuck (perhaps force can work wonders). If you encounter places that are difficult to insert, it is recommended to check for alignment; if all else fails, print connectors with a larger gap
License
This user content is licensed under a
Creative Commons Attribution
Comment & Rating (2)