

Print Profile(1)
Description
Robust Wall-Mounted Hay Rack with Clip-On Lid (Rabbits, Guinea Pigs, Chinchillas)
Boost Me (for free)
If your furry friends like this rack and you appreciate our modeling work, please support us by giving this model a Boost! ⭐
It costs you nothing, but it helps us immensely to continue creating new practical (and free!) designs for our little companions. A huge thank you in advance for your support! ❤️
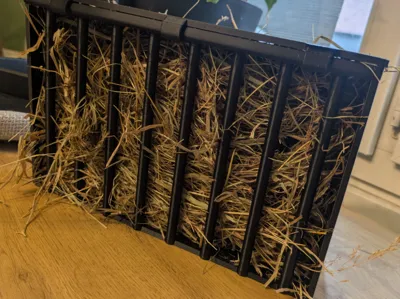
No more soiled and scattered hay everywhere! Carefully designed for the well-being of your small companions, this wall-mounted hay rack is robust, practical, and designed for efficient 3D printing.
✨ Design Highlights:
- Clip-on hinged lid: Thanks to its smart 'C' hinges, the lid clips directly onto the base's reinforcement bar with a slight play to pivot freely. Easy to open for refilling, it prevents your animals from jumping inside!
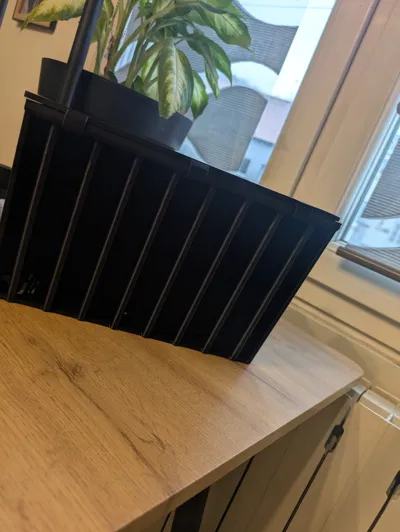
- Reinforced structure: An upper crossbar connects all the rungs, providing excellent rigidity to the entire structure to withstand the most eager animals.
- Optimized angled rungs: The 30 mm spacing between the 8 mm thick rungs allows easy access to hay while significantly limiting waste.
- Designer's touch: A discreet embossed signature (D&M) awaits you at the bottom of the hay bin.
⚙️ Ready-to-use print profile:
The print profile is already optimized and distributed across two plates in Bambu Studio. You don't have to place anything, everything is ready!
- Supports: Already configured for Plate 1 (the base). They are necessary under the top bar to ensure a clean print. Removal is easy thanks to tree supports.
- Layer height: 0.20 mm (Standard).
- Infill: 15% to 20% (Gyroid pattern for optimal strength).
- Walls: 3 to 4 perimeters to properly stiffen the rungs.
- Recommended material: PLA or PETG (PETG is recommended for its resistance and ease of cleaning, but PLA works very well).
🛠️ Assembly and Installation:
- Printing: Simply start printing both plates.
- Cleaning: Carefully remove all print supports from the base.
- Assembly: Take the lid and clip its 3 open hinges onto the upper cylindrical bar of the hay rack by applying very slight force. A small 'click' and it's in place!
- Fixing: The flat back allows for easy and versatile attachment. Personally, I use it for my free-roaming rabbit (no cage): I fixed it directly to the wall with extra-strong double-sided tape (3M type) and it holds perfectly! You can also drill through the back wall (4 mm thick) with a standard drill bit to insert screws, or use cable ties (Serflex) if you have a barred cage.
📸 Share your prints!
I would love to see your own printed models installed in your homes! Feel free to share photos (Makes) of your hay racks with your furry friends enjoying themselves in the comments section.
⚠️ License and Usage:
This model is strictly for personal use only. The resale of 3D files, as well as the commercial sale of printed hay racks based on this design, is strictly prohibited without our prior consent. Thank you for respecting our creative work!
Original design thoughtfully modeled with love by D&M. 🐹🐰
License
You shall not share, sub-license, sell, rent, host, transfer, or distribute in any way the digital or 3D printed versions of this object, nor any other derivative work of this object in its digital or physical format (including - but not limited to - remixes of this object, and hosting on other digital platforms). The objects may not be used without permission in any way whatsoever in which you charge money, or collect fees.
Comment & Rating (4)