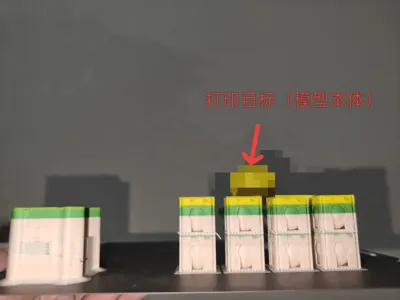
[AMS Multi-color Printing Purge Object] - Bead Combination (model for filament purge)


Print Profile(1)

Description
This model is designed to assist multi-color printing, aiming to reduce filament waste during changes and improve material utilization.
During AMS multi-color printing, filament purging is required for each filament change to prevent color bleed.
This generates a large amount of waste (poop), reducing material utilization. A multi-color model weighing a few grams might require tens of grams of waste to be generated.
Is there a way to avoid this waste?
I noticed that Bambu Lab slicer software allows setting purges to specific objects, meaning the purge material that would otherwise be discarded can be used to fill a specific model.
The advantage is that the purged material can become part of a specific model; the disadvantage is that the color of this specific model is random and changes with the color changes.
However, this disadvantage is not always a disadvantage, for example, for parts where color accuracy is not critical, or for some art pieces.
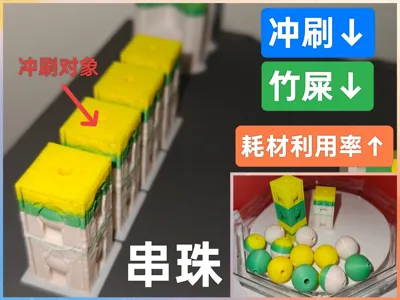
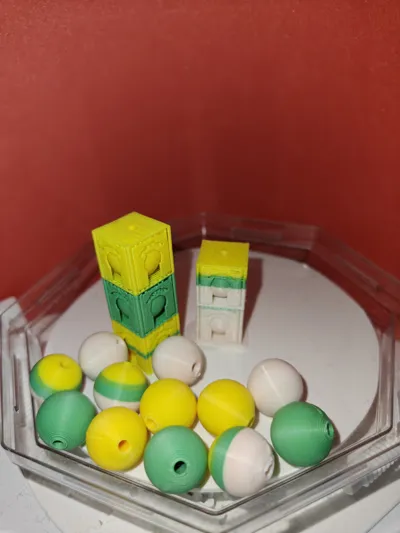
Here, some bead combination models have been designed to be used as purge objects for multi-color printing. After the target multi-color model is printed, you will get randomly colored beads as a byproduct.
The usage is also very simple: First, based on the Z-height of your target model, select a bead combination with a similar height. Place both the target model and the bead combination model on the same plate, and set the bead model as a purge object (Others -- Filament Purge Options -- Purge into this object; for purge objects, all three items should be checked, but for your own target model, make sure NOT to check 'Purge into this object').
Then, adjust the quantity of the bead combination models to achieve a suitable material consumption and print time. The more purge objects (i.e., bead models) used, the less purging is wasted, and the higher the utilization rate; however, please note that the total filament consumption and time will also increase accordingly. Finally, slice and print.

As shown in the figure, the image below shows the slicing results with the bead model set as a purge object and without the bead model. The difference in purge volume is clear.


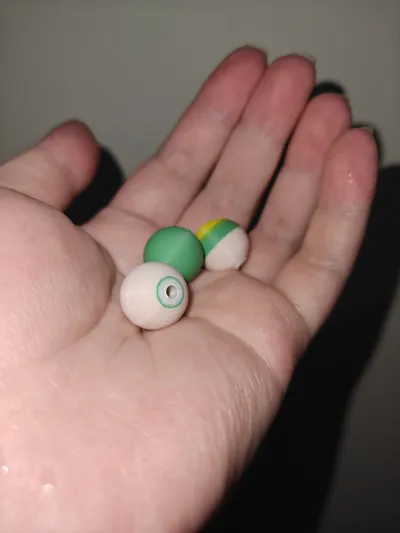
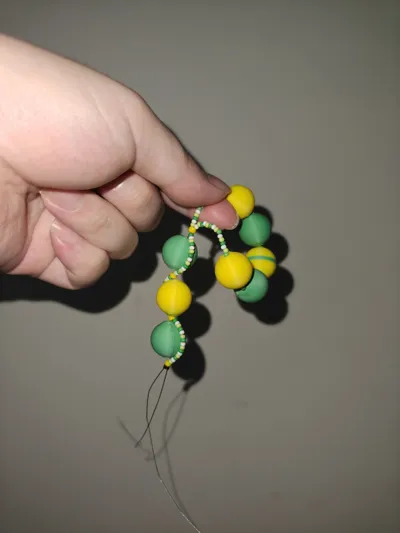
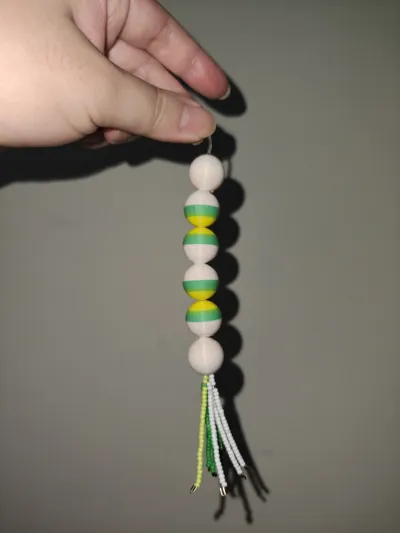
The bead combination models obtained from purging can be used as randomly colored beads after removing supports, which can be strung into a bracelet or used for art and decoration.


Considering not many people can afford H2C, filament changes can be quite bothersome for everyone. My main purpose here is to offer a humble idea and see if anyone has better solutions.
Attached are some parameters specifically set for purge objects, for your reference:
Others -- Filament Purge Options -- Purge into this object (Required)
Support -- Type -- Normal (Automatic); Style -- Snug
Support -- Advanced -- Support Main Pattern -- Rectilinear
Support -- Advanced -- Support Interface Pattern -- Overlapping Rectilinear
Top/Bottom Contact Z Distance: 0.3
Speed -- Other Layers Speed -- Bridge: 30
Boost Me (for free)
License
You shall not share, sub-license, sell, rent, host, transfer, or distribute in any way the digital or 3D printed versions of this object, nor any other derivative work of this object in its digital or physical format (including - but not limited to - remixes of this object, and hosting on other digital platforms). The objects may not be used without permission in any way whatsoever in which you charge money, or collect fees.
Comment & Rating (0)