


Print Profile(1)
Description
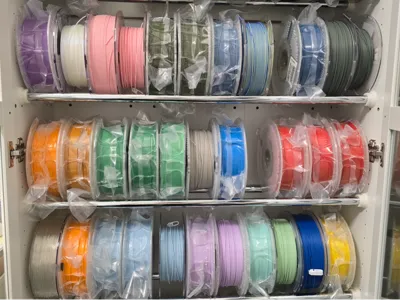
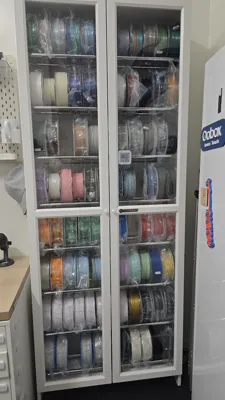
I've been asked about my filament storage cupboard, so here is how I did it. When completed, this system provides 8 levels of storage in an Ikea Billy bookcase, storing between 80 and 90 spools, depending on width. It's a bit more involved than other models, but once completed it's solid as a rock and will last years.
SAFETY NOTE: As the internal shelving is left out, the cupboard lacks structural rigidity. When full it will have quite a high center of mass and a total weight of over 100kg. You do NOT want this falling over, especially not on a person. For this reason, once it is assembled and in place, it must be top screwed to the wall at a stud point. Drywall anchor is not enough. THIS IS NOT OPTIONAL.
MATERIAL NOTE: Maximum strength and interlayer adhesion is needed for this to work in the long term. I do NOT recommend PLA or PETG for this, I recommend ASA with a slightly higher temperature print to improve layer fusing.
You need:
- 1x jig with the two arms
- 1x jig with 1 arm
- 16x rod mounts
- 32x rod securing pieces (the small U shaped pieces)
- 19mm diameter chrome bar cut to 750mm lengths (as accurately as possible!!)
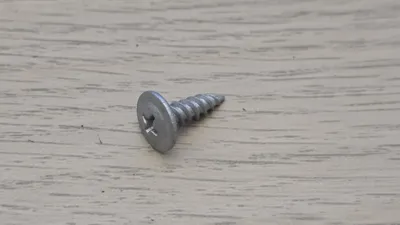
- 16 button head screws, 8G 20mm.
- 2x 1m lengths threaded rod, m4 or m5 is fine and 4x bolts to match.
- Cable ties.
Pilot Hole Locations:
The two jigs are used to get precise placement of the screw holes. You will need one of each of these. They are used before assembling the cupboard to mark and drill pilot holes for the bar mounts. Unfortunately, I've already assembled mine so I can't produce photos of these parts in use, but the descriptions below ought to be enough.
The jig with two arms is used to get the holes spaced evenly up and down the sides. You place it on the front edge of the inside surface of the side panel. Start at the bottom, and mark both holes. Slide the jig up so that one hole is exactly over one of the ones you just marked, and mark the other one. Keep doing this until you get to the top. These are precisely sized to give you 8 levels of filament storage.
Once you have all 8 marked on both panels, use the second jig in the same way, but this time use it to get the position of the second hole for each level.
You should now have 16 marked spots on each of the side panels on the inside surface, which will correspond to the 16 bars that you need. Pre drill these with 1.5mm pilot holes (1mm and 2mm should also be fine) to a depth of 10mm.
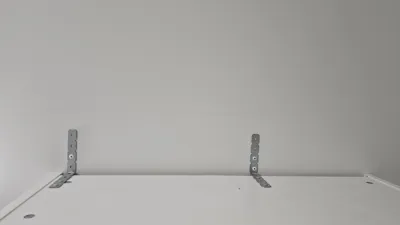
Mount the bar holders
Before you begin assembly, screw the bar holder mounts to these holes with the button head screws, being sure to have the opening upwards facing. The pilot holes should make this easy.
Assemble the cupboard
Now, assemble the cupboard, leaving out all internal shelving. Be careful, as without the internal shelving the cupboard is quite flimsy.
Once assembled, place the bars into the holders. Use the holding pieces and cable ties to lock them down.
At this point it's complete but you need to use the threaded rod to do the job that the shelves would have done.
Support the side panels
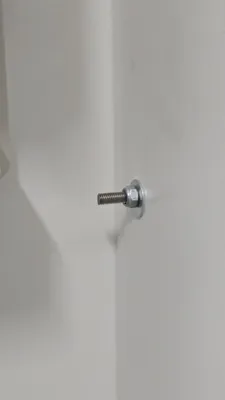
To stop the side panels from bending outward and allowing the backing board to slip out, we will use threaded rods to clamp them together.
Drill two holes in the sides of the cupboard, about 2cm inward from the back board and at the level of shelves 4 and 6 (counting from the bottom) that allow the threaded rod to pass through the whole cupboard. Use washers and bolts to firmly clamp the side panels towards each other, and thus prevent the back panel from slipping out.
Attach to wall
You now have a completed storage cupboard that will hold a LOT of spools. It is not going to be stable, so wall attachment is CRITICAL. You must screw it into a stud, not just the plaster / drywall, and I recommend at least two such mounts. 100kg of filament spools falling into someone followed by a cupboard will cause serious injury.
Enjoy
You now must stand back and admire your work. This step is not optional.
Comment & Rating (0)