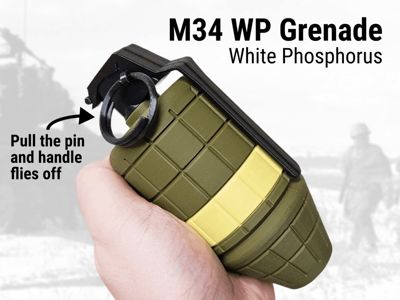
US M34 White Phosphorus Grenade with Flying Handle


Print Profile(4)


Bill of Materials


Description
Want more like this model? Check out these collections: Grenades | Artillery & Ammo | Life-size Weapons | Missiles & Bombs | and more (3)… |
Summary
Want a realistic replica of the M34 White Phosphorus grenade that has a spring-loaded flying handle when you pull the pin? This grenade was used in the Vietnam war and has been featured in many games and movies since.
Background: The M34 White Phosphorus grenade is a smoke and incendiary device historically used by military forces for signaling and screening operations. Upon deployment, the device creates a dense cloud of white smoke used to obscure troop movements or mark specific locations on a battlefield.
Spring options (for flying handle)
- Metal Spring (recommended) – if you have a metal spring, even a pen spring will usually work, then print the metal spring profile. It is designed to work with the Bambu Store's 0.5x7x12mm spring (linked lower on the page). If you use a pen spring, you can usually cut it in half and get two springs.
- Plastic Spring – if you don't have a metal spring, but still want the handle to fly off, then print the plastic spring profile.
- If the spring eventually wears out, just print a new one and pop it in.
- Don't leave the spring under tension when not using it as it will wear out much faster.
- Avoid Matte and Silk filament for the spring itself, Basic and Metal work better.
- No Flying Handle - if you don't want the handle to fly off and just want a grenade model, simply print either version and don't put in a spring.
Filaments used
- Black
- Sunlu Black Silk (Amazon link) or Bambu Metal Iron Gray
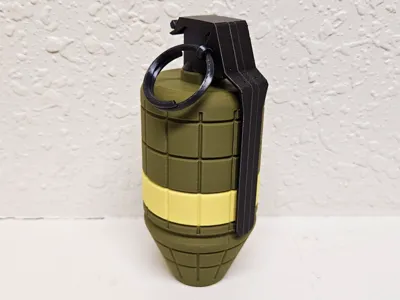
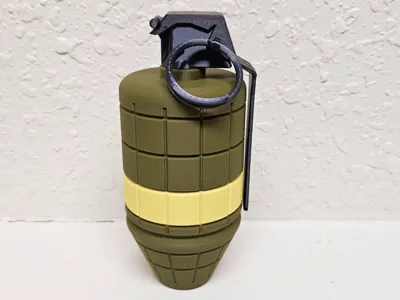
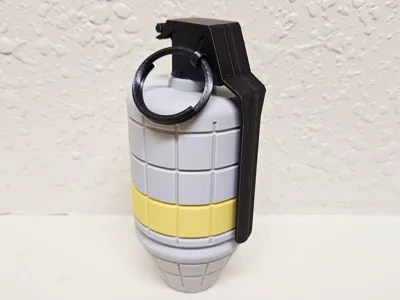
- Green or Gray
- Bambu Matte Dark Green (used in model photos)
- A light green would be most realistic
- Bambu Matte Ash Gray or a similar filament is also realistic
- Bambu Matte Dark Green (used in model photos)
- Bambu Matte Yellow
Metal Spring Version Assembly
1. Insert the tiny peg/plunger into the grenade topper.

2. Then insert the metal spring the same way you inserted the plunger/peg.

3. Lastly, screw the top onto the grenade body, doing this upside down is much easier. (this graphic shows the flashbang, but its the same style of assembly for this grenade too)

Plastic Spring Version Assembly
1. Insert the printed peg into the topper, make sure it sticks out the bottom, if not turn it until it does.

4. Lastly, screw the top onto the grenade body. Its much easier to do upside down. (this graphic shows the flashbang, but its the same style of assembly for this grenade too)

Boost Me (for free)
If you enjoy my work and would like to help support my ability to share more (and even better) models in the future, please consider boosting or buying me a coffee at the link below. Your support is what helps me have enough filament and supplies to do all the print testing required for my models to be high quality and easy to assemble. It takes a mountain of test prints for each model. Thanks :-)
| Here's a link to my Buy Me a Coffee page, thanks for the support! |
( ! ) Do not sell my prints — I have not authorized selling prints. If you sell my prints on Etsy, Amazon, eBay, etc, I will find out.
This 3D print is intended for decorative purposes only and is not suitable for children. Small parts may present a choking hazard and edges may be sharp. By printing this 3D print, you assume all liability for any harm to yourself or others resulting from its use.
License
You shall not share, sub-license, sell, rent, host, transfer, or distribute in any way the digital or 3D printed versions of this object, nor any other derivative work of this object in its digital or physical format (including - but not limited to - remixes of this object, and hosting on other digital platforms). The objects may not be used without permission in any way whatsoever in which you charge money, or collect fees.
Comment & Rating (20)