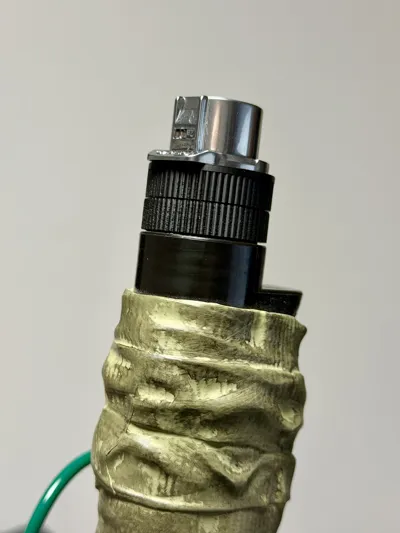
Spengler / 84 Neutrona wand CNLINKO end cap


Print Profile(1)

Description
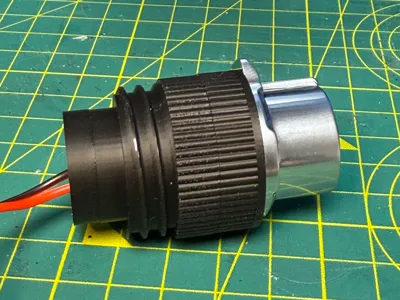
⚡ Haslab Neutrona Wand CNLINKO End Cap V2 ⚡
This is Version 2 of my CNLINKO end cap for the Haslab Neutrona Wand.
This version has been completely rebuilt from the ground up to work with my existing remix of the Neutrona Wand sled system while introducing one key upgrade: a swivelled hose connection.
Once installed, the CNLINKO connector can rotate freely within the end cap (you can determine the tightness). That means when your hose moves, twists, or shifts whilst out 'busting, it won’t slowly unscrew itself from the wand. The fitting stays tight to the wand body, dramatically reducing the risk of connection failure mid event.
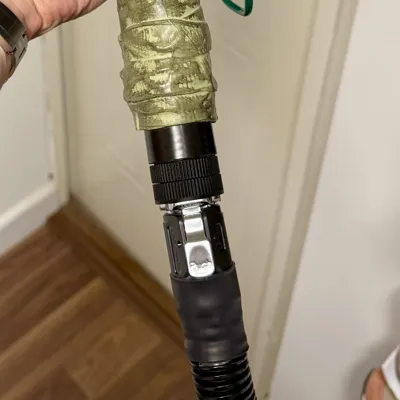
After completing this modification, you’ll be able to run a quick release hose kit to your Haslab Proton Pack, or the upcoming 1984 Hasbro pack.
This modification is compatible with the Tools and Talent hose upgrade and any wand modification / upgrade that used a CNLINKO LP-20 connector.
.
This is a single colour print and does not require AMS.
Boost Me (for free)
👻 If you like this print, a boost is a great way to support me on here 👻
🧰 Parts and tools needed
🔩 Parts required
To complete this modification, you will need:
- 1x CNLINKO end cap V2 (this model)
- 1x Neutrona Wand sled (just print the sled, not the end cap from that model)
- 1x CNLINKO LP-20 (or your preferred CNLINKO same size connector)
- Small amount of suitable wire (cut it slightly too long and trim before the final soldering)
- Battery terminal connectors
- Heat shrink
🪛 Tools required
- Soldering iron
- Wire snips
- Lighter / heat gun (heat shrink)
·····
🖨️ Printing setup
This is a single colour functional print.
Build plate: Any - Pick the most suitable for the filament you will be using.
Filament: Black filament, if home use only, PLA will work well. For outdoor conditions, please choose a suitable filament for those conditions.
Supports: Supports are used and will need to be removed before assembly.
Print settings: This profile has been setup for PLA (my pack stays at home!) please adjust the filament settings accordingly for your filament of choice.
·····
🔥 Tips before you start
Having a clean print bed and hot end free from filament is essential in getting that crisp, clean look. Here's some tips on what to do to get the best print possible;
🧼 Cleaning
Clean your plate first, following your usual routine. Dish soap works best, clean and then rinse thoroughly, ensure the plate is dry and free of debris before putting back in the printer.
Leftover filament residue on your hot end can cause unwanted marks on visible outer surfaces. Please inspect your hot end before starting the print, if you spot any clumps or leftover filament, follow Bambu's recommended cleaning guide to remove.
·····
🏗️ Assembly
This section assumes you are comfortable doing some very basic soldering work.
🔧 What you will need

🧩 Step-by-step overview
Soldering the CNLINKO connector
This needs to be done before assembling the end cap.Prepare your wires, and put suitable heat shrink over them before soldering starts. The heat shrink will need to be just big enough to fit over the CNLINKO connectors that we are soldering into. My advise would be to prepare the CNLINKO connectors with solder, then heat that and insert the wire

The red wire needs to be soldered into into 1, black into 2. Solder in place, then using either a lighter or heat gun (being careful to only melt the heat shrink, not the plastic components in the CNLINKO connector.

Assembling the end cap
Once soldered, it's time to screw the CNLINKO into the first part of the end cap, it will be tight, so please take your time and screw it in flush, making sure you pokes the wire through the hole of the cap. You can then slide over the second part as pictured.
With both parts in place, you now need to screw the end fitting on. This is what keeps the end cap together. If you want minimal “swivel” movement, do this up very tight, you shouldn't need to glue this, but please check out it fits together first. If you want it looser to allow for more movement, then I would recommend glue, as you won't be screwing it tight.
If using glue, I'd recommend a very small amount of superglue on the inside of the small circular end piece, take care when doing it and use it sparingly.
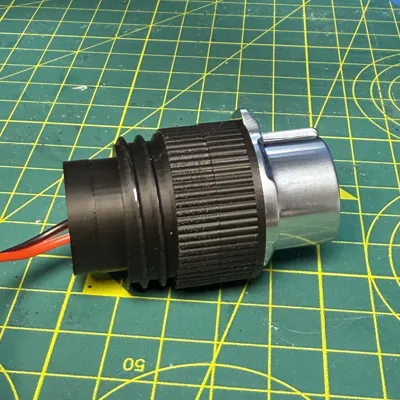
Your connector should now look like this
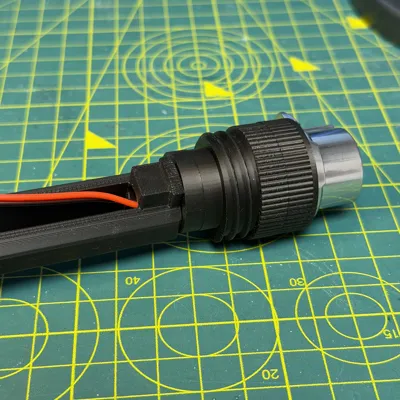
Attaching to the sled and completing the wiring.
Thread the wires through the sled entrance (the hollow tube at one end) and pull the end cap through until the hollow tube is inside the new end cap
I now loop the wire around the floating block within the wand like so (two pictures to show the loop loose and then tightened). I make sure I leave enough slack between the loop and the connector to allow the wire to turn. Doing this means that the turning of the hose won't be putting extra stress on the sled connectors.

Now poke the remaining wire through the hole at the bottom and we are ready to wire up the battery terminal end of the sled.
First, you need to straighten out part of the connectors, ready to be inserted into the sled. I slimply use a pair of pliers for this job (above is before, below is after straightening). Don't worry about the end being perfectly flat, as that can help the connector stay in place without glue.
Now straight, I'd recommend “keying” up the surface of the connector to make it easier to solder to, something as simple as an emery board can do it, or a small file. Once done, you need to put the connectors in place and then trim the wire at the correct length to allow it to poke through the hole and give you somewhere to solder to.
I don't suggest trying to put the heat shrink on at this point, there's not enough room, so I slide it over the connector once soldered (fiddly, but easy enough to do).
The sled is marked with + and - to show you where each wire should go, + for Red, - for Black
Solder your wires up, my soldering is a little rough here, but you get the idea
Apply your heat shrink and carefully heat it, taking care not to melt your new sled!
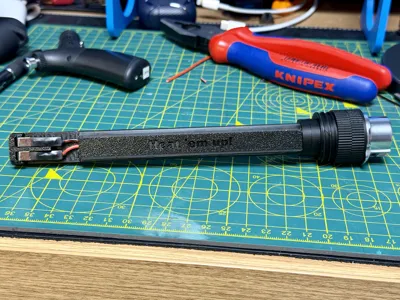
Your quick release sled connector (V2!) is now complete :)

Fit into the wand
Before installation, confirm that Pin 1 on the connector and the + terminal on the sled have a positive connetion with a multimeter, then repeat this with Pin 2 and the - connector on the sled.
Then insert the sled into the end of the wand, then holding the CNLINKO, screw into the knurled part nearest the wand into the wand, this will be tight, take your time and get it as flush as you want to.

- Plug it in and Heat 'em up!
All that's left now, is to fire that wand and pack up and go cause some havoc at the Sedgewick hotel. .
·····
🧰 Troubleshooting
Model Doesn’t Match Preview / Wrong Colours / Odd Layout / Dots instead of lines or shapes
If your model looks misaligned or prints incorrectly, please make sure you are using the supplied 3MF print profiles, not the raw STL or STEP files.
The 3MF files contain all the model specific tuning, including:
- Correct supports needed to print
- Line width settings
- Print specific adjustments
To use them properly:
- Either click “Open in Bambu Studio” directly from MakerWorld,
- Or download the .3MF file and open it manually in Bambu Studio.
Avoid using the raw STL or STEP files unless you specifically want to rebuild your own profiles, they do not include the tuned print settings.
·····
⚠️ Copyright / Safety / Final notes
This is an aftermarket modification part and is not affiliated with or endorsed by Hasbro.
Please note that installing this part is done at your own risk and may void your warranty.
🌡️ Filament choice matters
If you are planning to attend conventions or wear your pack for extended periods, especially in warm convention halls or summer outdoor events, please consider your filament choice carefully.
PLA can soften under sustained heat, particularly in enclosed spaces or under stage lighting. If you expect higher temperatures, PETG, ABS or ASA may be more suitable for long term durability.
Always match your filament to the environment you expect to endure.
Take your time during the build, test thoroughly, and enjoy upgrading your wand.
License
You shall not share, sub-license, sell, rent, host, transfer, or distribute in any way the digital or 3D printed versions of this object, nor any other derivative work of this object in its digital or physical format (including - but not limited to - remixes of this object, and hosting on other digital platforms). The objects may not be used without permission in any way whatsoever in which you charge money, or collect fees.
Comment & Rating (0)