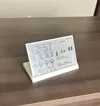
Smart E-Paper Desk Dashboard (ESP32 • 7.5” )


Print Profile(3)

Description
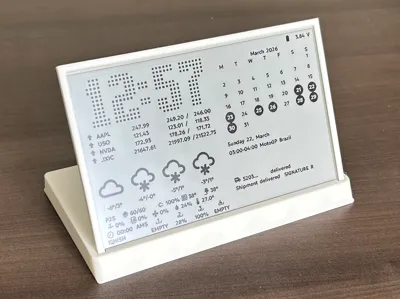
Turn your desk into a smart dashboard — no glare, no noise, no distractions.
✔ Always-on display (perfect for office / home)
✔ Ultra low power (e-paper)
✔ Clean minimal design
✔ ESP32 powered
Use it for:
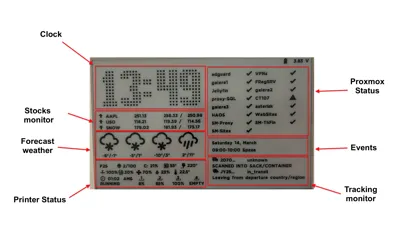
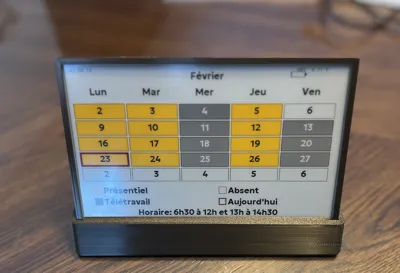
- Clock
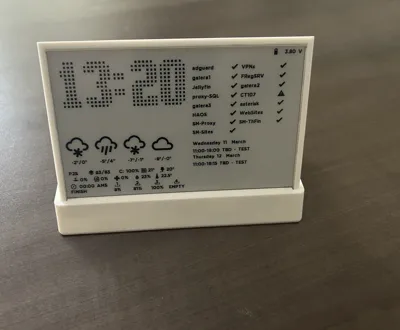
- Weather forecast
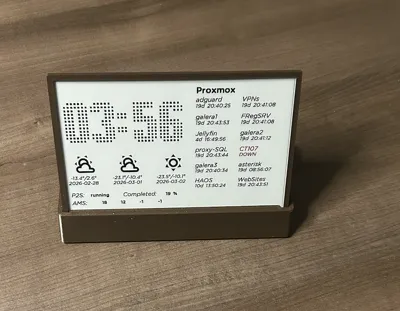
- 3D printer status
- Proxmox monitor
- Calendar events
- Shipment tracking
- Stock market monitor
- ZigBee
PS: The Git repository where you find everything. This project required a minimum soldering skills.
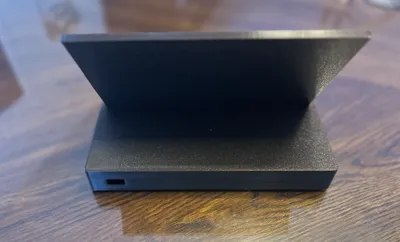
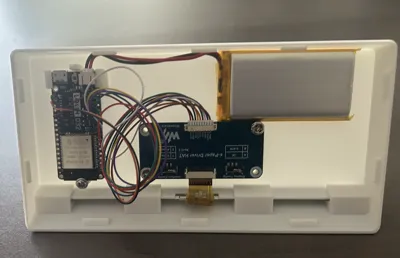
Hardware Choice
I chose the ESP32 C6 Supermini for this project, it is an economical version which has everything to manage the wifi, zigbee, battery.
Display Refresh Optimization
Depending on the type of display and your implementation (I’ve published sample code to help you get started), it is possible to refresh only part of the screen.
Partial refresh has two major advantages:
- It significantly reduces update time
- It makes the display much more responsive, which is ideal for dashboard-style applications
Hardware Requirements
To build this project you will need:
- ESP32 (I picked the ESP32 C6 supermini), but you can use an ESP32 C6 Firebeetle 2 or other, but you need to adapt them.
- 7.5" eInk display, the display must be compatible with the library GxEPD2 (use a BW for a low refresh rate)
- Waveshare HAT driver
- LiPo battery (can be fixed using bi-adhesive tape)
Disclaimer
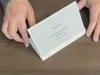
All work involving the display must be carried out with great care.
The enclosure is designed for a precise fit. If you encounter resistance or difficulty inserting any component, do not apply force, as this may permanently damage the display.
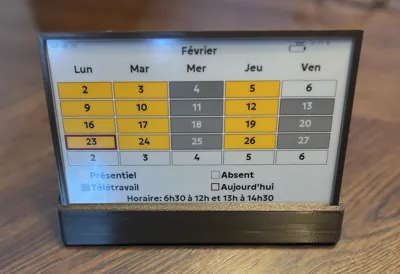
Custom Displays
In the Git repository you will find an example showing how to create your own display layout. You will find the info how to upload it the precompiled version.
You can also explore ESPHome as an alternative approach.
Please have a look at my other projects : https://makerworld.com/en/@VoIP
Boost Me (for free)
Your Boosting helps me, then if you can will be appreciated
License
You shall not share, sub-license, sell, rent, host, transfer, or distribute in any way the digital or 3D printed versions of this object, nor any other derivative work of this object in its digital or physical format (including - but not limited to - remixes of this object, and hosting on other digital platforms). The objects may not be used without permission in any way whatsoever in which you charge money, or collect fees.
Comment & Rating (22)