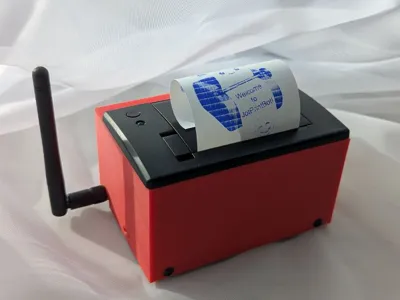
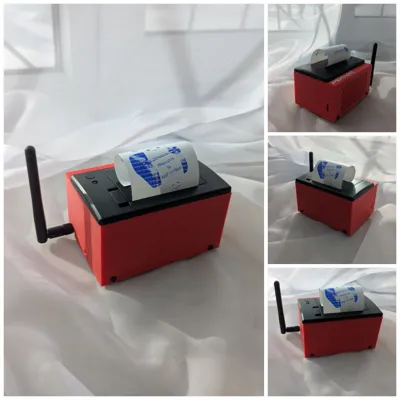
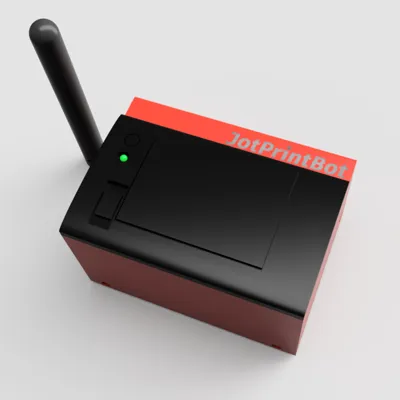
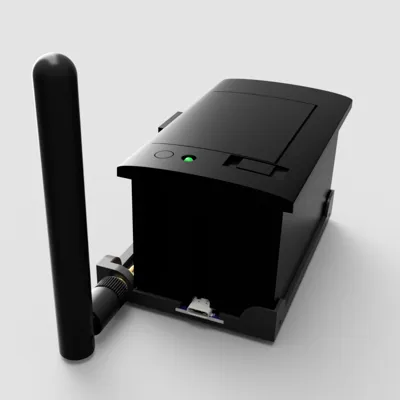
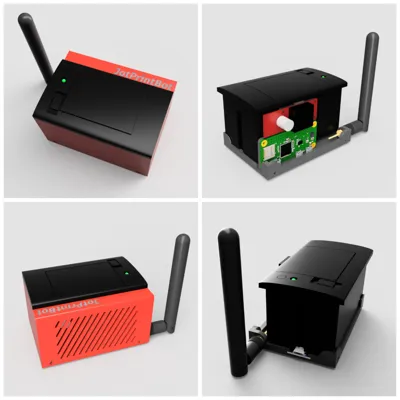
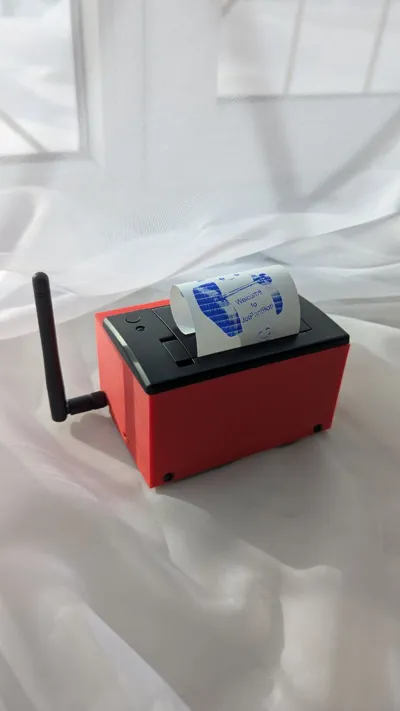
JotPrintBot: Portable Telegram Thermal Printer


Print Profile(1)

Bill of Materials


- CSN-A2 Micro panel printer (ESC/POS, 9V/12V) x 1: Manual https://cdn-shop.adafruit.com/datasheets/CSN-A2+User+Manual.pdf
- Raspberry Pi Zero W x 1: Manual https://cdn.sparkfun.com/assets/learn_tutorials/6/7/6/PiZero_1.pdf
- KIS-3R33S DC-DC step-down module x 1: Datasheet https://www.datasheetcafe.com/wp-content/uploads/2016/05/KIS-3R33S.pdf
- USB Type-C QC/PD/AFC Trigger board x 1: Datasheethttps://manuals.plus/asin/B0CDWXN1WR
- 2.4 GHz Wi-Fi antenna 2 dBi RP-SMA x 1:
- M3 × 4 mm bolts x 13: round head or flat head
- M2.5 × 5 mm bolts x 2:
- M3 threaded inserts (e.g. 4 mm length) x 8:
- 24 AWG wires: red, black x 2: ~15 cm each
- 28 AWG wires: red, black, green, yellow x 4: ~10 cm each
- Quick Charge / PD power supply Type-C x 1: supports 12 V output when used with the PD trigger module
Description
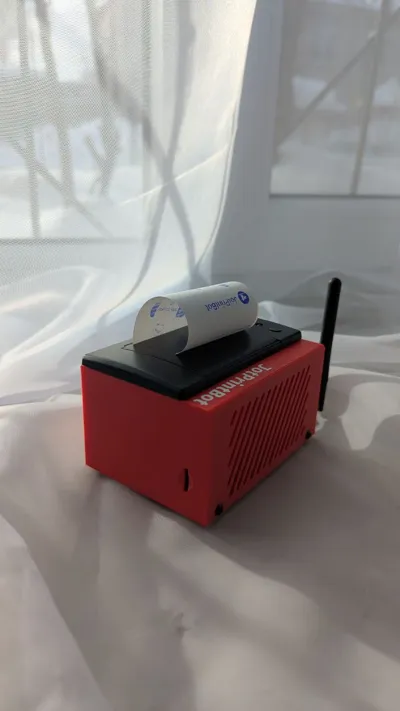
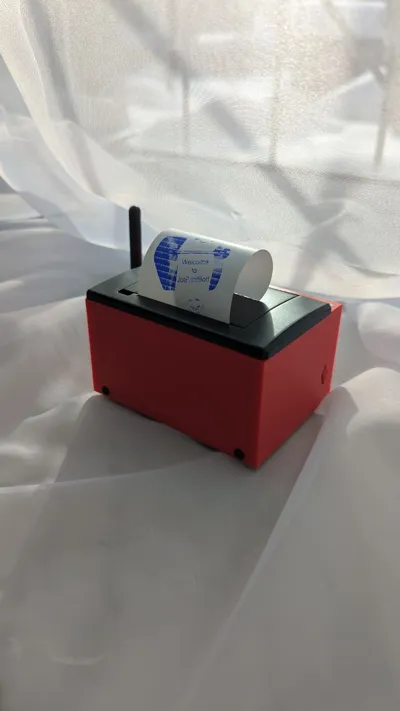
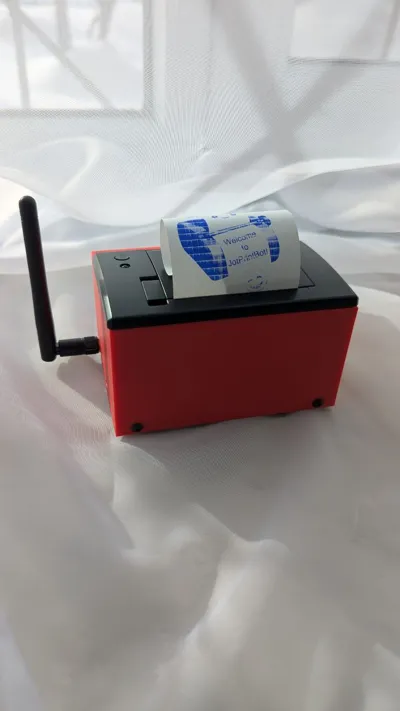
JotPrintBot: Portable Telegram Thermal Printer Case for Raspberry Pi Zero W and CSN-A2
Project Overview
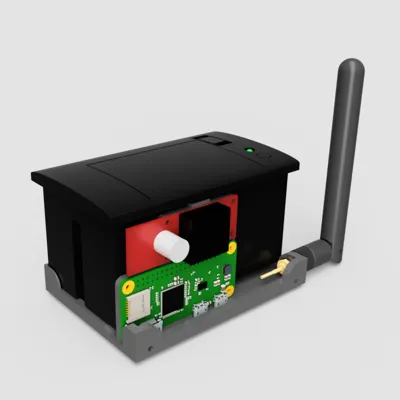
JotPrintBot is a compact, portable device that turns a standard thermal receipt printer into a smart Telegram-connected printer. Send text messages, QR codes, or images via Telegram, and the bot will queue and print them on the CSN-A2 TTL thermal printer. This project includes a custom 3D-printable case to house the Raspberry Pi Zero W, printer, and electronics for a clean, integrated build.
Key Features:
- Telegram Integration: Print messages, photos, and QR codes directly from Telegram chats.
- Portable Design: Powered via USB-C with PD/QC trigger for 12V output, stepped down to 5V for the Pi.
- Customizable Case: 3D-printable enclosure with space for wiring and easy assembly.
- Software: Open-source Python bot with support for text formatting, image enhancement (contrast, sharpness, dithering), and more.
- Hardware Compatibility: Designed for CSN-A2 printer and Raspberry Pi Zero W, but adaptable to similar ESC/POS printers.
This build is perfect for makers who want a fun IoT project: create a "message printer" for notes, receipts, or even automated alerts. The case ensures everything is secure and portable.


Bill of Materials (BOM)
Electronics
| # | Component | Quantity | Notes / Links |
|---|---|---|---|
| 1 | CSN-A2 Micro panel printer | 1 | ESC/POS, 9V/12V. AliExpress |
| 2 | Raspberry Pi Zero W | 1 | AliExpress |
| 3 | KIS-3R33S DC-DC step-down module | 1 | Datasheet, AliExpress |
| 4 | USB Type-C QC/PD/AFC Trigger board | 1 | 5/9/12/15/20V. Manual, AliExpress |
| 5 | 2.4 GHz Wi-Fi antenna 2 dBi RP-SMA | 1 | AliExpress |
Fasteners
- M3 × 4 mm bolts (round or flat head) — 13 pcs
- M2.5 × 5 mm bolts — 2 pcs
- M3 threaded inserts (e.g., 4 mm length) — 8 pcs
Wires
- 24 AWG: red, black — ~15 cm each
- 28 AWG: red, black, green, yellow — ~10 cm each
Power Supply
- Quick Charge / PD power supply supporting 12V output.
Tools
- Mini side nippers
- Cyanoacrylate glue
- Allen keys (for bolt sizes)
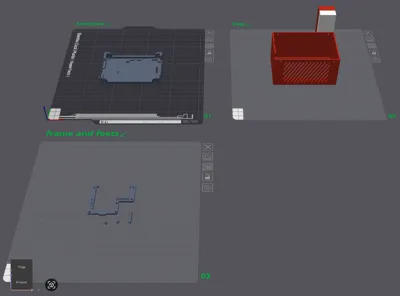
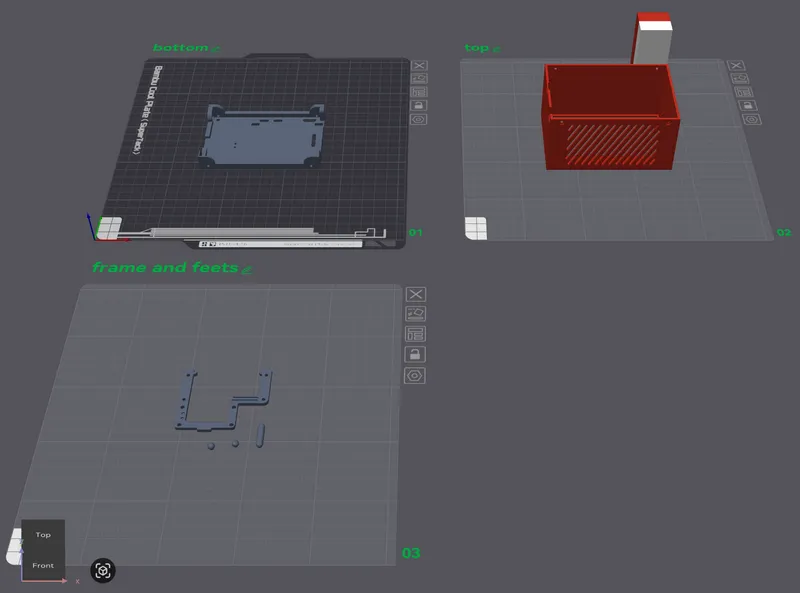
3D Printing Files
All files are located in the assembly/3D_printing/ folder of the GitHub repository.
| File Name | Description | Format |
|---|---|---|
| Printer Case.step | Full model for customization and printing | STEP |
| Printer Case.3mf | Bambu Lab Studio project with print profile | 3MF |
Download the files from GitHub: assembly/3D_printing.
Print Settings
- Material: PLA
- Layer Height: 0.08 mm
- Walls: 3
- Top Layers: 9
- Bottom Layers: 7
- Infill: 15%
- Supports: Yes (normal + snug)
- Brim: Recommended for small parts like legs
Use cyanoacrylate glue to attach the legs to the case after printing.
Assembly Instructions
Step 1: Wiring the Electronics
Follow the schematic below for connections. Double-check polarity to avoid damage.

- Set the PD trigger board to 12V mode (as marked on the board).
- Connect PD trigger outputs to printer power: VCC out → VH (+12V), GND out → GND.
- Connect PD trigger outputs to step-down module: VCC out → IN+, GND out → IN-.
- Connect step-down outputs to Raspberry Pi: OUT+ → PIN 2 (+5V), OUT- → PIN 6 (GND).
- Connect printer serial: RXD → PIN 8 (TXD/GPIO14), TXD → PIN 10 (RXD/GPIO15), TTL GND → PIN 14 (GND).
Enable serial on Raspberry Pi: Run raspi-config → Interface Options → Serial Port (disable login shell, enable serial port).
Step 2: Assemble the Case
- Insert M3 threaded inserts into the case holes (use a soldering iron or insert tool).
- Mount the Raspberry Pi Zero W using M2.5 × 5 mm bolts.
- Secure the CSN-A2 printer with M3 × 4 mm bolts.
- Route wires through the case channels and secure components.
- Attach the legs with glue.
- Close the case with remaining M3 bolts.
Step 3: Software Setup
- Clone the repository: git clone https://github.com/antonixus/JotPrintBot.git.
- Create venv and install dependencies: python -m venv venv, activate, pip install -r requirements.txt.
- Run python setup.py to create .env and logs.
- Edit .env with your BOT_TOKEN, ADMIN_ID, WHITELIST, and other settings.
- Launch: python bot.py or install as systemd service.
For full software details, see the GitHub README.
Additional Resources
- GitHub Repository: https://github.com/antonixus/JotPrintBot
- Printer Manual: CSN-A2 User Manual
If you print this case, share your makes and feedback! Happy printing! 🚀
License
You may create derivative works based on this object, provided that all such derivative works are published exclusively on the MakerWorld platform and include proper attribution to the original creator. You may not share, upload, host, distribute, or publish this object—or any derivative work of this object—on any other digital platform, marketplace, or distribution channel. Commercial use of this object and any derivative works is strictly prohibited. This includes, but is not limited to, selling, renting, sublicensing, or using the object in any context in which you receive monetary compensation or other financial benefits.
Comment & Rating (0)