
Eibos Dry Pods for AMS 1 V1
Print Profile(2)

Bill of Materials

Description
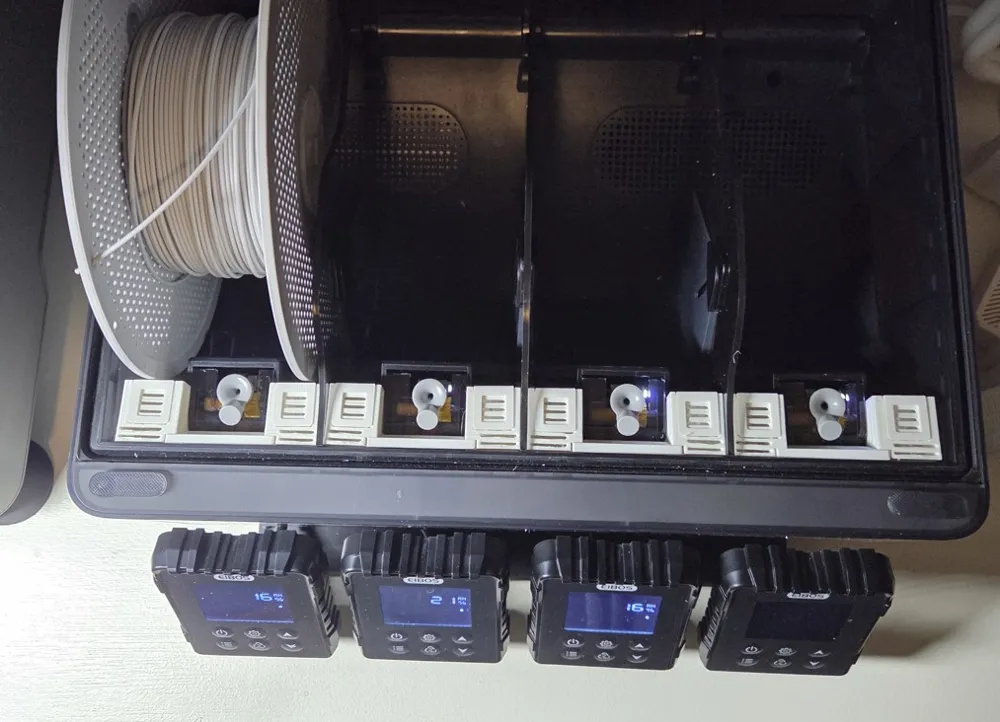
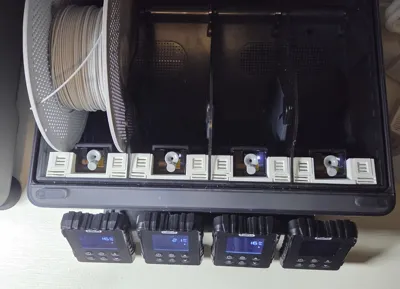
I recently picked up an Eibos Tetras for my AMS unit, and I really like it. After initially reducing the humidity of a slot to a target level (e.g., ~10%), it has a feature where each slot will independently and automatically cycle on and off to maintain a constant humidity level between 10 and 15%. However, it seems that there is always at least one slot that is actively dehumidifying and drawing power. Concerned about the power, I decided to add Dry Pods to the slots. A key design feature of the Tetras, is that the individual AMS slots are isolated so that their humidity/temperature levels can be managed independently. The Tetras comes with Acrylic Baffles that are installed to block the airflow between the slots. These Acrylic Baffles are held in place by plastic Baffle Clips that also help to block airflow through the filament Feeder Units. I reuse these clips to hold my Eibos Dry Pods in place.
My Eibos Pods are designed to use the same Funnel that all my other Dry Pods use! So there is no need to print the Funnel included in this 3MF if you already have one.
Note that the Tetras slot isolation does not completely block airflow between slots. However it does reduce it to the point where the humidity of each slot can effectively be managed independently. I followed the same philosophy in my design.
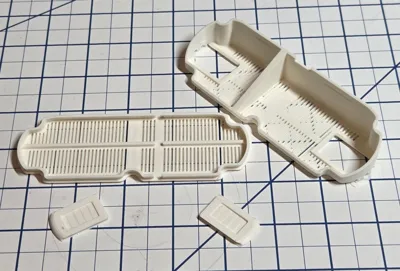
Also, the Tetras kit does not supply any method of blocking the air flow between the slots spanned by the factory desiccant holders in the bottom of the tray. In the 3MF there are 2 options provided for solving this problem. Plate 2 contains “Eibos Desiccant Insert” pods, which can be used to provide additional desiccant for each slot. Plate 3 provides a solid cover that blocks any airflow between adjacent slots. Print the Plate that works best for you. See the “Eibos Desiccant Insert” section below for more information.
My design maximizes the slot air flow isolation, while providing a significant volume of desiccant that is dedicated to each slot. The idea is that the additional desiccant will provide a ‘humidty mass’ that will slow down the rate of the Tetras' automatic humidity maintenance cycles, thus lowering the overall power consumption. Note that I have not done any hard analysis to prove this theory yet, but it makes sense to me intuitively.
Dry Pod Naming Conventions
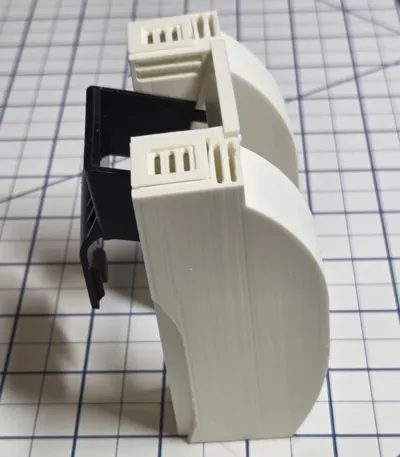
My models include paired Left and Right Eibos Dry Pods for each slot, similar to my normal AMS Dry Pods, but split to maintain the slot separation of the air flow. Only the part of the Eibos Dry Pods exposed to the slot are vented. The remainder of the pod surfaces are closed to prevent inter-slot airflow. Since the Tetras' automatic humidity maintenance cycles continuously dry each slot, the desiccant in the respective pods should never need to be manually refreshed. Again, the additional desiccant is only used to reduce the frequency of automatic drying cycles. A printed baffle is also included to prevent air flow from going over the top of the Feeder Unit, replacing the feature provided by the Eibos Acrylic Baffles.
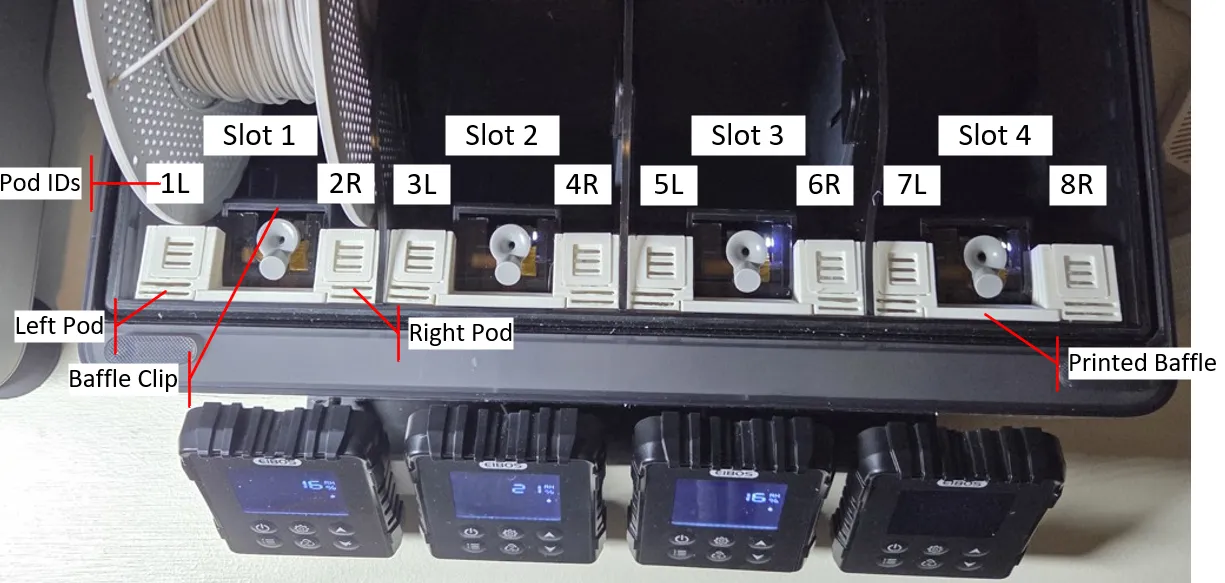
Note that in the figure above Pods 1L and 8R are identical widths but mirror images of each other, and are marked on their backs with the text “1,8”. Pods 2R, 3L, 6R, and 7L are also identical widths and are marked on their backs with “2,3,6,7”. And Pods 4R and 5L are identical widths and are marked on their backs with “4,5”. Pods of the same size have their Slot IDs on their backs.
Dry Pod Assembly

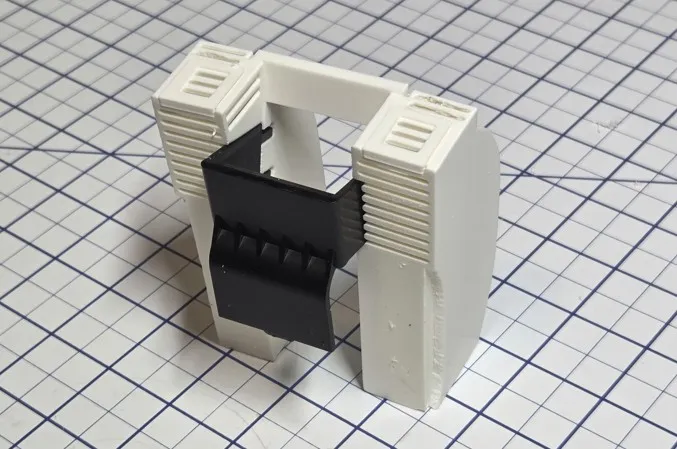
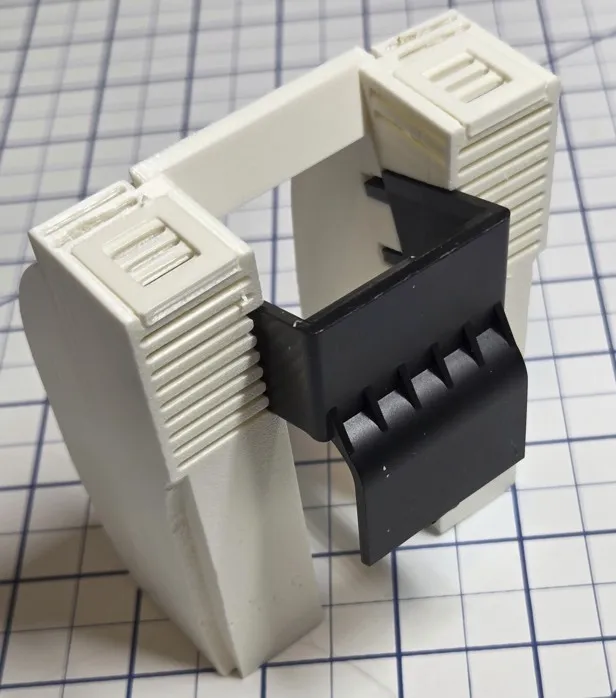
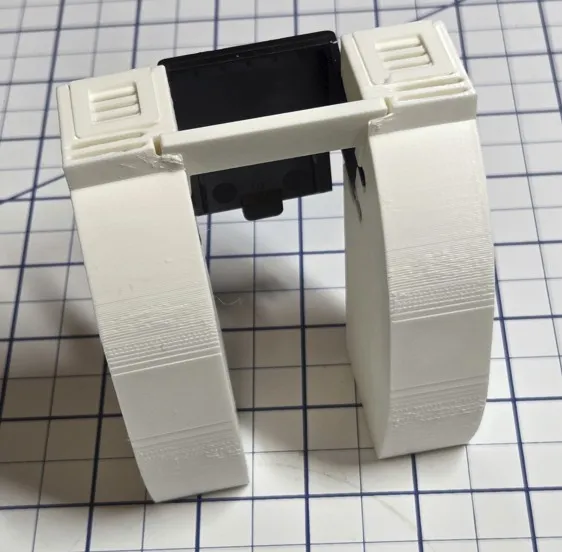
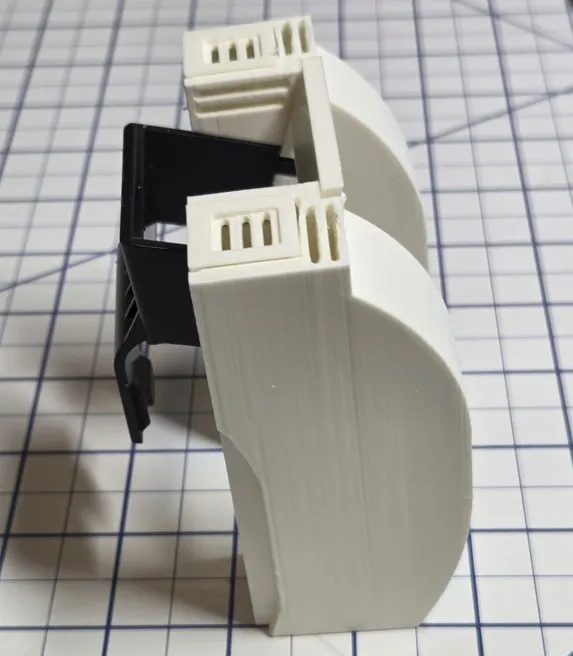

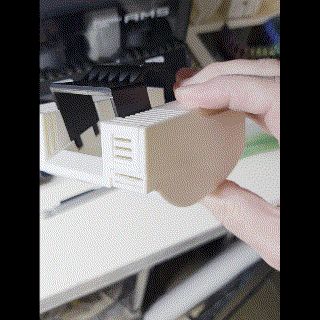
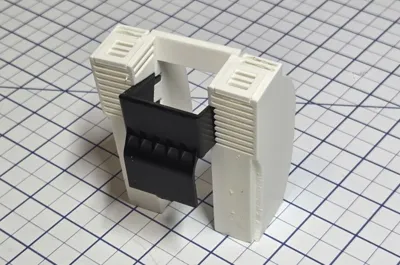
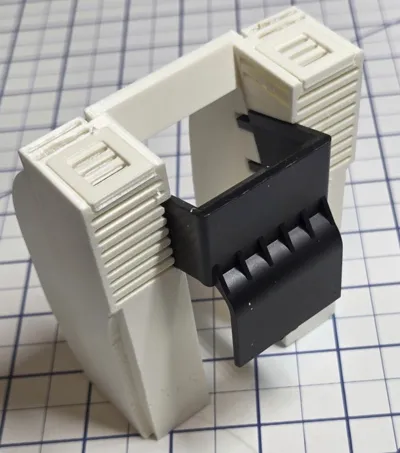
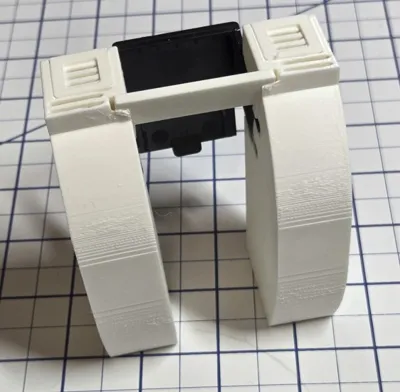
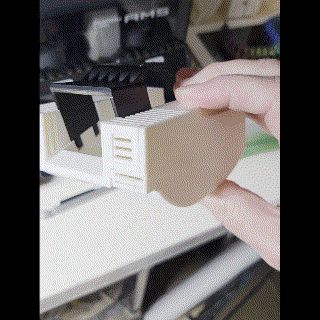
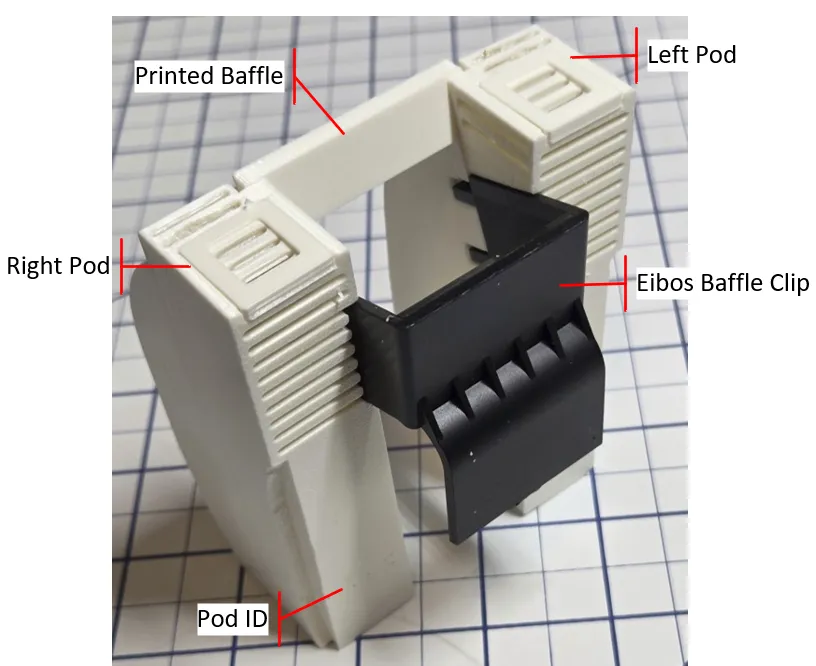

The figure below shows an assembled Pod set for a slot (from the back). The Printed Baffle fits into slots in the Right and Left Pods. And the Eibos Baffle Clip fits into dedicated cutouts in the Pods. I didn't bother to glue these parts because they fitted together tightly enough to hold together while inserting into their respective AMS slot. To insert them, place them on the Drive Roller at 45 degrees, then roll them forward into position. See the GIF video below.
The Pod ID is hard to see in this photo, but it is easily readable on the printer part.
Eibos Desiccant Insert
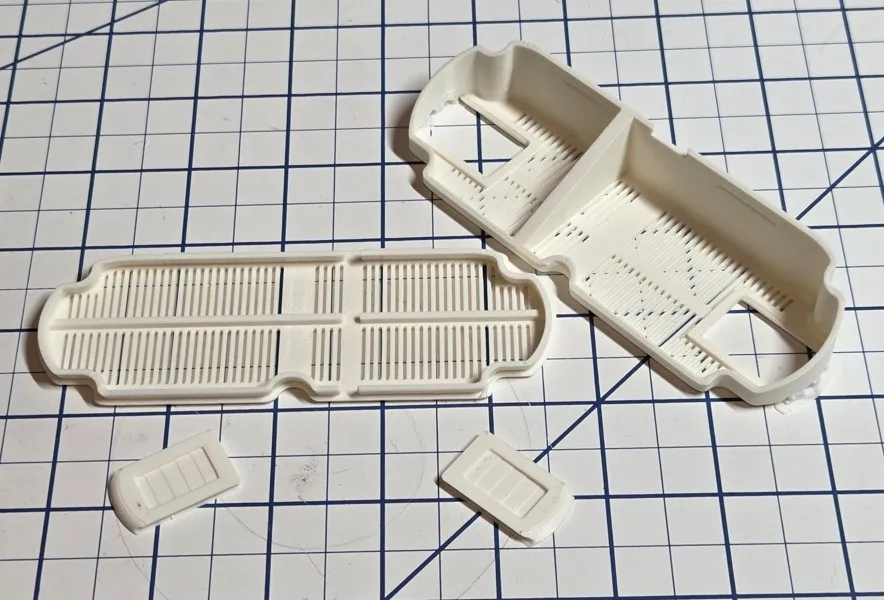
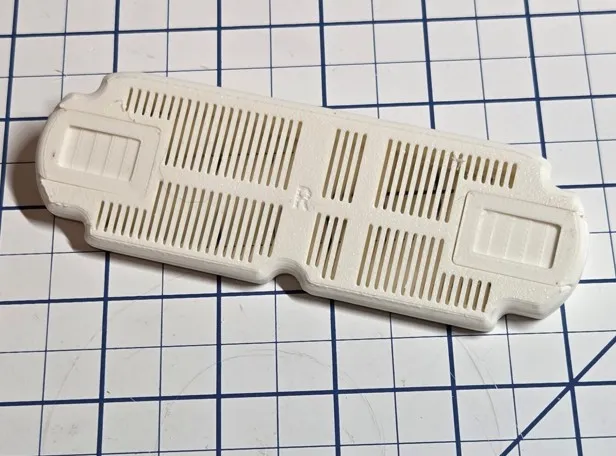
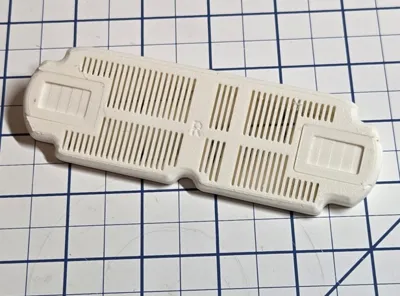
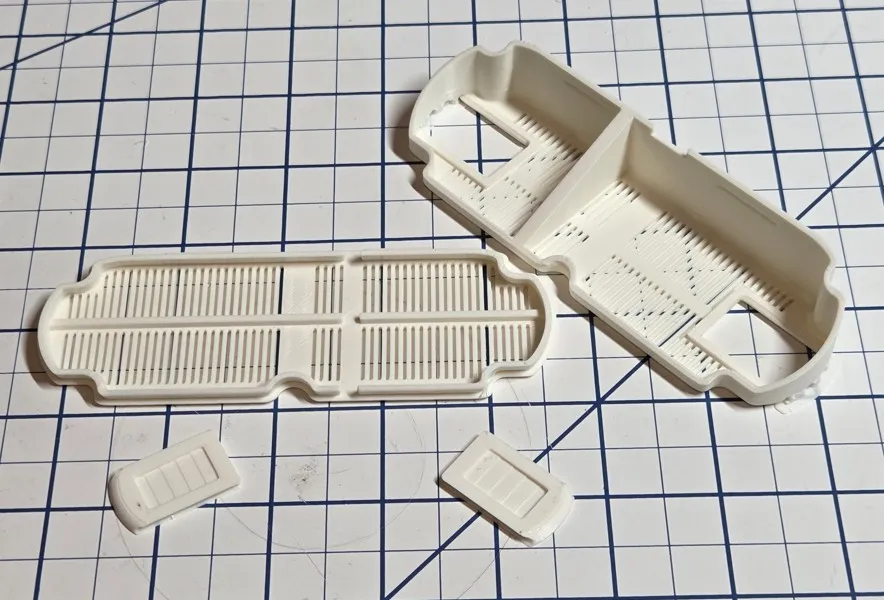
A “Eibos Desiccant Insert” pod, which is very similar to the versions provided by my design for a standard AMS is included, where a divider inside the pod splits the desiccant between adjacent slots. The Top snaps in place, and separate covers allow each side to be filled. Note that there are Right and Left versions of the Eibos Desiccant Insert pods. Both the Top and Bottom parts are marked with ‘R’ and ‘L’ to help eliminate any confusion. The Eibos Desiccant Insert pods need to be inserted before inserting the Eibos acrylic slot dividers. To install: remove the Bambu desiccant chamber covers, insert the Eibos Desiccant Insert pods, then replace the Bambu desiccant chamber covers.
3MF Plates
Plate 1 - Complete set of 8 Eibos Pods, covers, and Printed Baffles.
Plate 2 - Right and left “Eibos Desiccant Insert” pods. Do not print if printing Plate 3.
Plate 3 - Right and left Rear Pod Covers. Do not print if printing Plate 2.
Plate 4 - Optional Funnel. No need to print if you have already printed one of my Pod Funnels.
V1 - 25/02/21 - Initial release.
License



Comment & Rating (6)